no-bake coconut balls are the ultimate solution for when those sweet cravings hit but you have zero desire to turn on the oven. These little gems are a masterclass in texture, combining a moist shredded coconut interior with a silky, creamy binder. If you have been searching for a snack that looks like a professional truffle but requires the effort of a toddler’s craft project, you have found it.
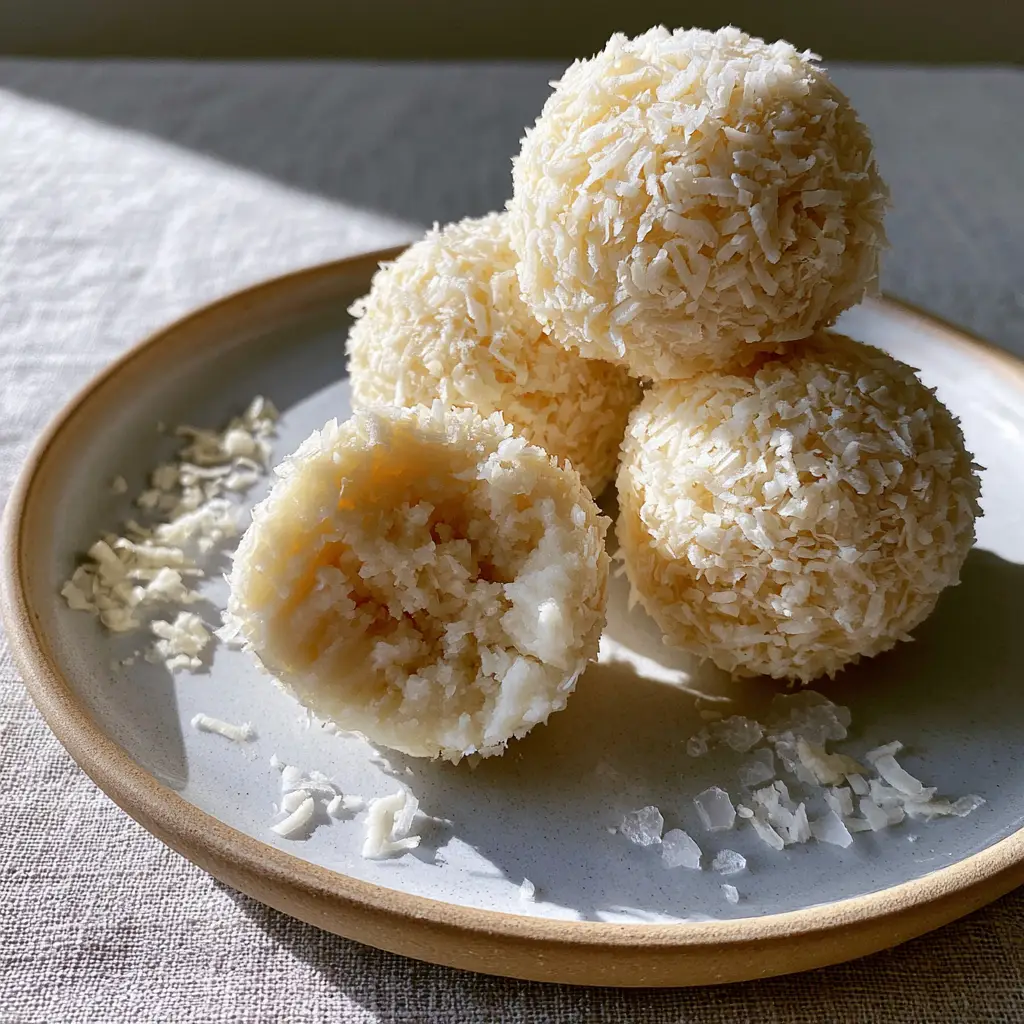
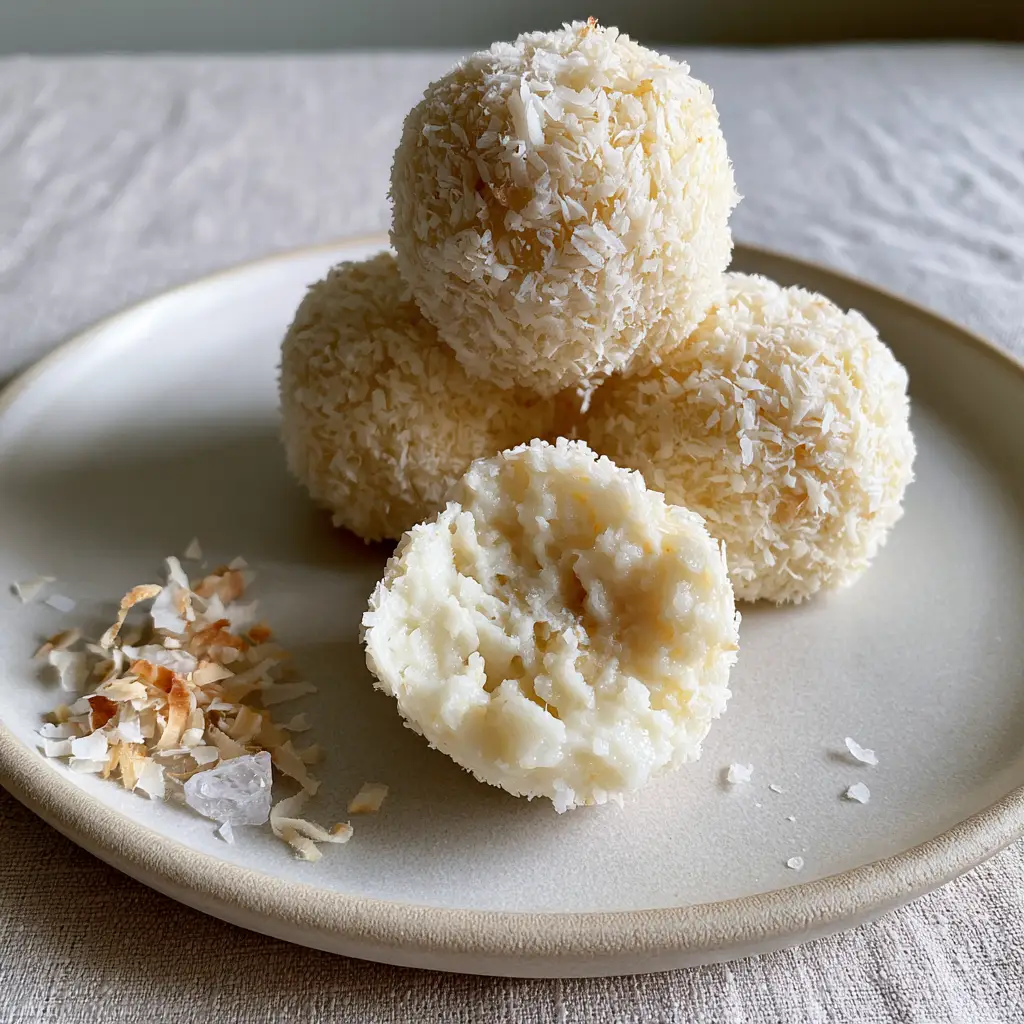
Imagine biting into a snow-white, densely packed sphere that practically melts on your tongue. The secret lies in the contrast between the creamy coconut butter and the fine, fuzzy coating of desiccated coconut. These no-bake coconut balls aren’t just a treat; they are a visual and sensory experience that validates every Pinterest-worthy aesthetic you’ve ever pinned to your “Dream Kitchen” board.
Why These Raw Coconut Truffles are a Pinterest Sensation
- Ultra-Moist Texture: Unlike dry, store-bought macaroons, these balls use moist shredded coconut for a succulent bite.
- Minimalist Ingredients: Only three main components are required to achieve professional-grade results.
- Visual Contrast: The fine desiccated coconut coating catches the light beautifully, mimicking fresh fallen snow.
- The Salty Finish: A light dusting of flaky sea salt cuts through the sweetness, creating an addictive flavor profile.
If you enjoy quick, bite-sized treats like these, you should also check out our berry chocolate fudge bites (coming soon) for another no-bake win. Much like those fudge bites, these coconut balls rely on high-quality fats to provide a satisfying, satiating snack that keeps you full between meals.
The Essential Ingredients for Coconut Perfection
To achieve the raw texture and snow-white appearance seen in our photography, the quality of your ingredients is paramount. We aren’t just looking for “coconut flavor”; we are looking for the structural integrity that only these specific items provide.
Moist Shredded Coconut: You want the unsweetened variety that still feels slightly soft to the touch. This provides the bulk of the no-bake coconut balls and ensures they aren’t gritty. You’ll need 2 cups (160g).
Creamy Coconut Butter: Also known as coconut manna, this is the ground flesh of the coconut. It acts as our “glue.” When warmed, it is liquid; when chilled, it sets firmly. Measure out 1/2 cup (120ml).
Clear Liquid Sweetener: To keep that snow-white interior pristine, use a clear sweetener like agave nectar or a refined maple syrup. Use 1/4 cup (60ml) or adjust to your preferred sweetness level.
Fine Desiccated Coconut: This is much finer than shredded coconut. It is used exclusively for the coating to give that “fuzzy” macro look. Keep 1/2 cup (40g) in a separate shallow bowl.
Flaky Sea Salt: A few crystalline flakes on top elevate this from a simple snack to a gourmet dessert. It provides that essential “pop” of flavor.
How to Construct Your no-bake coconut balls
Step 1: Achieving the Creamy Emulsion
Start by gently warming your creamy coconut butter. Coconut butter often separates in the jar, with the oil rising to the top. It is vital to stir it thoroughly until it is completely smooth and homogenous before measuring.
In a large glass mixing bowl, combine the warmed coconut butter with your clear liquid sweetener. Whisk these together until they form a glossy, thick syrup. If your kitchen is cold, do this over a warm water bath to prevent premature setting.
Step 2: Incorporating the Moist Shredded Coconut
Fold in the 2 cups (160g) of moist shredded coconut. Use a sturdy spatula for this. You want every single shred of coconut to be encapsulated by the creamy binder.
The mixture should look like thick, wet snow. It should be malleable but hold its shape when pressed against the side of the bowl. If it feels too loose, let it sit for 5 minutes; the coconut will absorb some of the moisture.
For those who love hearty, batch-cooked meals as much as quick snacks, this prep style is just as satisfying as putting together a hashbrown breakfast casserole (coming soon) for the week ahead.
Step 3: Rolling and Shaping
Using a small cookie scoop or a tablespoon, portion out the mixture into 1-inch spheres. Roll them between your palms with gentle pressure. You are looking for a densely packed structure so they don’t crumble when bitten.
If the mixture sticks to your hands, lightly dampen your palms with water. Place the formed balls on a tray lined with parchment paper.
Step 4: The Signature Desiccated Coating
While the balls are still slightly tacky, roll each one in the fine desiccated coconut. Ensure a thick, even layer is applied. This coating is what creates that beautiful, soft texture seen in the macro photography.
Finish each ball with a tiny dusting of flaky sea salt. Press the salt gently into the surface so it adheres. This is the “chef’s kiss” that completes the no-bake coconut balls.
Expert Tips for Success
- Temperature Control: If the mixture is too soft to roll, refrigerate the bowl for 10 minutes. Don’t leave it too long, or the coconut butter will become rock hard.
- Freshness Matters: Coconut can go rancid. Taste your shredded coconut before starting to ensure it has a sweet, nutty aroma.
- Squeeze Test: Before rolling, squeeze a handful of the mixture. It should hold together firmly. If it crumbles, add one extra tablespoon of melted coconut butter.
- Storage Insight: These are best served at room temperature for the creamiest texture, but must be stored in the fridge to remain food-safe.
How to Store Your no-bake coconut balls
Keep these treats in an airtight container in the refrigerator for up to 10 days. The creamy coconut butter acts as a natural preservative, but the moisture in the coconut can eventually attract spoilage.
For long-term storage, these balls freeze beautifully. Place them on a baking sheet to flash-freeze for one hour, then transfer to a freezer-safe bag. They will stay fresh for up to 3 months. Simply thaw for 15 minutes before enjoying.
What to Serve With This
These no-bake coconut balls are incredibly versatile. Serve them as a light dessert following a heavy meal like our zuppa toscana soup recipe. The brightness of the coconut cleanses the palate perfectly.
They also pair wonderfully with a hot cup of coffee or as a side to a protein-packed breakfast like paleo pumpkin protein muffins. The healthy fats in the coconut butter provide a steady stream of energy without the sugar crash.
Frequently Asked Questions
Yes! If you use a sugar-free clear liquid sweetener (like monk fruit syrup), these balls are naturally high in healthy fats and very low in net carbs.
Yes, but you will need to add more liquid sweetener or a splash of coconut milk to compensate for the dryness of the powder to maintain the moist interior.
No, coconut oil will not provide the same creamy, structural ‘meat’ that coconut butter does. The balls would be greasy and likely fall apart at room temperature.
Shredded coconut is longer, moister strips, while desiccated coconut is finely ground and drier. We use shredded for the ‘meat’ and desiccated for the ‘fuzz’.
Your coconut butter might have been too cold or not stirred enough. Add another tablespoon of melted coconut butter or a teaspoon of water to help the shreds bind.
The Ultimate no-bake coconut balls Recipe
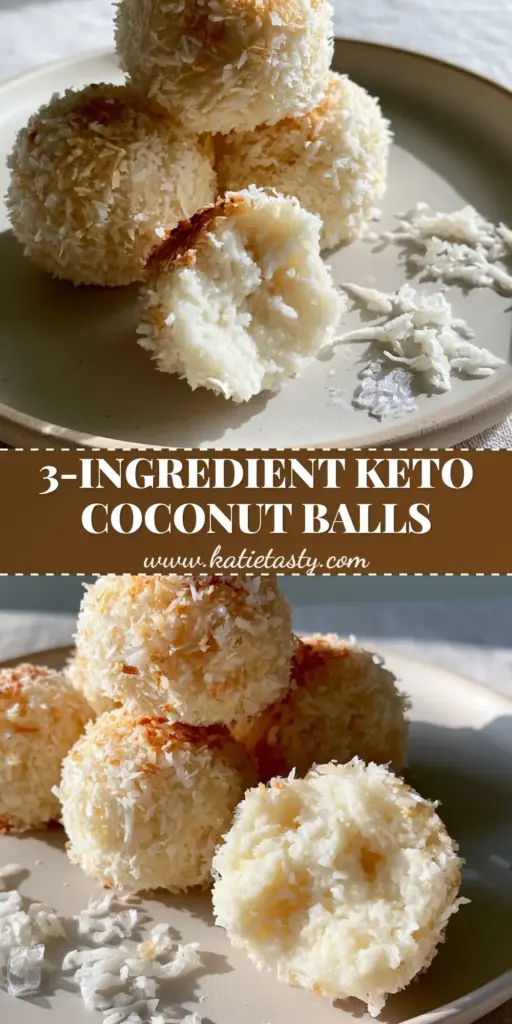
no-bake coconut balls: Easy 3-Ingredient Snowball Treats
Ingredients
Equipment
Method
- In a large bowl, whisk together the melted creamy coconut butter and liquid sweetener until a smooth, glossy emulsion forms.
- Fold in the moist shredded coconut until the mixture resembles thick, wet snow and every shred is coated.
- Scoop 1-inch portions and roll between your palms into dense, smooth spheres.
- Immediately roll each ball in fine desiccated coconut and top with a few flakes of sea salt.
Notes
If the dough is too soft to roll, chill for 5-10 minutes.
Share Your Snowball Success!
We want to see your no-bake coconut balls! Did you achieve that perfect, fuzzy desiccated coating? Did the flaky sea salt make all the difference? This recipe is a staple in the katie_tasty kitchen, and we hope it becomes one in yours too.
Please save this recipe to your Pinterest boards so you never lose it! If you made these, snap a photo and share it in the comments below. Don’t forget to leave a 5-star rating in the recipe card—it helps our community grow and keeps the recipes coming!