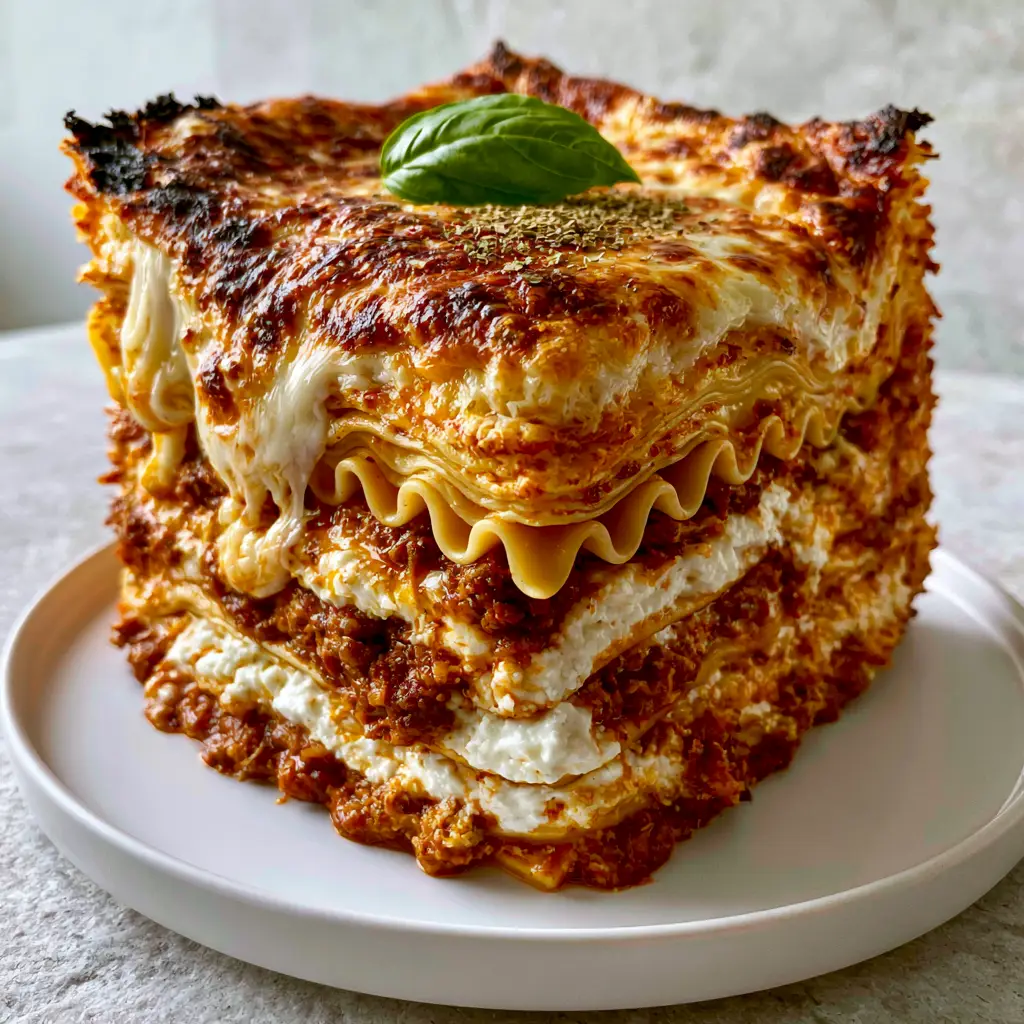
There is nothing quite like a towering, homemade lasagna fresh out of the oven to bring everyone to the table. This isn’t just any pasta dish; we are talking about a massive, vertical slice featuring 10 distinct layers of wavy pasta, chunky beef bolognese, and thick, creamy ricotta. If you have been searching for that picture-perfect Italian comfort food that looks just as good as it tastes, you have found it.
Every bite of this homemade lasagna delivers a symphony of textures, from the melted golden mozzarella to the slightly charred cheese crust that adds a sophisticated bitterness to the rich sauce. Whether you are hosting a Sunday family dinner or meal-prepping for the week, this recipe provides the ultimate culinary blueprint for success. It’s a showstopper that mirrors the best authentic Italian recipes found in the heart of Rome.
Why This Is the Best Homemade Lasagna You Will Ever Make
- Epic Vertical Height: We use a specific layering technique to achieve a massive, perfectly vertical square slice that stands tall on your plate.
- Wavy Pasta Texture: Those iconic wavy pasta sheets aren’t just for looks; they trap the dense chunky dark red bolognese meat sauce in every curve.
- The Perfect Char: We master the art of the bubbling golden-brown charred cheese crust with crispy dark edges for maximum flavor.
- Creamy Contrast: A thick layer of whipped ricotta creates a velvety barrier against the robust, savory beef sauce.
The Heart of the Dish: Ingredients for a Towering Lasagna
To achieve the structural integrity and deep flavor profile of this homemade lasagna, high-quality ingredients are non-negotiable. Here is what you will need to gather for your masterpiece.
1 lb (450g) Lean Ground Beef: Choose a 90/10 blend to ensure a chunky beef bolognese that isn’t overly greasy. The beef provides the savory foundation of the dish.
1 lb (450g) Ground Italian Sausage: This adds a layer of complexity with notes of fennel and garlic. You can use mild or spicy depending on your preference.
2 cans (28 oz / 800g each) Crushed Tomatoes: These form the base of our dark red bolognese. High-quality San Marzano tomatoes are preferred for their low acidity.
15 oz (425g) Whole Milk Ricotta Cheese: We use whole milk for that thick creamy ricotta texture that holds its shape between the layers.
1 lb (450g) Shredded Mozzarella Cheese: This is what gives us those molten cheese pulls and the iconic melted golden mozzarella topping.
1/2 cup (50g) Freshly Grated Parmesan: Adds a salty, nutty kick and helps create the charred cheese crust on top.
12-15 Wavy Lasagna Noodles: Look for the classic ruffled edges to create the visual “waves” seen in the side profile of the slice.
2 tbsp (30ml) Extra Virgin Olive Oil: Essential for searing the meats and blooming the dried herbs.
Fresh Basil & Dried Oregano: A fresh basil sprig and a dusting of fine dried oregano provide the aromatic finish that cuts through the richness.
If you love these flavors but want a quicker weeknight option, you might also enjoy our lasagna soup or a hearty baked spaghetti casserole.
Step-by-Step Guide to the Perfect 10-Layer Lasagna
Creating a homemade lasagna with 10 distinct, clean layers requires a bit of patience and a specific assembly order. Follow these steps to ensure your slice stands perfectly vertical.
Crafting the Chunky Beef Bolognese
In a large Dutch oven, heat the olive oil over medium-high heat. Add the ground beef and Italian sausage, breaking it into large, chunky pieces. You want texture here, not fine crumbles.
Sear the meat until it is deeply browned. Drain the excess fat, then stir in the crushed tomatoes, garlic, and dried oregano. Let this simmer for at least 45 minutes. The goal is a dense, dark red sauce that isn’t watery.
Preparing the Ricotta and Pasta
While the sauce simmers, boil your wavy pasta sheets in heavily salted water. Aim for “al dente”—they should still have a firm bite as they will continue to cook in the oven.
In a medium bowl, whisk the ricotta with one egg and a pinch of salt. This “sets” the cheese so it stays as a thick creamy white layer instead of melting into the sauce. If you have leftovers, this ricotta mixture is also great in cottage cheese sticks for a high-protein snack.
The Architecture of 10 Layers
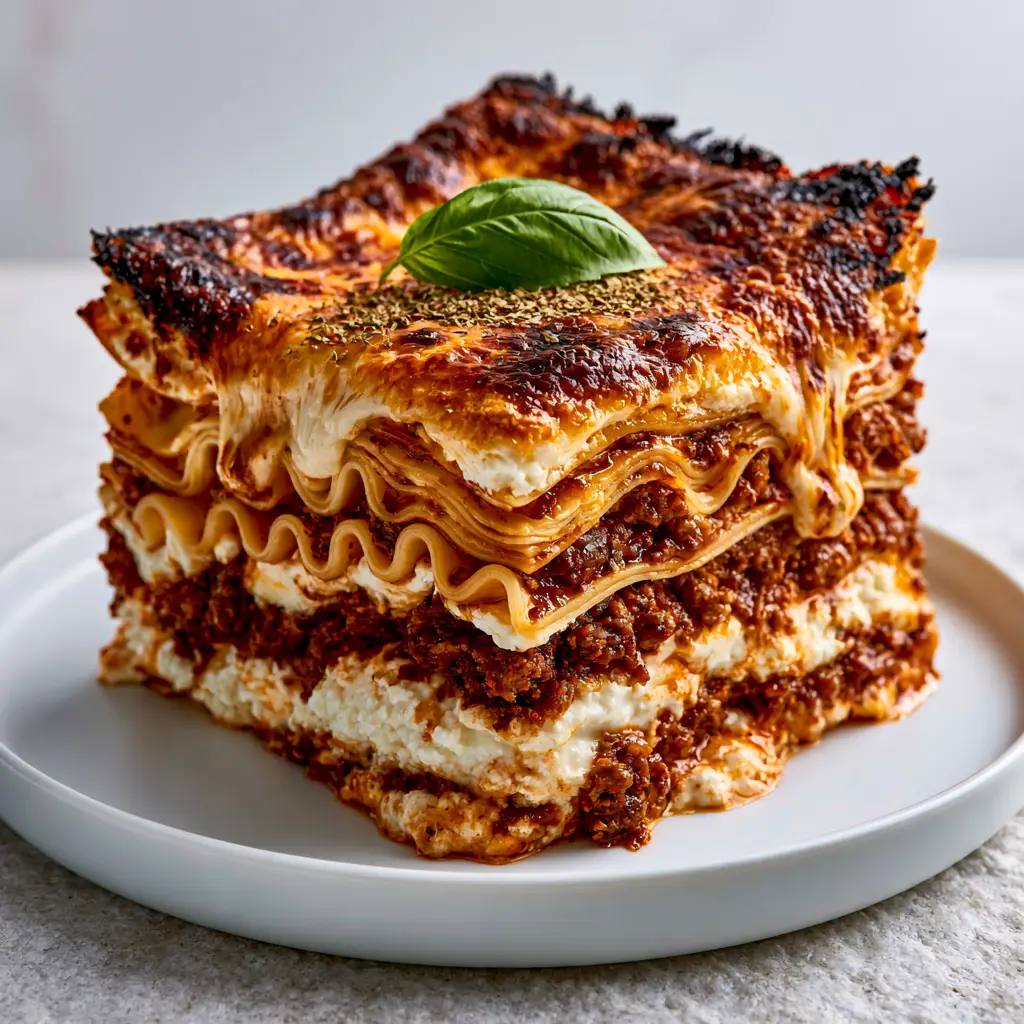
Spread a thin layer of sauce on the bottom of a deep 9×13 inch (23x33cm) baking dish. Lay down your first set of wavy pasta sheets, slightly overlapping them.
Follow with a thick layer of the chunky beef bolognese, then a generous spread of the thick creamy ricotta. Sprinkle a handful of mozzarella and Parmesan. Repeat this process until you reach the top of the dish.
Achieving the Golden Charred Crust
For the final layer, cover the pasta completely with the remaining mozzarella and Parmesan. Dust with more dried oregano flakes. Bake at 375°F (190°C) for 45 minutes.
For the last 5 minutes, turn the oven to broil. Watch closely until you see the bubbling golden-brown charred cheese crust forming with crispy dark edges. This is the hallmark of a professional homemade lasagna.
Expert Tips for a Perfectly Vertical Slice
- The Resting Rule: You MUST let the lasagna rest for at least 20-30 minutes before cutting. This allows the layers to set and ensures the slice stays perfectly vertical.
- Dry the Noodles: After boiling the wavy sheets, lay them flat on clean kitchen towels. Excess water is the enemy of a clean lasagna side profile.
- Whip the Ricotta: Use a whisk to aerate the ricotta before layering; it makes it lighter and more “pillowy” visually.
- Chunky is Better: Keep your meat chunks large. It provides structural “pillars” that prevent the layers from sliding.
Storage, Reheating, and Freezing
Homemade lasagna is famously even better the next day. To store, cover the dish tightly with foil or transfer individual slices to airtight containers. It will stay fresh in the refrigerator for up to 4 days.
To reheat, place a slice on a plate and cover with a damp paper towel to maintain moisture. Microwave for 2-3 minutes, or reheat in the oven at 350°F (175°C) until the molten cheese begins to bubble again.
You can also freeze this recipe! Wrap unbaked or baked lasagna tightly in plastic wrap and then foil. It will last for up to 3 months. If you are a fan of make-ahead meals, check out our asian dinner recipes for more prep-friendly ideas.
What to Serve With Your Homemade Lasagna
Since this dish is incredibly rich, you want side dishes that offer brightness and crunch. A simple green salad or a tangy asian ramen coleslaw provides a great textural contrast.
For a complete Italian feast, serve with garlic bread and perhaps a light seafood starter like our creamy seafood bake. And for dessert? Nothing beats a homemade banana pudding to round out the meal.
Frequently Asked Questions
No-boil noodles are thinner and may not provide the massive vertical height and distinct wavy profile shown in this recipe. For the best results, stick to traditional wavy noodles.
While flat noodles work, wavy pasta sheets are traditional for tall lasagnas because the ridges help hold the chunky sauce and cheese in place, creating better structural integrity.
To prevent a watery lasagna, ensure your bolognese sauce is simmered until thick and dense. Also, pat your boiled wavy pasta sheets completely dry with a towel before layering.
The most common reason for a collapsing slice is not letting it rest. You must wait 20-30 minutes after baking for the cheese and sauce to set into firm layers.
The Ultimate Homemade Lasagna Recipe Card
Homemade Lasagna Recipe: The Ultimate Tall and Cheesy 10-Layer Classic
Ingredients
Equipment
Method
- Brown the beef and sausage in a Dutch oven with olive oil until chunky and cooked through.
- Add tomatoes and herbs; simmer for 45 minutes until the bolognese is dense and dark red.
- Layer sauce, wavy pasta, ricotta, and mozzarella to create 10 distinct layers.
- Bake at 375°F (190°C) for 45 minutes, then broil for a charred cheese crust.
Notes
Pat the boiled noodles dry to prevent a watery lasagna.
Join the Tasty Community!
Did you manage to get all 10 layers in your homemade lasagna? I would love to see your results! Please save this recipe to your Pinterest boards so you never lose it, and follow @katie_tasty for more comforting dinner inspiration.
If you made this, please leave a 5-star rating and a comment below with a photo of your slice. Seeing your charred cheese crusts makes my day! Happy cooking!