There is a profound culinary difference between a soggy, grey mushroom and the deep, mahogany-brown treasures found in high-end steakhouses. These Mushroom recipes focus on a specific, professional technique: the dry-sear. By mastering the art of the cast iron char, you transform humble fungi into meaty, succulent bites that rival any protein on the plate.
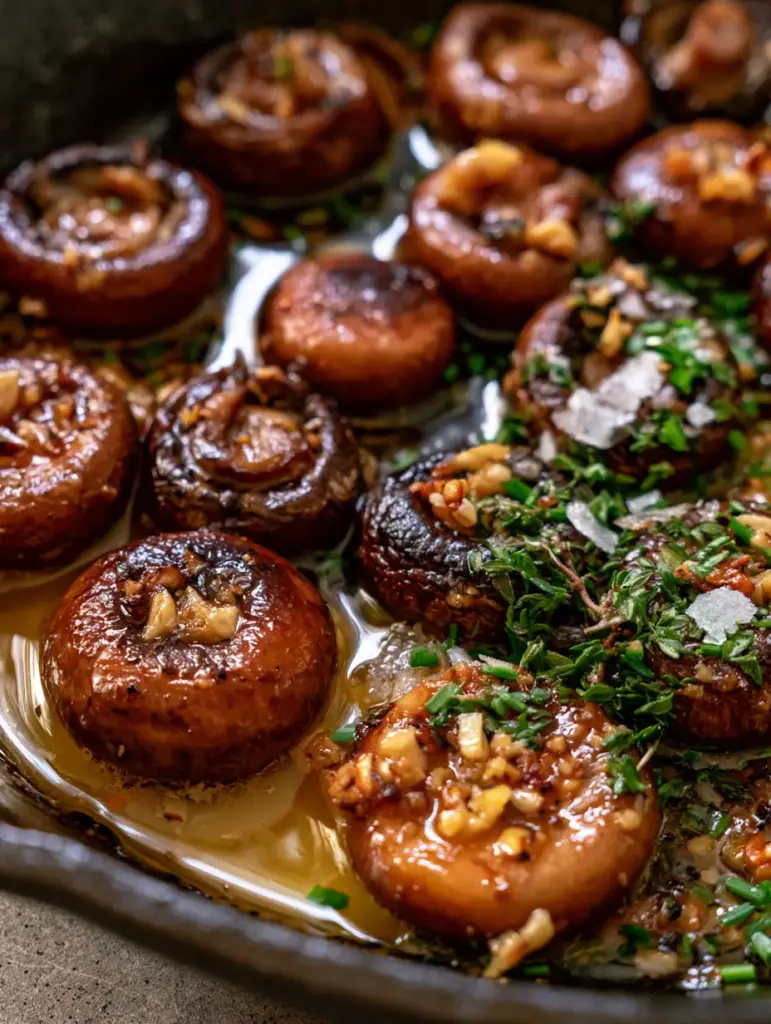
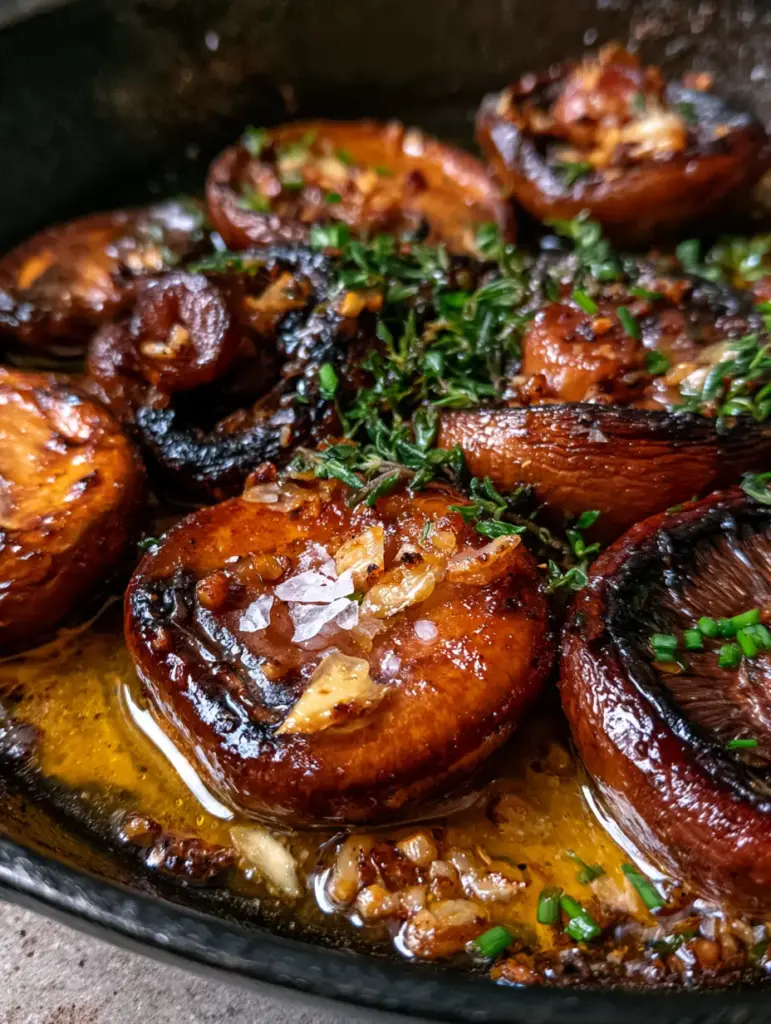
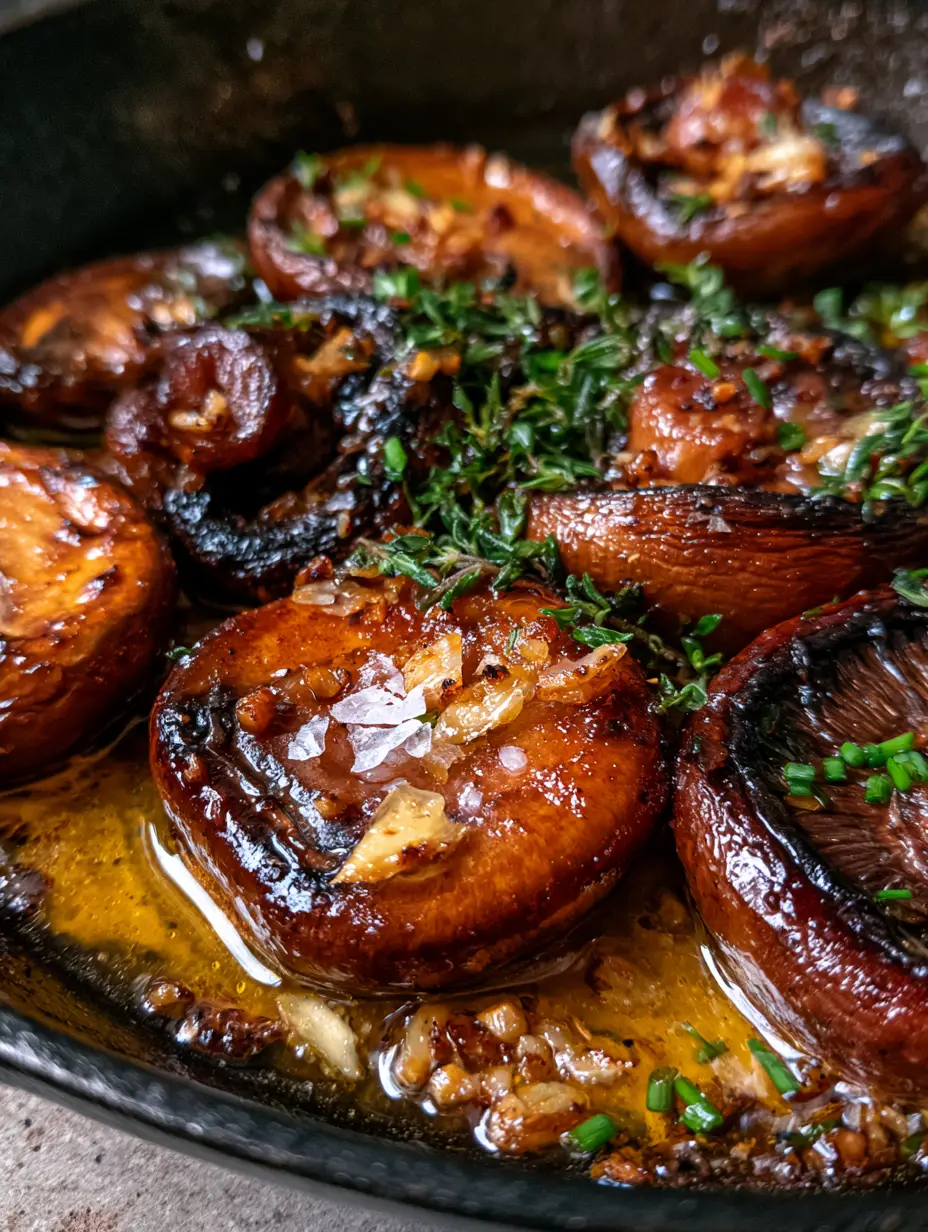
When you look at a perfectly seared mushroom, you should see crisp, charred edges and a glistening coat of golden garlic butter. There should be zero moisture or slime in the pan. This visual excellence is a direct result of understanding how mushrooms release water and how to manage heat effectively.
In this guide, we are diving deep into the science of the Maillard reaction as it applies to cremini mushrooms. We will explore why the cast iron skillet is your best friend and how a handful of fresh herbs like thyme and chives can elevate the earthy profile of this dish to gourmet heights.
Why You Will Love These Mahogany-Seared Cremini Mushrooms
- Steak-Like Texture: By using thick slices and high heat, we achieve a meaty, succulent bite that is firm rather than mushy.
- Deep Umami Caramelization: The “dry-sear” method ensures the natural sugars in the mushrooms brown perfectly without steaming.
- Aromatic Garlic Butter Finish: We don’t just cook with butter; we baste the mushrooms in a swirling pool of golden fat infused with fried garlic.
- Vibrant Herb Contrast: Fresh green thyme and chopped chives provide a bright, citrusy lift to the heavy, earthy flavors of the skillet.
- Visually Stunning: The contrast between the dark mahogany mushrooms and the glistening flakes of sea salt makes this a centerpiece-worthy side dish.
The Essential Pantry Items for Deep Umami Flavor
To achieve the result shown in our visual guide, you need specific ingredients that contribute to both the structural integrity and the final flavor profile of the dish. Here is what you will need for these Mushroom recipes.
1 lb (454g) Cremini (Baby Bella) Mushrooms: These are preferred over white button mushrooms because they have a lower moisture content and a more developed, earthy flavor. Look for firm caps with no visible bruising.
2 tbsp (28g) Unsalted Butter: We use unsalted butter to maintain complete control over the seasoning. The butter will brown slightly in the skillet, adding a nutty dimension to the final sauce.
1 tbsp (15ml) High-Smoke Point Oil: An oil like avocado or grapeseed is essential for the initial high-heat sear. This prevents the butter from burning before the mushrooms have a chance to caramelize.
3 cloves (15g) Fresh Garlic: Minced finely, this garlic will fry in the butter at the very end. This ensures the garlic is golden and crisp rather than bitter and burnt.
4 sprigs (2g) Fresh Thyme: Thyme and mushrooms are a classic pairing. The woody stems release oils into the butter that permeate the entire dish with a rustic aroma.
2 tbsp (6g) Fresh Chives: Finely chopped chives added at the very end provide a mild onion bite and a beautiful pop of vibrant green color.
1/2 tsp (3g) Flaky Sea Salt: Large flakes of salt provide a textural crunch and a burst of salinity that enhances the natural umami of the mushrooms.
1/2 tsp (1g) Cracked Black Pepper: Coarsely cracked pepper adds a gentle heat and visual interest, matching the charred edges of the seared fungi.
Tools Required for the Perfect Cast Iron Char
The most important tool in your arsenal for these Mushroom recipes is a heavy-bottomed 10-inch (25cm) or 12-inch (30cm) cast iron skillet. Cast iron is superior because it retains heat exceptionally well, which is necessary to evaporate the mushroom’s moisture instantly upon contact.
If you use a thin non-stick pan, the temperature will drop the moment the mushrooms hit the surface. This causes the mushrooms to “bleed” their liquid, resulting in a boiled, rubbery texture rather than a crisp sear.
You will also need a sharp chef’s knife to ensure thick, even slices. If the slices are too thin, they will shrivel into nothingness; if they are too thick, the centers will remain raw while the outsides burn. Aim for a consistent 1/2-inch (1.25cm) thickness.
A Step-by-Step Guide to Achieving That Mahogany-Brown Crust
Phase 1: Preparation and Cleaning
Never soak your mushrooms in water. Mushrooms act like sponges and will absorb liquid, making it impossible to get a crisp sear. Instead, wipe each mushroom with a damp paper towel to remove any substrate or dirt.
Slice the cremini mushrooms into thick, uniform planks. Keeping the stem attached to the slice provides a beautiful visual “silhouette” that looks stunning in the skillet.
Phase 2: The Initial Dry Sear
Place your cast iron skillet over medium-high heat. Add the neutral oil and wait until you see a faint wisp of smoke. This is the signal that the pan is ready for the Mushroom recipes magic.
Add the mushrooms in a single layer. Do not crowd the pan. If you have too many mushrooms, cook them in two batches. If they are touching, they will steam each other.
Crucial Tip: Do not touch the mushrooms for at least 3 to 4 minutes. You are looking for a deep mahogany-brown caramelization. If you flip them too early, you break the Maillard reaction.
Phase 3: Developing Charred Edges
Once the first side is deeply browned, toss the mushrooms gently. Continue to cook for another 3 minutes. At this point, you should see the edges beginning to look crisp and slightly charred.
Listen for the sound: a sharp, aggressive sizzle. If the sound is muffled or “wet,” your heat is too low or your pan is too full.
Phase 4: The Garlic Butter Baste
Turn the heat down to medium. Push the mushrooms to the perimeter of the skillet and drop the 2 tbsp (28g) of butter into the center. As it melts and begins to foam, add the minced garlic and thyme sprigs.
Toss the mushrooms back into the center, swirling them through the golden, bubbling butter. The garlic should turn a light golden brown and become fragrant within 60 seconds.
Phase 5: Finishing Touches
Remove the skillet from the heat immediately to prevent the garlic from burning. Remove the woody thyme stems. Sprinkle generously with the chopped chives, cracked black pepper, and the flaky sea salt.
The mushrooms should look meaty and succulent, bathed in a glistening film of herb-infused butter with zero residual water in the pan.
Pro-Chef Secrets for Maximum Mushroom Caramelization
One of the biggest mistakes home cooks make with Mushroom recipes is salting too early. Salt draws out moisture through osmosis. If you salt the mushrooms at the start of the cooking process, they will release their water immediately and stew in their own juices.
Always wait until the very last second to add your flaky sea salt. This ensures the salt stays on the surface of the mushroom, providing that essential crunch and preventing the texture from turning soggy.
Another secret is the “weight” method. If you want exceptionally flat, charred surfaces, you can place another heavy skillet on top of the mushrooms for the first two minutes of searing. This creates maximum surface contact with the heat.
How to Store and Reheat Your Leftover Mushrooms
While these mushrooms are best served immediately from the skillet, you can store leftovers in an airtight container in the refrigerator for up to 3 days. However, the texture will soften as the mushrooms sit in the butter.
To reheat, do not use a microwave. The microwave will turn the mushrooms rubbery and tough. Instead, place them back into a hot skillet for 2-3 minutes until the butter melts and the edges regain some of their crispness.
Freezing is not recommended for this specific recipe, as the cellular structure of the mushroom breaks down when frozen, losing the “meaty” texture we worked so hard to achieve.
Perfect Pairings: What to Serve with Seared Mushrooms
These garlic butter mushrooms are incredibly versatile. For a classic comfort meal, serve them over a bed of garlic butter noodles where the extra sauce from the skillet can coat the pasta.
If you prefer a lighter pairing, these mushrooms make an excellent warm topping for a simple spinach salad. The warmth of the mushrooms slightly wilts the spinach, creating a wonderful texture contrast.
For a high-protein dinner, use these mushrooms as a decadent topping for bruschetta chicken or a seared ribeye steak. They also work beautifully folded into a morning omelet or served on top of toasted sourdough with a smear of goat cheese.
Frequently Asked Questions
Yes, but cremini (baby bellas) are preferred for their deeper flavor and lower moisture content. If using white button mushrooms, you may need to cook them slightly longer to achieve the same level of caramelization.
Yes, these garlic butter mushrooms are naturally low-carb and high-fat, making them an excellent side dish for those following a ketogenic or paleo lifestyle.
No, you should never soak mushrooms. They are porous and absorb water like a sponge. Instead, wipe them with a damp paper towel to remove dirt. If you must wash them, do it quickly and pat them completely dry immediately.
Always add salt at the very end. Salt draws out moisture; adding it early will cause the mushrooms to release their liquid too soon, preventing that beautiful mahogany crust from forming.
Sliminess usually occurs because the pan was not hot enough or was overcrowded. When mushrooms touch, they steam rather than sear. Use a cast iron skillet on medium-high heat and cook in batches to ensure plenty of space.
The Ultimate Pan-Seared Mushroom Recipe Card
Mushroom recipes: The Ultimate Garlic Butter Pan-Seared Cremini Mushrooms
Ingredients
Equipment
Method
- Wipe mushrooms clean with a damp cloth. Slice into thick 1/2-inch (1.25cm) planks.
- Heat oil in a cast iron skillet over medium-high heat until shimmering. Add mushrooms in a single layer. Do not stir for 3-4 minutes until a deep mahogany crust forms.
- Toss the mushrooms and cook for another 3 minutes until edges are crisp and charred.
- Lower heat to medium. Add butter, minced garlic, and thyme. Swirl the mushrooms in the melting butter for 1 minute until garlic is fragrant and golden.
- Remove from heat. Discard thyme stems. Garnish with chives, flaky sea salt, and cracked pepper. Serve immediately.
Notes
Ensure the skillet is screaming hot before adding the mushrooms to achieve the best caramelization.
Closing & Call to Action
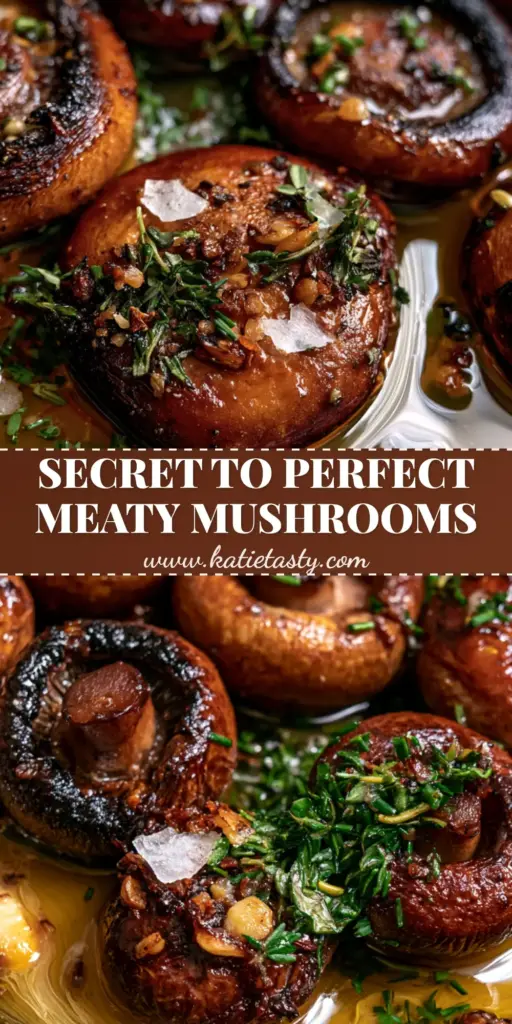
Mastering these Mushroom recipes is a rite of passage for any home cook looking to elevate their vegetable game. The combination of high-heat searing and a luxurious garlic butter finish creates a dish that is as visually stunning as it is delicious. We hope you enjoy the deep, umami-rich flavors and the perfect, meaty texture of these cremini mushrooms.
If you enjoyed this recipe, please leave a comment below and let us know how your sear turned out! Don’t forget to sign up for our newsletter for more culinary deep-dives, and be sure to share this recipe with your friends on Pinterest.