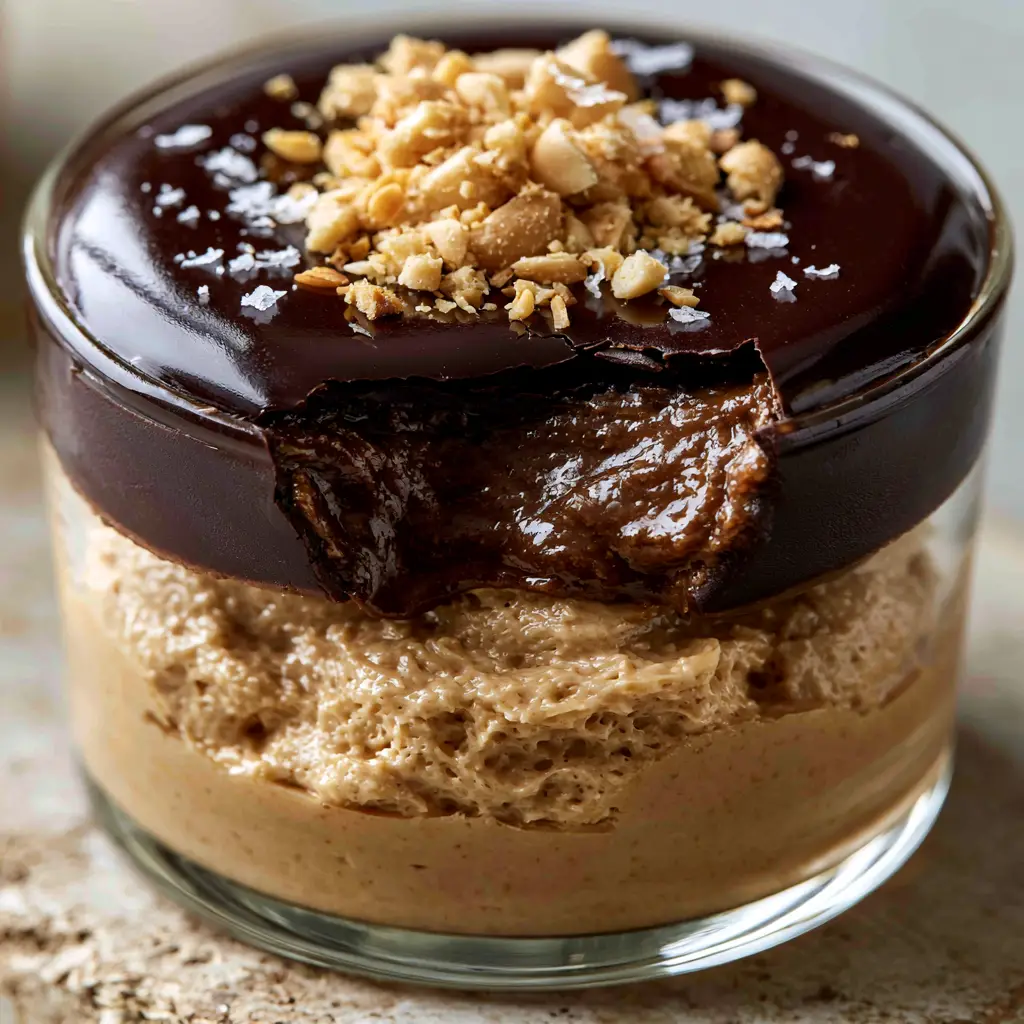
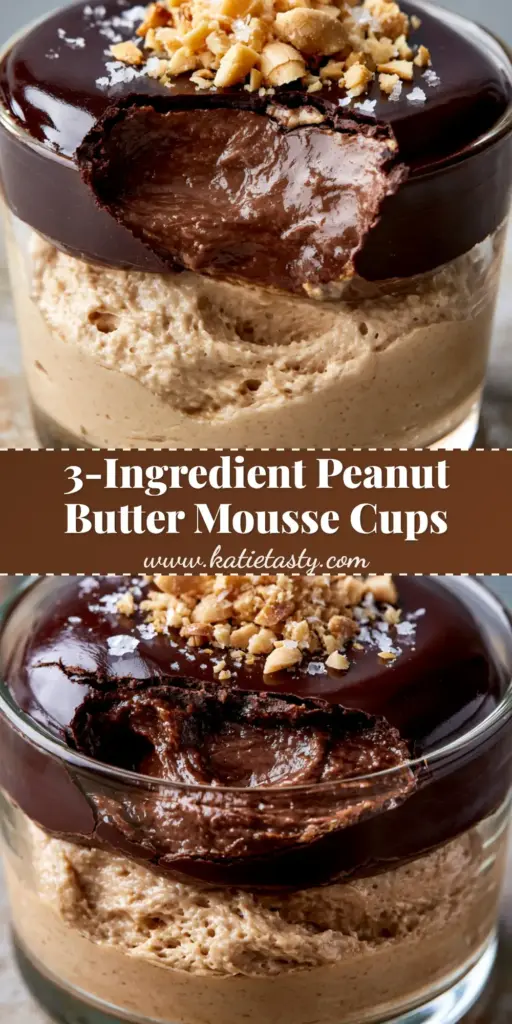
There is something inherently magical about the moment a spoon breaks through a crisp, glossy layer of chocolate into a cloud of velvety cream. These peanut butter mousse cups are designed to deliver that exact sensory experience, combining the rustic charm of roasted nuts with the sophisticated finish of a high-end patisserie dessert.
Inspired by the visual perfection of a professional pastry kitchen, this recipe focuses on textural contrast. You have the aerated, light-brown mousse, the snap of a dark chocolate shell, and the jagged crunch of roasted peanuts topped with shimmering flakes of sea salt.
Whether you are looking for a show-stopping finale to a dinner party or simply want to elevate your homemade snacks, these individual glass desserts are the ultimate solution. They require no baking, yet they offer a refined aesthetic that looks stunning under natural daylight or soft evening glow.
Why You Will Crave These Aerated Peanut Butter Delights
- The Perfect Snap: A specialized chocolate-to-oil ratio ensures the dark chocolate shell is glossy and smooth but cracks effortlessly without collapsing the mousse.
- Airy Texture: By using a folding technique instead of high-speed mixing, the mousse maintains a “fluffy, aerated” structure that feels weightless on the tongue.
- Salted Harmony: The inclusion of flaky Maldon sea salt bridges the gap between the rich peanut fats and the bitterness of the dark chocolate.
- Individual Presentation: Serving these in clear glass dessert cups showcases the distinct layers, making them a feast for the eyes before the first bite.
Essential Components for the Ultimate Peanut Butter Mousse Cups
Creating a professional-grade mousse requires high-quality fats and stabilizers to ensure the dessert holds its shape in the glass cup. Below are the specific ingredients needed to achieve the visual and culinary results described in our blueprint.
The Fluffy Mousse Base
Creamy Peanut Butter: 1 cup (250g) of high-quality creamy peanut butter provides the foundational flavor and a smooth, light-brown hue. Avoid “natural” stir-style varieties for this recipe as the oil separation can deflate the mousse.
Heavy Whipping Cream: 1.5 cups (360ml) of cold heavy cream is the engine of the aeration. When whipped to stiff peaks, it provides the “cloud-like” volume required for a true mousse.
Cream Cheese: 4 oz (115g) of softened cream cheese acts as a structural anchor. It ensures the peanut butter mousse cups stay upright and stable rather than turning into a liquid cream.
Powdered Sugar: 3/4 cup (90g) of sifted confectioners’ sugar sweetens the base without adding grit. It also contains a touch of cornstarch which further helps in stabilizing the whipped texture.
Vanilla Extract: 1 tsp (5ml) of pure vanilla bean extract rounds out the earthy notes of the peanuts and enhances the aroma.
The Glossy Dark Chocolate Shell
Dark Chocolate Chips: 1/2 cup (90g) of 60% or higher cacao chocolate provides the “rich mousse underneath” with a sophisticated, bitter contrast. This is the key to preventing the dessert from becoming overly cloying.
Coconut Oil: 1 tbsp (15g) of refined coconut oil is the secret to the “cracked” shell. It lowers the melting point of the chocolate, allowing it to snap under a spoon rather than acting like a hard, impenetrable disc.
The Finishing Garnishes
Roasted Peanuts: 2 tbsp (20g) of finely chopped roasted peanuts provide a visual and textural cue of the main flavor profile. The roasting process brings out the essential oils for maximum fragrance.
Maldon Sea Salt: A generous pinch of flaky sea salt is the final touch. These large, pyramid-shaped crystals provide a targeted burst of saltiness that cuts through the richness.
Professional Tools for Patisserie-Style Results
To achieve the “eye-level close-up” beauty seen in professional food photography, you will need a few specific tools. While the flavors are simple, the execution relies on proper aeration and temperature control.
An electric hand mixer or stand mixer is vital for achieving the stiff peaks in your heavy cream. Without this, the mousse will lack the aerated, light-brown appearance that defines the dish.
A piping bag fitted with a large round tip allows you to fill the clear glass dessert cups cleanly. This prevents smearing on the sides of the glass, keeping the layers distinct and sharp for a handheld smartphone photo aesthetic.
Small, clear glass cups or ramekins are essential for the visual appeal. The transparency allows the user to see the “rich mousse underneath” the chocolate shell before they even take a bite.
Step-By-Step Guide to Crafting the Perfect Mousse
Step 1: Achieving Structural Stability
In a large mixing bowl, beat the softened cream cheese and powdered sugar together until completely smooth and pale. Add the creamy peanut butter and vanilla extract, mixing until the color is a uniform, light tan.
This base should be thick and tacky. If it feels too stiff, do not worry; the whipped cream will lighten it in the next step. If you enjoy this flavor profile, you might also love our inside-out chocolate chip cookies which feature a similar creamy center.
Step 2: The Art of Aeration
In a separate, chilled bowl, whip the cold heavy cream until it reaches stiff peaks. You are looking for the cream to hold its shape firmly when the whisk is lifted.
Gently fold one-third of the whipped cream into the peanut butter mixture to lighten it. Then, fold in the remaining cream using a wide spatula. Use a “cut and fold” motion to avoid deflating the air bubbles you just created.
Step 3: Piping and Chilling
Transfer the fluffy mousse into a piping bag. Pipe the mixture into your clear glass dessert cups, leaving about half an inch (1.25cm) of space at the top for the chocolate shell.
Tap the cups gently on the counter to level the mousse. Place them in the refrigerator for at least 30 minutes. A chilled surface is critical for the chocolate shell to set quickly and stay glossy.
Step 4: Melting the Glossy Shell
Combine the dark chocolate chips and coconut oil in a microwave-safe bowl. Heat in 20-second bursts, stirring in between, until the mixture is completely smooth and liquid.
Allow the chocolate to cool for about 5 minutes until it is just above room temperature. If it is too hot, it will melt the mousse; if it is too cold, it won’t spread into a smooth, glossy layer.
Step 5: The Final Assembly and Garnish
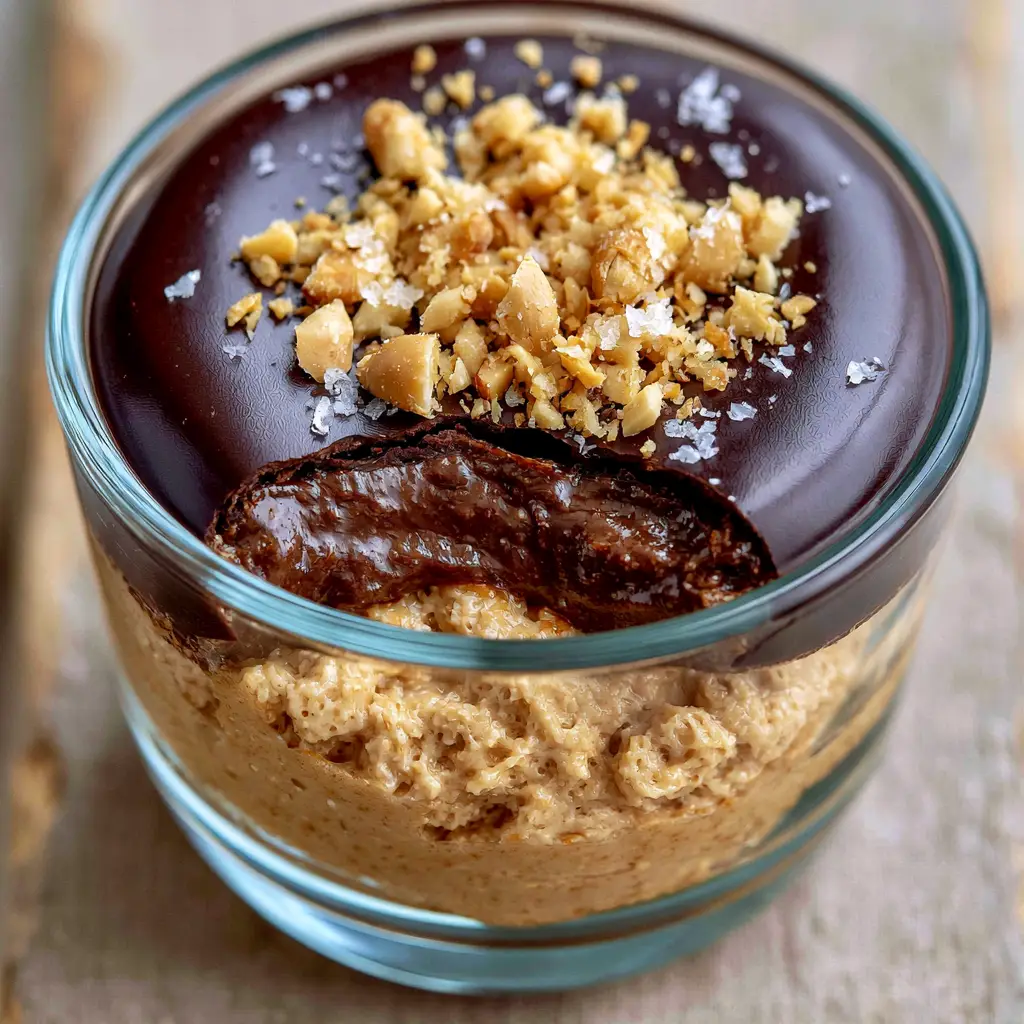
Pour approximately 1 to 2 tablespoons of the chocolate mixture over each mousse cup. Tilt the glass in a circular motion to ensure the chocolate reaches the edges, creating a complete seal.
Immediately sprinkle the finely chopped roasted peanuts and a pinch of flaky Maldon sea salt over the wet chocolate. This ensures the garnishes are embedded in the shell once it hardens.
Place the cups back in the fridge for 15-20 minutes until the shell is firm to the touch. The result should be a smooth dark chocolate shell, slightly cracked once your spoon enters the dessert.
Expert Tips for Culinary Forensic Accuracy
- Avoid Over-Mixing: Once you add the whipped cream, stop mixing as soon as no white streaks remain. Over-mixing will turn the mousse into a dense butter-like consistency.
- Temperature Control: Ensure your cream cheese is truly at room temperature. Cold cream cheese will create tiny lumps in your peanut butter mousse cups that ruin the “glossy, smooth” mouthfeel.
- The “Magic” Shell Ratio: If you prefer a softer shell, add an extra teaspoon of coconut oil. This makes the chocolate even more pliable while maintaining that characteristic “crack.”
- Sifting is Key: Always sift your powdered sugar. Small clumps of sugar are the enemy of an aerated, light-brown peanut butter mousse.
Safe Storage and Serving Suggestions
These mousse cups are best served chilled, directly from the refrigerator. The chocolate shell will begin to soften if left in a warm room for more than 45 minutes, losing its signature snap.
You can store these in the refrigerator for up to 4 days. Cover the glass cups loosely with plastic wrap, ensuring it doesn’t touch the chocolate shell to maintain that unedited, handheld photo-ready finish.
We do not recommend freezing these cups. The high fat content in the peanut butter and cream cheese can lead to a grainy texture once thawed, destroying the fluffy, aerated quality of the mousse.
What to Serve with Peanut Butter Mousse Cups
These rich, decadent cups pair beautifully with other textured desserts. If you are hosting a dessert party, consider serving them alongside thick NYC-style cookies for a variety of chocolate experiences.
For those who enjoy a more classic pairing, these cups are the perfect follow-up to a salty snack plate featuring easy homemade snacks like pretzels or popcorn. The contrast between the cold mousse and a warm chewy melted butter chocolate chip cookie is also a fan favorite.
Frequently Asked Questions
Yes! Substitute the heavy cream with chilled coconut cream (whipped to peaks), use a vegan cream cheese alternative, and ensure your dark chocolate is dairy-free.
We recommend using conventional creamy peanut butter. Natural varieties that require stirring often have too much oil separation, which can cause the mousse to lose its aerated structure and become runny.
They will stay fresh and delicious in the refrigerator for up to 4 days. Keep them covered to prevent the mousse from absorbing other refrigerator odors.
The ‘crack’ comes from the addition of coconut oil. If you omit the oil, the chocolate sets too hard and will pull the mousse up when you try to bite it. Ensure you use the 1 tbsp of oil for that perfect snap.
The Ultimate Peanut Butter Mousse Cup Recipe
Peanut Butter Mousse Cups with Cracked Dark Chocolate Shell
Ingredients
Equipment
Method
- Beat softened cream cheese and sifted powdered sugar until smooth. Incorporate peanut butter and vanilla until uniform.
- In a cold bowl, whip heavy cream to stiff peaks. Gently fold into the peanut butter mixture in two additions to maintain aeration.
- Pipe the mousse into clear glass dessert cups, leaving space at the top. Chill for 30 minutes.
- Melt dark chocolate and coconut oil in the microwave until glossy. Cool slightly.
- Pour chocolate over mousse, sprinkle with chopped peanuts and sea salt. Chill until firm.
Notes
Ensure the mousse is cold before adding the chocolate to prevent melting.
Closing & Call to Action
These peanut butter mousse cups are a testament to how simple ingredients, when treated with professional technique, can create a world-class dessert. The contrast of the aerated mousse against the cracked dark chocolate shell is a culinary experience you won’t soon forget.
If you made these, we would love to see your “cracked shell” photos! Leave a comment below and tell us how yours turned out. Don’t forget to follow us on Pinterest and share this recipe with your fellow peanut butter lovers!