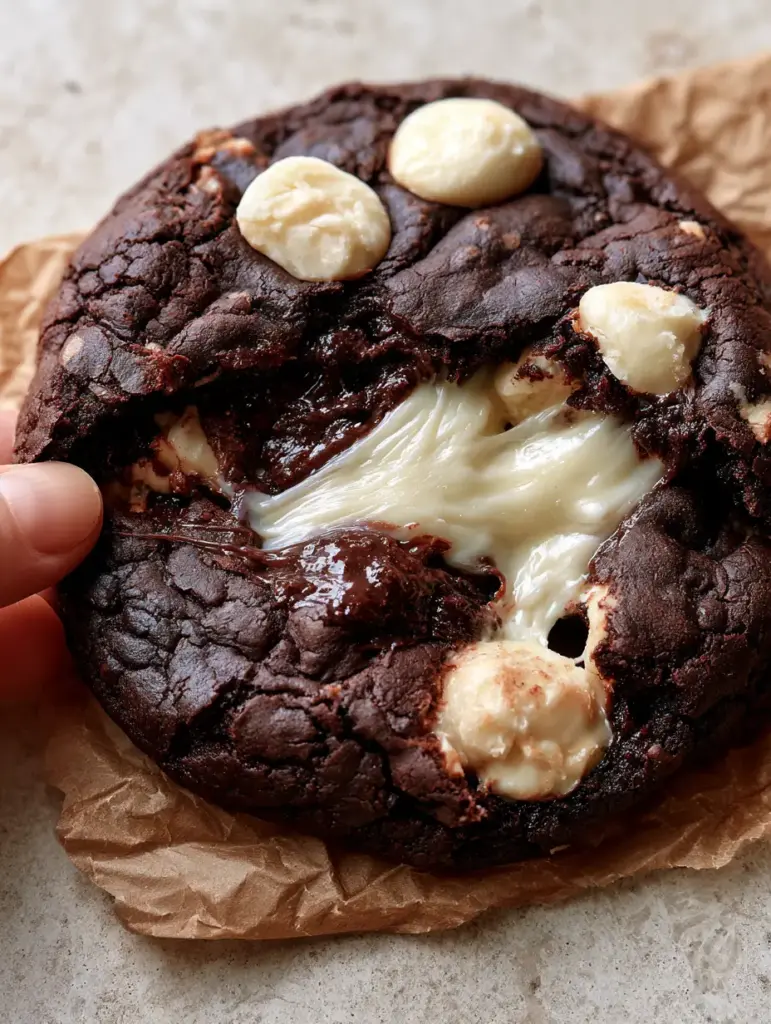
When you imagine the perfect cookie, your mind likely drifts to a golden-brown disc dotted with dark morsels. However, these Inside Out Chocolate Chip Cookies flip the script entirely, offering a sophisticated, artisanal twist that challenges every cookie convention. Imagine a deep ebony, dark cocoa dough that crumbles slightly at the edges before giving way to a center so fudgy it mimics a high-end brownie.
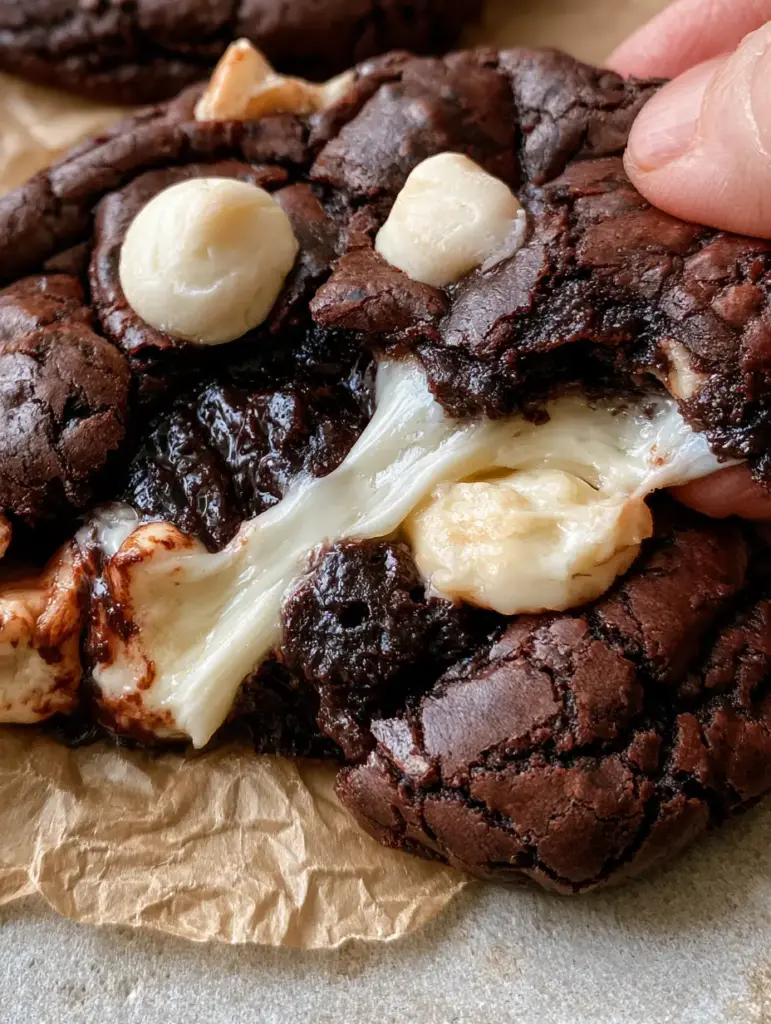
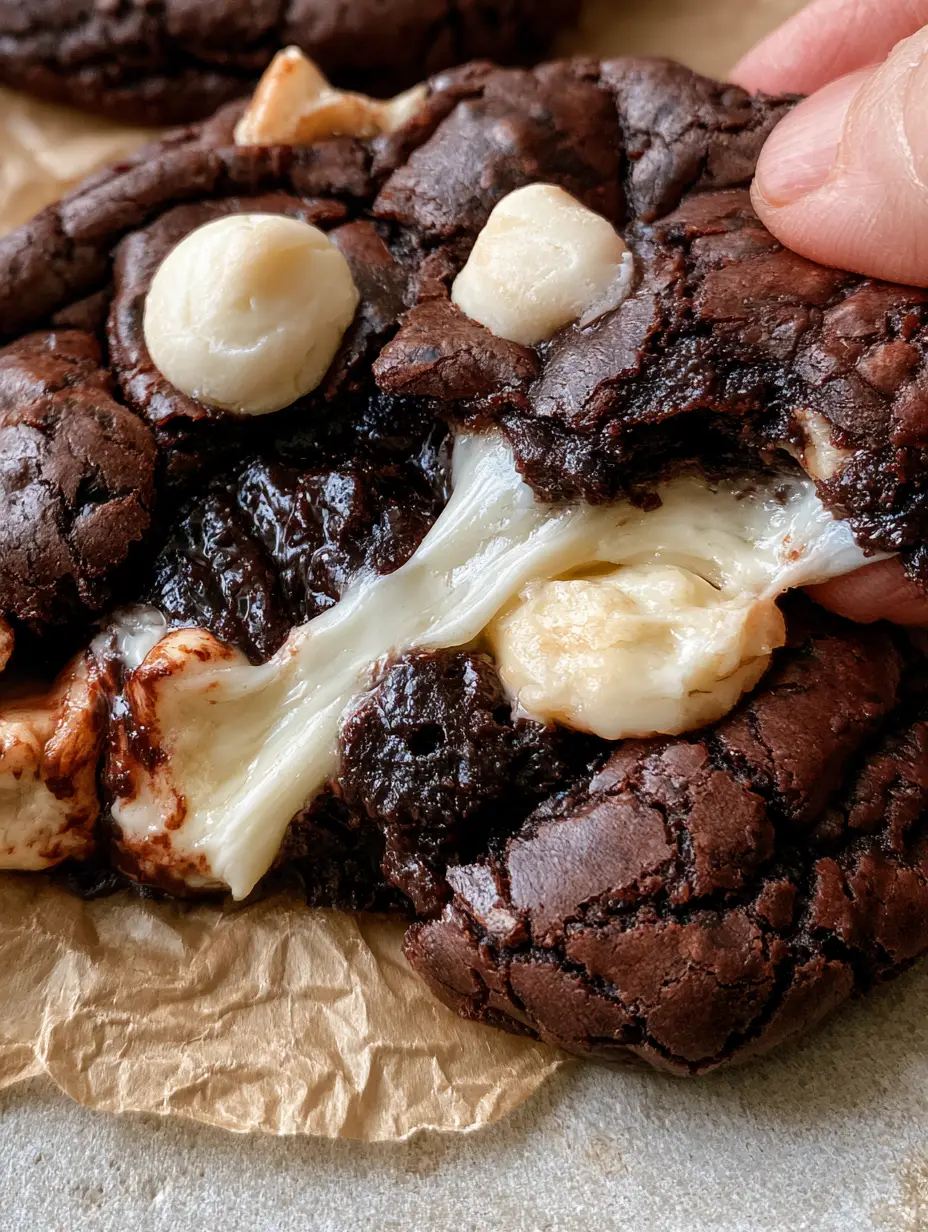
The visual contrast is breathtaking: a matte, crackled exterior set against the brilliant, creamy white of high-quality white chocolate. When pulled apart, thick, gooey strands of white chocolate stretch between the two halves, revealing a glistening, moist interior that looks like molten lava. This isn’t just a snack; it’s a structural masterpiece designed for those who believe chocolate should be an immersive experience.
Whether you are looking for a show-stopping dessert for a dinner party or a decadent treat to enjoy with morning coffee—the soft natural light hitting those crinkly tops is enough to make any baker swoon—this recipe delivers. By mastering the balance of Dutch-processed cocoa and specific chilling techniques, you will create a cookie that looks as if it stepped off the pages of a professional culinary magazine.
The Anatomy of an Exceptional Dark Cocoa Cookie
- Sensory Contrast: A crisp, crackled outer shell provides the perfect structural housing for a dense, molten brownie-style center.
- Visual Brilliance: The deep matte ebony dough creates a stunning backdrop for the ivory white chocolate chips and melting gooey strands.
- Texture Play: The inclusion of both melted white chocolate within the dough and whole, unmelted morsels on top ensures every bite is dynamic.
- Artisanal Appeal: Thick, hefty, and rustic, these cookies represent the pinnacle of modern, handheld smartphone food photography aesthetics.
Essential Elements for the Ultimate Dark Cocoa Dough
To achieve the specific visual and structural results of these Inside Out Chocolate Chip Cookies, you must select your ingredients with scientific precision. Every component serves a dual purpose: flavor and architecture.
1 cup (225g) Unsalted Butter, Room Temperature: The foundation of the cookie’s structure. We use room temperature butter to ensure proper aeration during the creaming process, which helps create that “thick” artisanal height seen in NYC-style cookie thickness.
¾ cup (150g) Granulated White Sugar: Sugar is not just a sweetener; it is a liquefier. In this recipe, granulated sugar helps create the crisp, crackled edges and the crinkly texture on the surface.
¾ cup (150g) Packed Light Brown Sugar: The molasses content in brown sugar provides the “fudgy” moisture required for that glistening, moist center. It reacts with the baking soda to give the cookies a slight lift and deep chewiness.
2 Large Eggs, Room Temperature: Eggs provide the protein structure that holds the molten center together. Ensuring they are at room temperature prevents the butter from curdling during mixing.
1 tsp (5ml) Pure Vanilla Extract: A crucial aromatic that enhances the floral notes of the white chocolate. It acts as a bridge between the bitter cocoa and the sweet creaminess of the chips.
2 cups (250g) All-Purpose Flour: The skeletal frame of the cookie. We use a precise amount to ensure the cookie remains thick without becoming “cakey,” much like a traditional chocolate chip cookie recipe.
¾ cup (60g) Extra Dark (Dutch-Processed) Cocoa Powder: This is the secret to the ebony color. Dutch-processed cocoa is neutralized, allowing the deep, dark chocolate flavor to shine while providing that signature matte black appearance.
1 tsp (5g) Baking Soda: The primary leavening agent. It reacts with the acidic cocoa and brown sugar to create the gas bubbles that eventually pop and form the crackled exterior.
½ tsp (3g) Sea Salt: A culinary forensic essential. Salt intensifies the cocoa flavor and cuts through the sweetness of the white chocolate chips.
1 ½ cups (255g) High-Quality White Chocolate Chips: These are the star of the show. We divide these—folding most into the dough for melting and reserving a handful of whole morsels for the top to ensure a professional finish.
Tool Kit for Professional Artisanal Cookies
Achieving the “macro close-up” look requires more than just ingredients; you need the right tools to manage the dough’s temperature and shape. A heavy-duty stand mixer or electric hand mixer is essential for creaming the butter and sugars until they are light and fluffy.
You will also need a large (3-tablespoon) cookie scoop to ensure every cookie is uniform in size, which is critical for even baking. For the surface, wrinkled brown parchment paper is non-negotiable; it provides the rustic, textured background seen in professional photography and prevents the dark cocoa dough from sticking to the pan.
Finally, a cooling rack is vital. Because the centers are designed to be “molten” and “fudgy,” the cookies need to set slowly. Placing them on a cooling rack allows air to circulate, ensuring the edges stay crisp while the center remains moist and dense.
The Secret Technique for Molten Centers and Crinkly Tops
Follow these steps to ensure your Inside Out Chocolate Chip Cookies look exactly like the visual blueprint: thick, dark, and filled with gooey white chocolate strands.
Step 1: The Creaming Phase
In your mixer, beat the room temperature butter, white sugar, and brown sugar on medium-high speed for at least 3-4 minutes. You are looking for a pale, fluffy texture. This step incorporates the air necessary to create the internal gaps that will eventually be filled with molten chocolate. If you prefer a flatter cookie, you might consider a melted butter cookie technique, but for this artisanal thick version, creaming is king.
Step 2: Incorporating the Ebony Base
Sift the flour, Dutch-processed cocoa, baking soda, and salt together. Sifting is mandatory for cocoa powder as it tends to clump. Slowly add the dry ingredients to the wet, mixing on low until just combined. Overmixing at this stage will develop too much gluten, destroying that brownie-like interior we are striving for.
Step 3: The White Chocolate Fold
Using a silicone spatula, gently fold in 1 ¼ cups of the white chocolate chips. Ensure they are evenly distributed throughout the dark dough. You want every bite to have a pocket of white chocolate that will eventually turn into a gooey strand when the cookie is pulled apart.
Step 4: The Critical Chill
Scoop the dough into large balls (about 60g each) and place them on a tray. Chill the dough in the refrigerator for at least 2 hours (or up to 24 hours). This prevents the cookies from spreading too much in the oven, ensuring they remain “thick and artisanal” with a “dense” center.
Step 5: Baking for Visual Impact
Preheat your oven to 350°F (175°C). Line your baking sheet with wrinkled brown parchment paper. Arrange the chilled dough balls, leaving 3 inches of space between them. Press 3-4 whole white chocolate morsels into the top of each ball. Bake for 10-12 minutes. The visual cue for doneness is a set, crackled edge while the center still looks slightly soft and “glistening.”
Troubleshooting Your Cocoa Cookies
- If the cookies aren’t crackling: Your oven may be too cool. The crackle occurs when the surface dries out before the center finishes rising. Ensure your oven is fully preheated.
- If the dough is too light: You likely used natural cocoa powder instead of Dutch-processed. Natural cocoa is lighter and more acidic; for the “ebony” look, Dutch-processed is required.
- Achieving the “Pull”: To get those thick, gooey white chocolate strands, you must pull the cookie apart while it is still warm (about 5-10 minutes after baking).
- Preventing Flatness: If your cookies spread into thin puddles, your butter was likely too soft or you skipped the chilling phase. High-quality ultimate homemade snacks require patience!
Preserving the Fudgy Texture
To keep that molten, brownie-style interior, store these cookies in an airtight container at room temperature for up to 3 days. If you want to recreate the “molten” experience on day two, simply microwave a cookie for 8-10 seconds until the white chocolate chips begin to glisten again.
For long-term storage, these cookies freeze beautifully. You can freeze the baked cookies for up to 2 months. Alternatively, freeze the raw dough balls and bake them from frozen, adding 2 minutes to the total baking time. This is a great way to always have decadent, artisanal treats ready for unexpected guests.
Elevating the Experience: Pairings and Plating
These Inside Out Chocolate Chip Cookies are incredibly rich, making them the perfect candidate for a “milk and cookies” upgrade. Serve them alongside a cold glass of whole milk, or for a more mature pairing, a double shot of espresso to highlight the bitterness of the dark cocoa.
If you are looking to build a full dessert spread, these cookies pair wonderfully with other unique bakes. Consider serving them with a brown sugar maple cookie pie for a study in contrasting sugar profiles, or even a side of peanut butter mousse cups for the classic chocolate-peanut butter combination. The deep ebony color of these cookies makes them a visual anchor for any dessert board.
Your Questions Answered
Yes! Chunks often provide even larger pools and longer ‘strands’ of melted chocolate, which enhances the molten, artisanal look described in the visual blueprint.
The crackle is achieved by a high sugar-to-flour ratio and the specific reaction of baking soda with brown sugar. Chilling the dough also helps the surface dry out and crack as the center rises.
The most common causes for spreading are skipping the 2-hour refrigeration step or using butter that was too warm (melted instead of room temperature) during the creaming phase.
Dutch-processed cocoa has been neutralized of its acidity, resulting in a much darker, almost black ‘ebony’ color and a smoother, more intense chocolate flavor compared to natural cocoa.
The Definitive Recipe for Inside Out Chocolate Chip Cookies
Ready to bake the most photogenic cookie in your repertoire? This recipe combines the science of Dutch cocoa with the indulgence of white chocolate to create a textural marvel. Follow the instructions below for the perfect crackle and that iconic molten center.
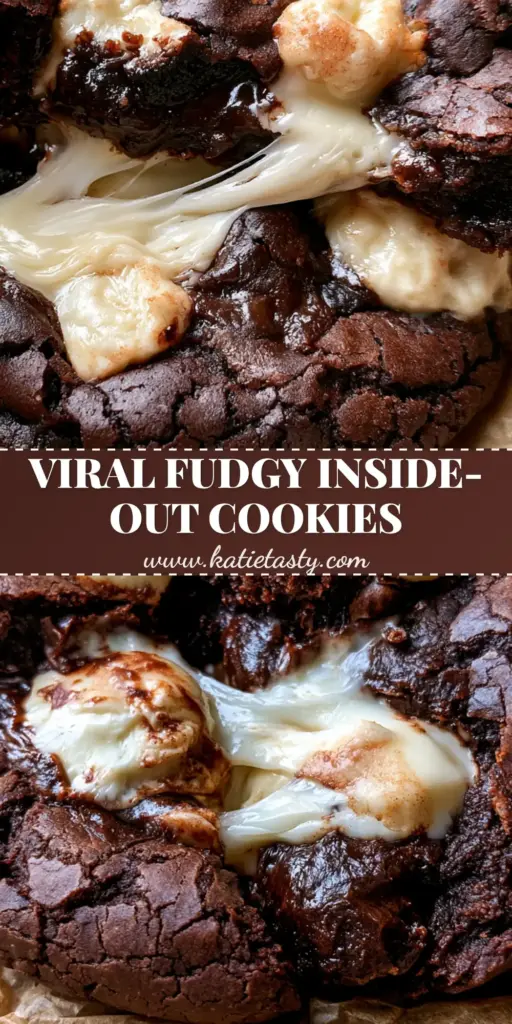
Inside Out Chocolate Chip Cookies: The Ultimate Molten Dark Cocoa Experience
Ingredients
Equipment
Method
- In a stand mixer, cream the butter and both sugars on medium-high until pale and fluffy (3-4 minutes). Add eggs and vanilla, beating until fully incorporated.
- Sift together flour, dark cocoa, baking soda, and salt. Gradually add to the wet ingredients on low speed, mixing until just combined.
- Fold in 1 1/4 cups of white chocolate chips by hand. Do not overmix.
- Scoop 3-tbsp balls of dough and place on a tray. Refrigerate for at least 2 hours to ensure a thick, artisanal shape.
- Preheat oven to 350°F (175°C). Line sheets with wrinkled brown parchment. Place dough balls and press remaining white chocolate morsels on top.
- Bake for 10-12 minutes until the edges are crackled but the center is glistening and soft. Cool on a rack for 10 minutes before pulling apart.
Notes
Do not skip the 2-hour chill time; it is essential for the crackled texture.
Final Thoughts on This Decadent Bake
Mastering the Inside Out Chocolate Chip Cookies is a rite of passage for any serious home baker. It requires a balance of temperature control, high-quality ingredients, and an eye for visual cues. The result is a cookie that transcends the ordinary—a dark, brooding exterior that hides a sweet, molten heart.
If you enjoyed this deep dive into artisanal baking, please leave a comment below and share your results! Don’t forget to follow me on Pinterest for more visually stunning recipe inspiration and tips for taking your food photography to the next level.