There is something inherently magical about the combination of dark, bitter cocoa and sweet, velvety cream. These Cookies & Cream Cupcakes are the ultimate manifestation of that harmony, designed for the baker who demands both visual perfection and a multi-textured sensory experience. With a hidden surprise waiting at the bottom of every liner, these treats are far from your average bakery offering.
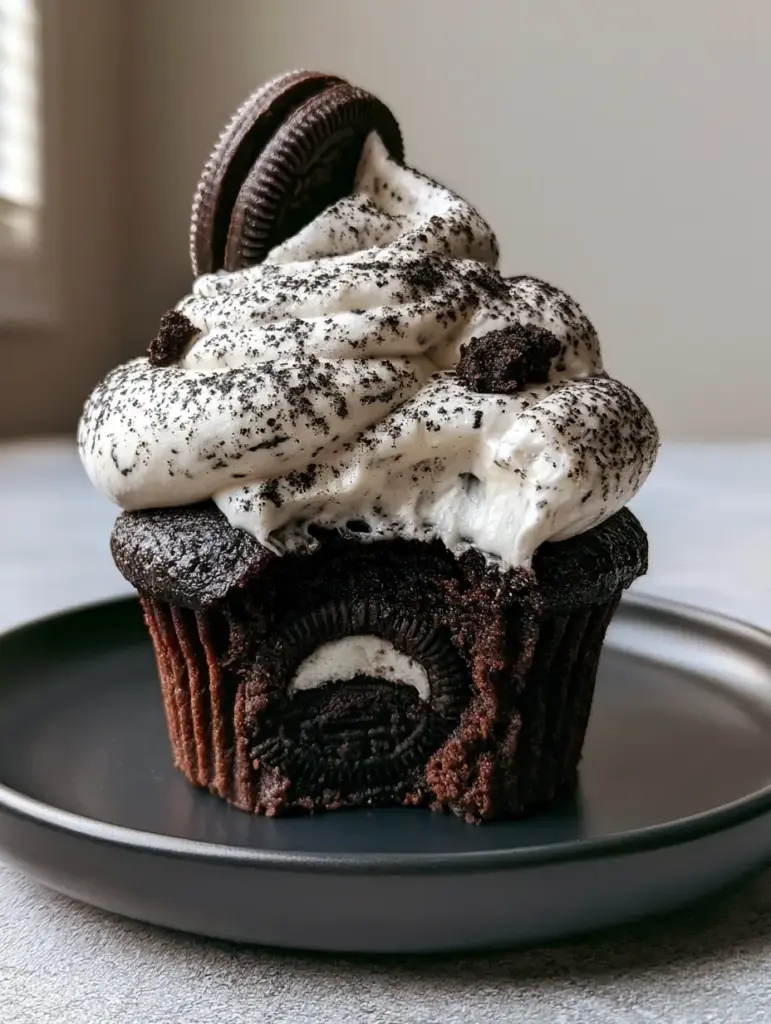
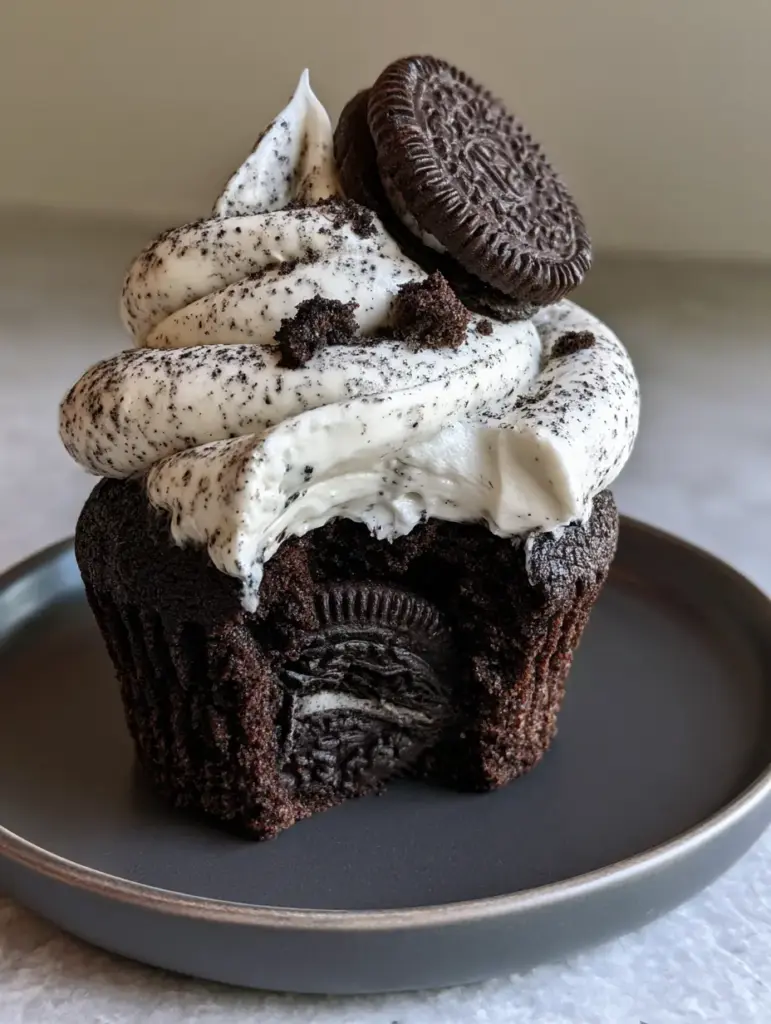
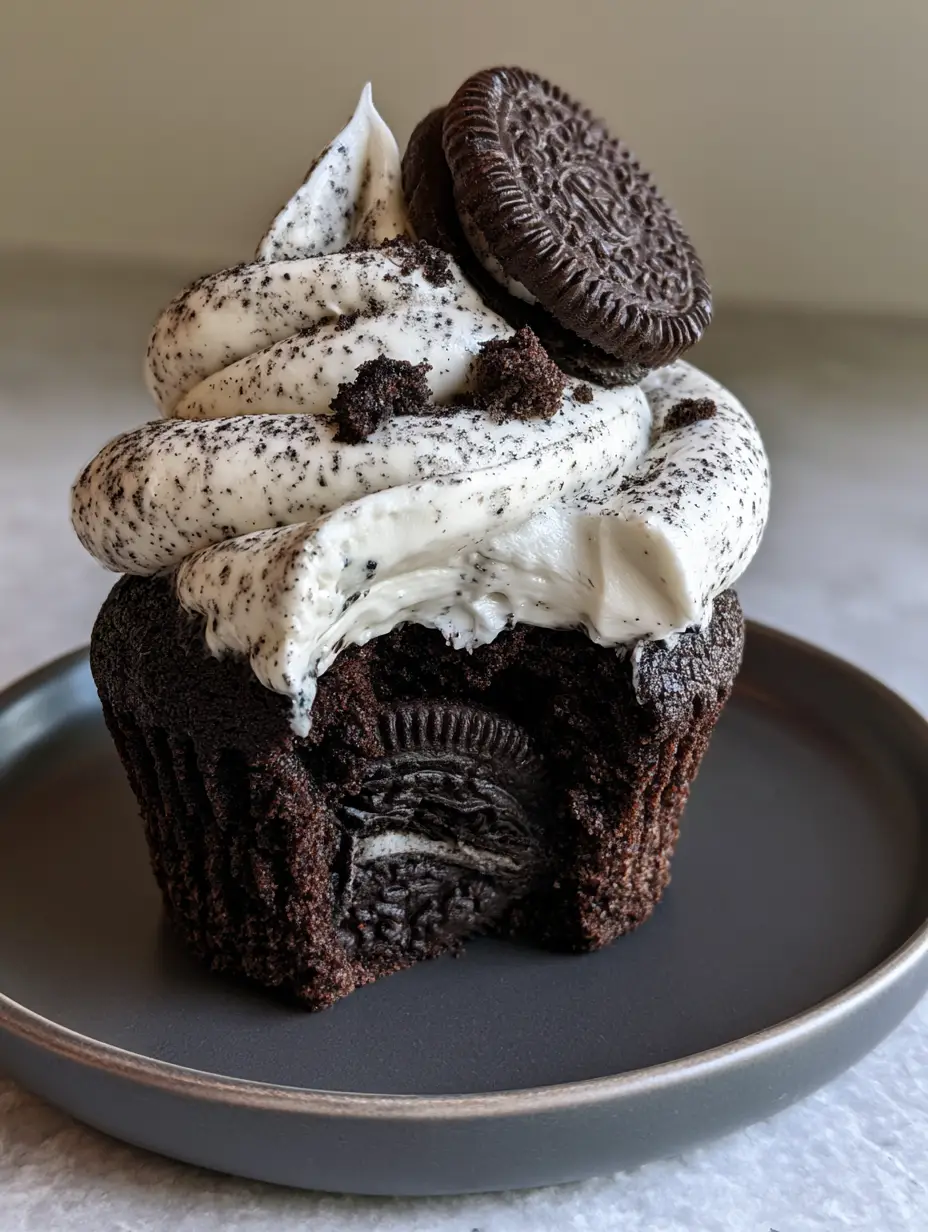
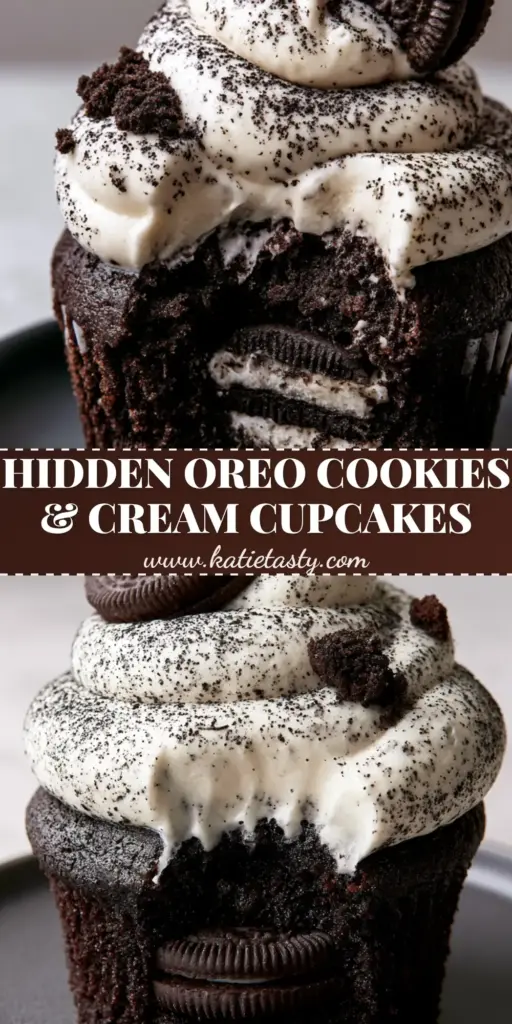
Imagine peeling back a cupcake liner to reveal a moist, dark cocoa sponge that holds a secret: a whole, intact chocolate sandwich cookie forming a crunchy, decadent base. The cupcake is crowned with a stable swirl of white buttercream, so heavily speckled with fine cookie dust it looks like artisanal granite. A single bite reveals the structural integrity of the cake, the silkiness of the frosting, and the satisfying snap of the hidden cookie center.
This recipe was developed to replicate the exact handheld, macro-photography aesthetic seen in high-end culinary journals. Whether you are baking for a special event or simply satisfying a deep craving for Oreos, these cupcakes deliver a professional result that looks as good on a matte ceramic plate as it tastes in your mouth. Get ready to master the art of the “hidden center” bake.
Why These Cookies & Cream Cupcakes are a Baker’s Dream
- The Hidden Foundation: A whole chocolate sandwich cookie is tucked at the bottom, providing a surprising crunch that contrasts with the soft, ultra-moist cocoa sponge.
- Visual Speckle Detail: The frosting isn’t just flavored; it’s visually textured with fine cookie dust to achieve that signature “cookies and cream” aesthetic.
- Professional Stability: The buttercream is engineered for “tall swirls” and stable peaks, ensuring your garnish stays perfectly perched at a 45-degree angle.
- Deep Cocoa Profile: Using Dutch-processed cocoa ensures a dark, moody sponge that mimics the flavor profile of the cookies themselves.
Essential Ingredients for the Perfect Cocoa Sponge
Dutch-Processed Cocoa Powder: 3/4 cup (60g). This is vital for achieving that near-black, dark cocoa sponge color and a smooth, mellow chocolate flavor that isn’t overly acidic.
All-Purpose Flour: 1.5 cups (190g). This provides the structural framework for the cupcake, ensuring it can support the weight of the frosting and the cookie base without collapsing.
Granulated Sugar: 1.5 cups (300g). Sugar does more than sweeten; it tenderizes the crumb by interfering with gluten development, resulting in that moist cake crumb texture.
Whole Chocolate Sandwich Cookies: 12 cookies for the base, plus extra for dust. These provide the iconic flavor profile and the physical “hidden” surprise at the bottom of each liner.
Boiling Water: 3/4 cup (180ml). Adding boiling water at the end “blooms” the cocoa powder, releasing deep flavor notes and creating a thin, liquid batter that bakes into a velvety sponge.
Vegetable Oil: 1/3 cup (80ml). While butter adds flavor, oil is the secret to a cupcake that stays moist for days, providing a superior mouthfeel even when cold.
Large Eggs: 2 units. Eggs act as the binder and provide the necessary lift, ensuring the dark cocoa sponge rises evenly around the cookie base.
Buttermilk: 3/4 cup (180ml). The acidity in buttermilk reacts with the leavening agents to create a tender, light crumb that balances the density of the Oreo base.
Baking Powder & Soda: 1.5 tsp (6g) and 1 tsp (5g) respectively. These chemical leaveners provide the “puff” needed to cover the cookie base and create a domed top.
Fine Sea Salt: 1 tsp (6g). Salt is the ultimate flavor enhancer; it cuts through the sweetness of the buttercream and intensifies the chocolate notes.
Tools Required for Professional Frosting Swirls
To achieve the macro-level handheld look, you need the right equipment. A standard 12-cup muffin tin is essential, but the real magic happens with the piping tools. A large open star tip (like a Wilton 1M or 2D) is necessary to create those stable frosting peaks and silky swirls.
A high-powered blender or food processor is also required to turn your cookies into “fine Oreo crumb dust.” If the dust isn’t fine enough, it will clog your piping tip and ruin the velvety texture of the buttercream. Finally, a matte charcoal ceramic plate provides the perfect neutral backdrop to make the dark cocoa and white cream colors pop.
Building the Foundation: How to Bake the Hidden Cookie Layer
Prepping the Oven and Liners
Start by preheating your oven to 350°F (175°C). Line a standard muffin tin with high-quality paper liners. Taking a cue from professional NYC-style thick cookies, we want everything to be perfectly measured and prepared before the batter is mixed.
Place one whole chocolate sandwich cookie at the very bottom of each liner. Press it down slightly to ensure it sits flat. This cookie will soften slightly during baking but maintain enough structural integrity to provide a distinct “crunch” in the final bite.
Mixing the Dark Cocoa Batter
In a large bowl, whisk together your flour, sugar, cocoa, baking powder, baking soda, and salt. Sifting the cocoa is non-negotiable here; cocoa powder is notoriously lumpy and you want a perfectly smooth, dark cocoa sponge.
Add your eggs, buttermilk, oil, and vanilla extract. Beat on medium speed for about two minutes until the mixture is thick and glossy. This ensures that the fats are fully emulsified with the liquids, a key step for a moist cake crumb texture.
The Blooming Technique
Lower your mixer speed and carefully pour in the boiling water. The batter will become very thin and watery—this is exactly what you want. The hot water cooks the cocoa starch slightly, intensifying the color and flavor to match the dark aesthetic of our blueprint.
Divide the batter evenly among the 12 liners, pouring it directly over the cookies. Fill each about 3/4 full. Bake for 18-22 minutes. You’ll know they are ready when a toothpick inserted into the cake (not the cookie!) comes out clean and the tops feel springy to the touch.
Mastering the Speckled White Buttercream
Achieving the Silky Texture
For the frosting, beat 1 cup (226g) of softened unsalted butter for at least 5 minutes. You want it to be pale, almost white, and incredibly airy. This creates the “velvety texture” described in our visual prompt.
Gradually add 4 cups (500g) of sifted powdered sugar and 2 tablespoons (30ml) of heavy cream. Beat on high until the frosting is stable enough to hold its shape. If the frosting is too soft, add more sugar; if too stiff, add a drop more cream.
Integrating the Fine Oreo Crumb Dust
Take 5-6 cookies and pulse them in a blender until they are a fine black powder. Fold this dust gently into the white buttercream using a spatula. Do not over-mix, or the frosting will turn a muddy grey.
We want a high-contrast look: a “silky white buttercream frosting heavily speckled with fine black cookie dust.” Once mixed, fit your piping bag with the star tip and prepare to decorate. This technique is similar to how we balance textures in our peanut butter mousse cups.
Assembling Your Masterpiece
Once the cupcakes are completely cool, pipe a tall, stable swirl of frosting onto each. Start from the outside edge and spiral inward, building height as you reach the center. This creates the professional “stable frosting peaks” required for the blueprint.
Immediately after piping, take a mini Oreo cookie and perch it at a 45-degree angle near the top of the swirl. This adds height and a sense of movement to the dish. Finally, scatter a few coarse cookie crumbs over the top for a rustic, authentic touch.
The final result should look exactly like a handheld smartphone photo: raw, authentic, and incredibly appetizing. The contrast between the matte charcoal plate and the speckled frosting creates a stunning visual that is perfect for sharing on social media.
Pro Secrets for Ultra-Moist Cupcake Textures
- Don’t Overbake: Because the sponge is so dark, it is hard to see “browning.” Trust the toothpick test and the springy feel of the cake surface.
- Room Temperature Ingredients: Ensure your eggs and buttermilk are at room temperature to prevent the batter from curdling during the emulsification process.
- Sift the Dust: If you plan on using a small piping tip, run your cookie dust through a fine-mesh sieve to prevent clogging.
- The Bite Reveal: If you are photographing these, take a bite while the cupcake is slightly chilled; this ensures the “whole, intact cookie” at the bottom shows a clean cross-section.
Keeping Your Cupcakes Fresh and Frosting Stable
These cupcakes are best enjoyed within 24 hours but can be stored in an airtight container at room temperature for up to 3 days. Because of the oil-based sponge, they will stay moist much longer than butter-based cakes.
If you need to make them ahead of time, you can freeze the unfrosted cupcakes (with the cookie base) for up to 2 months. Simply thaw at room temperature before frosting. We recommend adding the mini Oreo garnish just before serving to prevent the cookie from losing its crunch due to the moisture in the frosting.
Delicious Pairings for an Afternoon Treat
These rich, chocolatey cupcakes pair beautifully with a variety of other treats. If you are hosting a dessert party, consider serving them alongside some homemade snacks to balance the sugar levels. A cold glass of milk is the classic choice, but a bitter espresso also works wonders to cut through the sweetness of the buttercream.
If you enjoy this flavor profile, you might also love our Samoas cookies or our traditional classic chocolate chip cookie recipe. For those who prefer a different fruit-based texture in the morning, our moist carrot muffins offer a wonderful contrast to these decadent chocolate treats.
Common Questions About Cookies & Cream Cupcakes
You can, but the cupcakes will be lighter in color and have a slightly more acidic flavor. Dutch-processed cocoa is what gives these cupcakes their signature dark cocoa sponge appearance that matches the Oreo cookies.
The cookie will naturally soften slightly as it absorbs moisture from the batter, but using a high-quality sandwich cookie and baking at the correct temperature ensures it retains a pleasant, distinct bite rather than turning into mush.
For that perfect macro reveal, let the cupcakes chill in the fridge for 30 minutes. This firms up both the sponge and the hidden cookie base, allowing for a sharp, clean cross-section when you take a bite.
This happens if the cookie crumbs are mixed too vigorously or for too long. Gently fold the fine cookie dust into the white buttercream with a spatula just until it is distributed to maintain that high-contrast speckled look.
The Ultimate Cookies & Cream Cupcake Recipe
Cookies & Cream Cupcakes with a Hidden Whole Cookie Center
Ingredients
Equipment
Method
- Preheat oven to 350°F (175°C) and line a muffin tin. Place one whole cookie at the bottom of each liner.
- Whisk flour, sugar, cocoa, baking powder, baking soda, and salt in a large bowl.
- Add eggs, buttermilk, and oil. Beat on medium for 2 minutes. Stir in boiling water by hand until smooth.
- Pour batter over the cookies in the liners. Bake for 18-22 minutes until springy.
- Beat butter for 5 minutes until pale and fluffy. Add sugar and cream, beating until stable.
- Fold in fine cookie dust until speckled. Pipe tall swirls onto cooled cupcakes.
- Top with a mini Oreo at a 45-degree angle and a scatter of coarse crumbs.
Notes
Allow cupcakes to cool completely before frosting to maintain stable peaks.
Join the Baking Community!
These Cookies & Cream Cupcakes are a testament to the joy of home baking. They combine scientific precision with creative flair, resulting in a dessert that is as beautiful as it is delicious. The hidden cookie base is always a conversation starter, and that speckled frosting is the stuff of dreams.
If you made these cupcakes, we would love to see your results! Tag us in your photos and follow our journey for more culinary inspiration. Don’t forget to save this recipe to your favorite boards on Pinterest so you can bake them whenever the craving strikes. Happy baking!