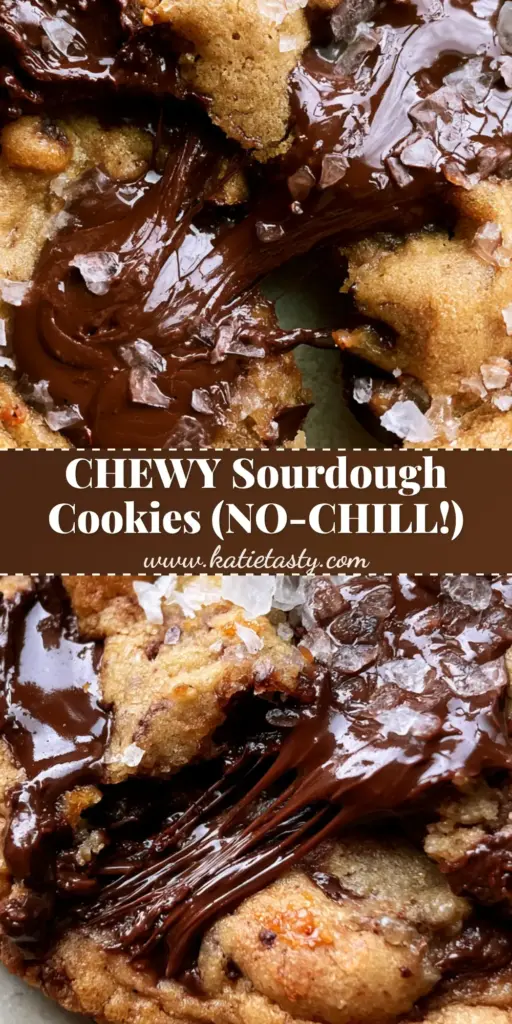
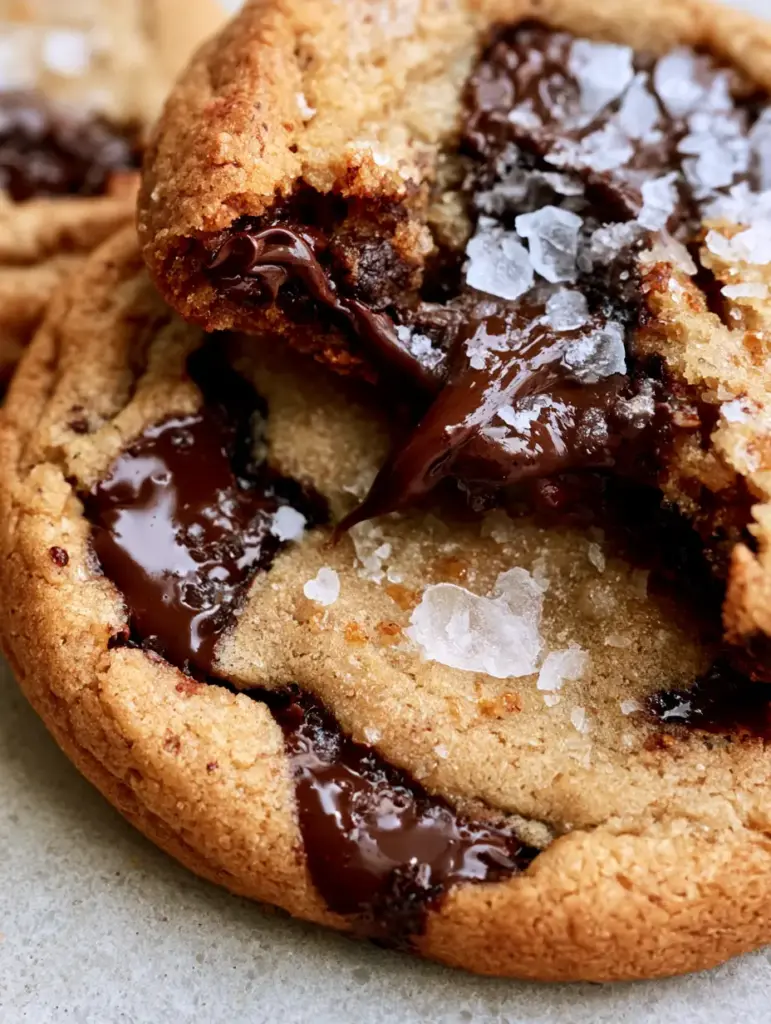
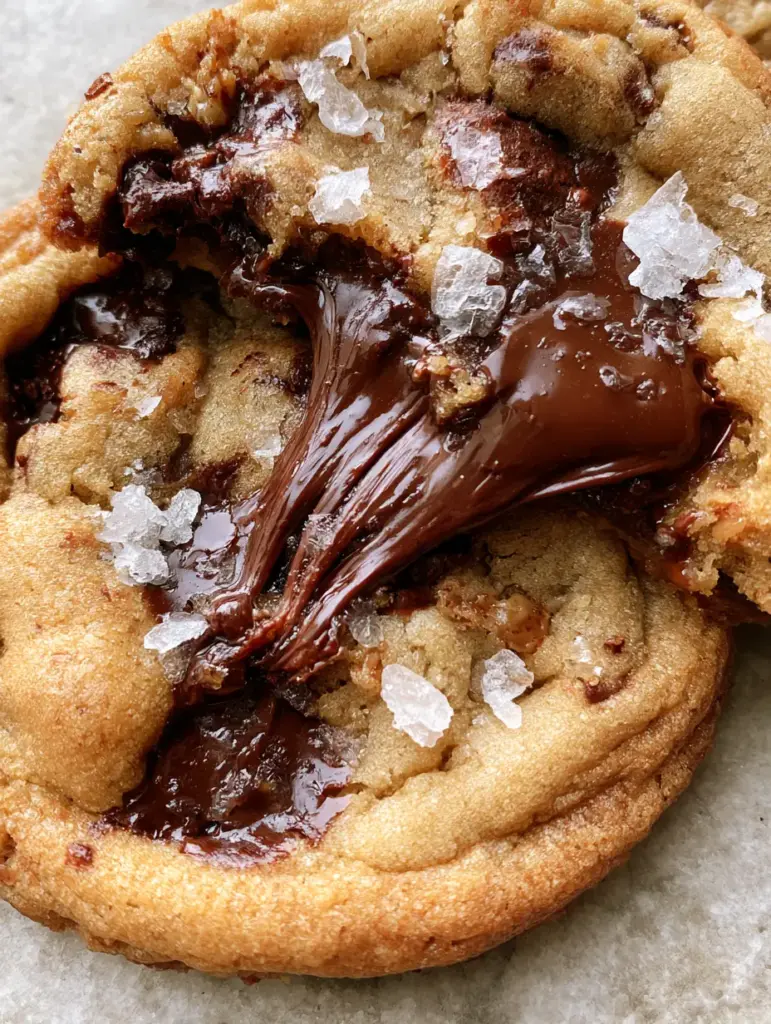
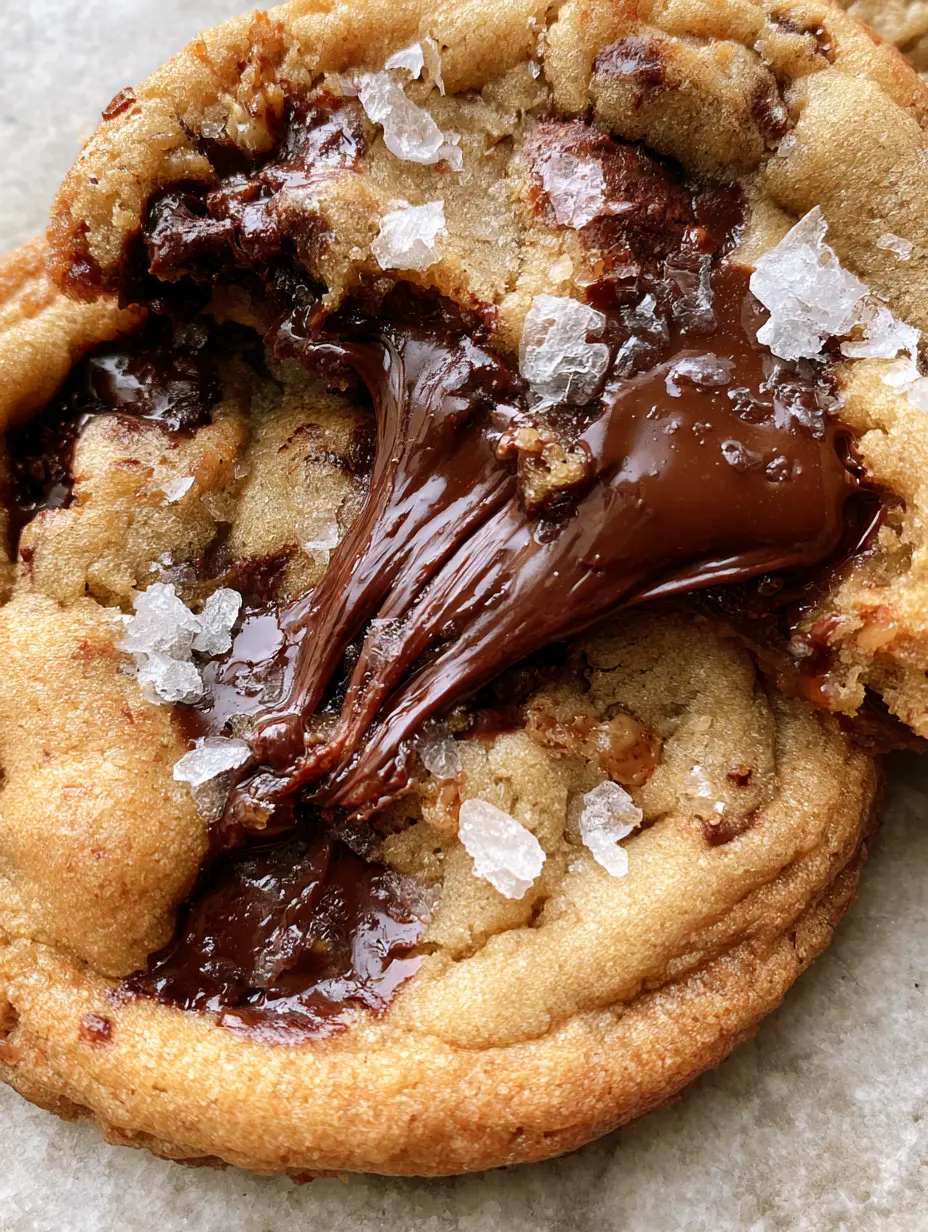
There is a specific, almost architectural beauty to the perfect cookie. When you craft these Brown Butter Sourdough Discard Chocolate Chip Cookies, you aren’t just baking; you are engineering a sensory experience. Imagine breaking open a thick, chewy disc to reveal a soft, fudgy, underbaked center where long, gooey strings of melted dark chocolate stretch apart. The surface is a landscape of caramelized golden-brown ripples, deep craters filled with molten chocolate puddles, and a generous dusting of large, translucent flaky sea salt crystals that catch the light.
These Brown Butter Sourdough Discard Chocolate Chip Cookies represent the pinnacle of home baking, combining the nutty, toasted depth of beurre noisette with the complex, lactic tang of sourdough discard. The result is a cookie that tastes sophisticated, looks like a professional food blog masterpiece, and delivers a texture that bridges the gap between a brownie and a traditional biscuit. Whether you are a sourdough enthusiast or just looking for the best cookie of your life, this recipe is designed to hit every culinary high note.
The Science of Flavor: Why These Sourdough Discard Cookies Stand Out
- The Maillard Reaction: By browning the butter, we create toasted milk solids that appear as tiny, flavorful specks throughout the dough, providing a rich, toffee-like backbone.
- Lactic Acid Complexity: The sourdough discard doesn’t just act as a moisture source; it breaks down starches, resulting in a deeper, more fermented flavor profile that balances the sweetness.
- Textural Contrast: We use a high ratio of brown sugar and specific chilling techniques to ensure those iconic rippled crispy edges and a dense, fudgy interior.
- Molten Chocolate Architecture: By using chopped dark chocolate bars instead of just chips, we create those signature “molten pools” visible in the visual blueprint.
Essential Components for Your Gourmet Cookie Dough
Achieving the visual and structural perfection of Brown Butter Sourdough Discard Chocolate Chip Cookies requires specific ingredients chosen for their chemical properties. Do not substitute these if you want the exact results seen in our professional photography.
Unsalted European-Style Butter: 1 cup (226g). High-fat butter is essential for browning; the milk solids will toast into the dark specks that define the dough’s appearance.
Sourdough Discard: 1/2 cup (125g). Use discard that is at room temperature; it provides the acidity needed to react with the leavening agents for a soft, tender crumb.
Dark Chocolate Bar (70% Cacao): 6 oz (170g). Chop this by hand to create varying sizes, ensuring both tiny shards and large molten puddles throughout the cookie.
Semi-Sweet Chocolate Chunks: 1/2 cup (90g). These hold their shape better than dark chocolate, providing structural “melty chunks” alongside the molten dark chocolate pools.
Dark Brown Sugar: 1 cup (200g). The high molasses content is the secret to the chewy, fudgy center and the caramelized golden-brown color.
Granulated White Sugar: 1/2 cup (100g). This is what creates the “rippled crispy edges” as the sugar recrystallizes during the baking process.
All-Purpose Flour: 2 ¼ cups (280g). Provides the necessary protein structure to hold the heavy inclusions of chocolate and butter.
Maldon Flaky Sea Salt: 1 tbsp (15g). These large, translucent crystals are the finishing touch that cuts through the richness and adds a professional aesthetic.
Foundational Additions: 1 large egg, 2 tsp (10ml) vanilla extract, 1 tsp (5g) baking soda, and ½ tsp (3g) fine sea salt for the dough itself.
Professional Equipment for Bakery-Style Results
To replicate the macro-shot quality of these cookies, you need tools that manage heat and airflow effectively. A heavy-duty light-colored baking sheet is preferred to prevent the bottoms from burning before the edges ripple.
You will also need a stainless steel skillet for browning the butter—this allows you to see the color change of the milk solids clearly. A large cookie scoop (3-tablespoon capacity) ensures the cookies are “thick and chewy” rather than thin. Finally, a wire cooling rack is essential to prevent the “fudgy center” from becoming soggy due to trapped steam.
Step-by-Step: Crafting the Perfect Brown Butter Sourdough Base
Achieving the Perfect Beurre Noisette
In a medium stainless steel skillet, melt the butter over medium heat. Stir constantly with a silicone spatula as it foams and pops; listen for the sound to subside, which indicates the water has evaporated. Watch for the milk solids to turn a deep amber color and smell a distinct nutty aroma. Immediately transfer to a heat-proof bowl, scraping every last toasted brown butter speck into the dish, and let it cool for 15 minutes.
Integrating the Sourdough Discard
In a large mixing bowl, whisk together the cooled brown butter, dark brown sugar, and granulated sugar until it looks like wet sand. Add the egg, vanilla, and the sourdough discard. Whisk vigorously for 2 minutes; the discard will emulsify with the fats, creating a glossy, pale ribbon when the whisk is lifted. This step is crucial for the melted butter chocolate chip cookies (coming soon) texture we are aiming for.
Folding for Texture and Inclusions
Sift in the flour, baking soda, and fine sea salt. Use a spatula to fold until just a few streaks of flour remain. Fold in the chopped dark chocolate and semi-sweet chunks. The dough should be thick and heavy. Cover and chill the dough for at least 2 hours, or ideally 24 hours. This “cold ferment” allows the flour to fully hydrate, intensifying the caramelized flavor and ensuring the cookies don’t spread too thin.
Baking for Rippled Edges and Molten Pools
Preheat your oven to 350°F (175°C). Scoop large mounds of dough (about 60g each) onto a parchment-lined sheet. Space them 3 inches apart. Bake for 10-12 minutes. For the “rippled edges,” pull the tray out halfway through and firmly tap it against the oven rack. This “pan-banging” technique, similar to our NYC cookies, collapses the air bubbles and creates those beautiful ridges.
Visual & Sensory Cues: When to Pull Them Out
Your Brown Butter Sourdough Discard Chocolate Chip Cookies are done when the edges are set and a deep, caramelized golden-brown, but the centers still look slightly soft and “underbaked.” You should see molten chocolate puddles bubbling on the surface. Immediately upon removing from the oven, sprinkle the large flaky Maldon sea salt over the hot chocolate pools so the crystals adhere.
Expert Tips for Success
- Temperature Control: Never add sourdough discard directly from the fridge to hot butter; it will seize the fats and ruin the emulsion.
- Chocolate Selection: Use a high-quality chocolate bar rather than just chips. The cocoa butter in bars helps create the “long, gooey strings” of chocolate seen in our classic chocolate chip cookie recipe.
- The Scoop Hack: If your cookies aren’t perfectly round, place a large circular cutter or glass over the hot cookie and gently scoot it in a circular motion to pull the edges inward.
- Don’t Overbake: The residual heat from the pan will finish cooking the “fudgy center.” If they look fully cooked in the oven, they will be hard once cooled.
Storage, Reheating, and Freezing
These cookies are best enjoyed warm, but they stay fudgy for up to 4 days in an airtight container at room temperature. To regain that “molten chocolate” experience, microwave a cookie for 10 seconds before serving. You can also freeze the pre-scooped dough balls for up to 3 months. Bake them directly from frozen, adding 2-3 minutes to the total bake time.
Creative Pairings and Service Suggestions
While these cookies are a masterpiece on their own, they pair beautifully with a cold glass of milk or a sharp espresso. If you are looking for more homemade snacks, consider serving these alongside a fruit platter. For a more decadent dessert spread, they complement our cookies and cream cupcakes or even a slice of cinnamon roll cheesecake cookies.
Frequently Asked Questions
You can, but the cookies will spread more and won’t have the same fudgy, thick center. Chilling for at least 2 hours allows the flour to hydrate and the fats to solidify for better texture.
Yes, you can use active starter, but discard is preferred for its higher acidity, which provides a more tender, fudgy texture and a deeper fermented flavor profile.
Use the ‘pan-banging’ technique: halfway through baking, lift the sheet and firmly tap it against the oven rack. This collapses the dough, creating crispy, rippled ridges.
A high-quality dark chocolate bar (at least 70% cacao) chopped by hand is best. Chocolate bars contain more cocoa butter than chips, allowing them to melt into gooey pools.
Browning the butter creates toasted milk solids (beurre noisette) which add a complex nutty flavor and provide the visible dark specks in the dough seen in professional bakery cookies.
The Ultimate Brown Butter Sourdough Discard Chocolate Chip Cookie Recipe
Brown Butter Sourdough Discard Chocolate Chip Cookies: The Ultimate Guide to Fudgy Centers and Crispy Edges
Ingredients
Equipment
Method
- Melt butter in a skillet over medium heat. Whisk as it foams and turns amber with dark brown specks. Transfer to a bowl to cool for 15 minutes.
- Whisk brown butter and both sugars. Add the sourdough discard, egg, and vanilla. Whisk for 2 minutes until glossy and emulsified.
- Fold in flour, baking soda, and fine salt until barely combined. Fold in dark chocolate shards and semi-sweet chunks.
- Refrigerate the dough for at least 2 hours. This ensures the cookies are thick and fudgy rather than flat.
- Preheat oven to 350°F (175°C). Scoop 3-tbsp mounds onto parchment. Bake for 10-12 minutes.
- Halfway through baking, tap the pan against the oven rack to create rippled edges. Remove when edges are golden but centers are soft.
- Top hot cookies with Maldon sea salt. Let cool on the pan for 10 minutes before moving to a wire rack.
Notes
Do not overmix after adding flour to keep the center fudgy.
Final Thoughts: Master the Bake
Mastering the Brown Butter Sourdough Discard Chocolate Chip Cookies is a rite of passage for the modern home baker. The combination of forensic visual appeal and deep culinary science makes this recipe a rewarding challenge. We would love to see your rippled edges and molten chocolate pools! Tag us in your photos and follow katie_tasty on Pinterest for more elevated dessert inspiration.