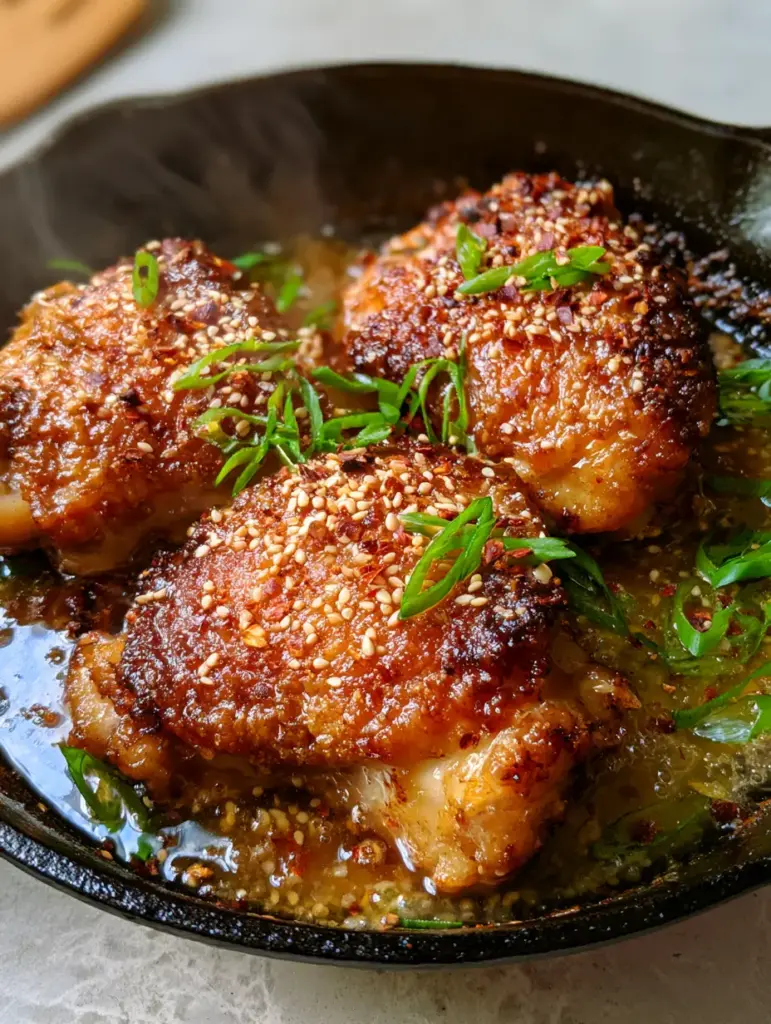
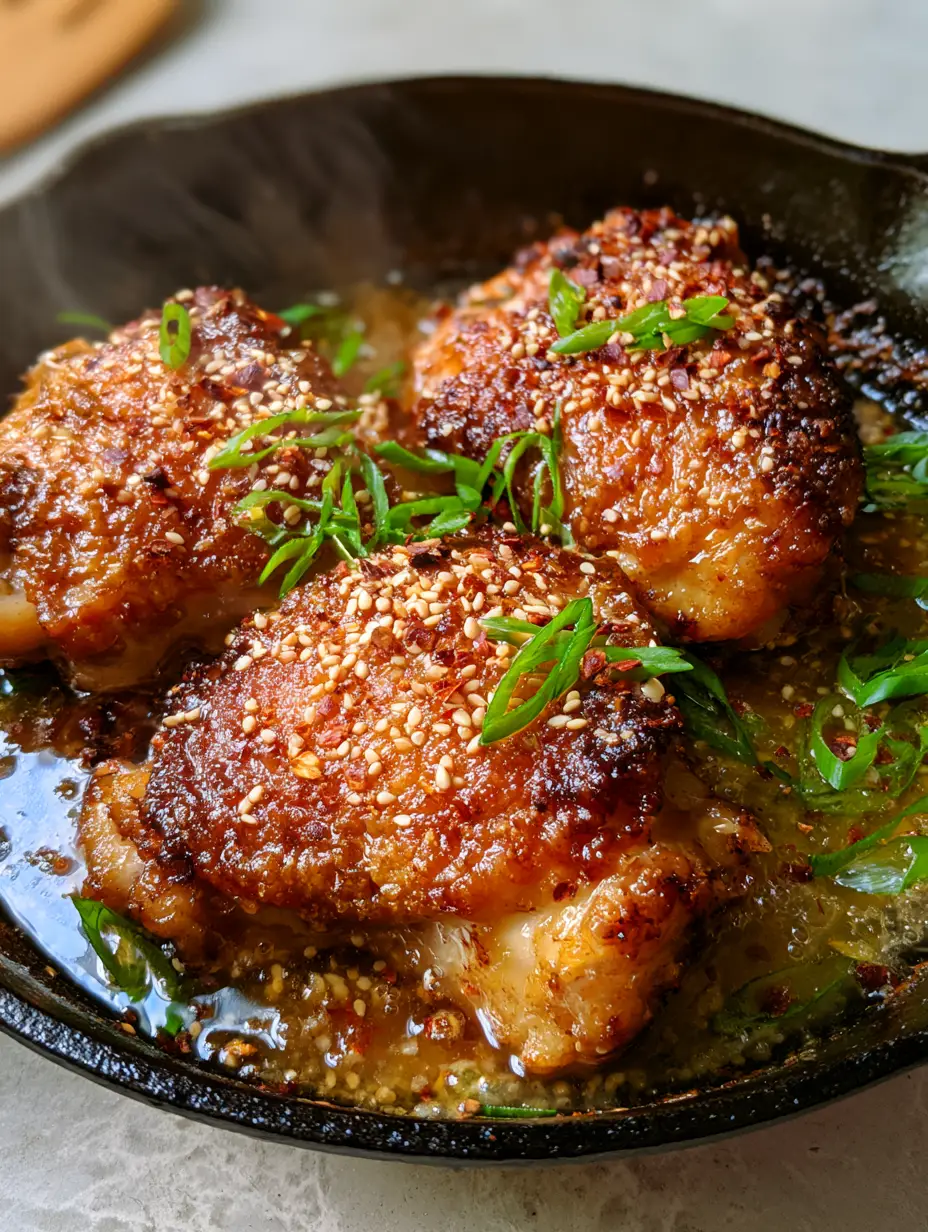
There is a specific kind of culinary magic that happens when high-heat searing meets the sticky, floral sweetness of a honey reduction. If you have been searching for the perfect way to prepare chicken thighs, look no further than this cast iron masterpiece. This recipe isn’t just about dinner; it is about achieving that elusive, crackling golden-brown crust that shatters under the fork, giving way to succulent, tender meat bathed in a translucent amber glow.
Imagine standing in your kitchen as the soft natural window light hits a seasoned black cast iron skillet, illuminating the glistening edges of caramelized garlic and honey. The aroma of toasted sesame and the sharp, fresh bite of bias-cut scallions fills the air, creating a sensory experience that rivals any high-end bistro. These chicken thighs are designed for the home cook who craves restaurant-quality textures and deep, complex flavors without the need for overly complicated techniques.
Whether you are a seasoned pro or an enthusiastic beginner, the key to this dish lies in the details—the hiss of the pan, the visual cue of the Maillard reaction, and the precise timing of the glaze. We are moving beyond basic pan-frying into the realm of professional-level glazing. Let’s dive into the science and soul of the ultimate honey garlic experience.
The Secret to Achieving That Shatter-Crisp Golden Crust
The foundation of any world-class dish involving chicken thighs is the sear. To achieve the “extreme golden-brown, crackling crust” described in our visual blueprint, you must master the art of moisture control. Surface moisture is the enemy of the Maillard reaction; if the meat is damp, it will steam rather than sear, resulting in a grey, rubbery texture instead of a golden-brown crown.
- The “Bone-Dry” Method: Always use paper towels to pat the meat until it is completely dry on all sides before seasoning.
- Cast Iron Retention: A seasoned black cast iron skillet is non-negotiable here because it holds heat better than stainless steel, ensuring the temperature doesn’t drop when the meat hits the pan.
- High Smoke Point Fats: Use an oil like avocado or grapeseed that can withstand the intense heat required for that initial “crackling” texture.
- The “Leave It Alone” Rule: Once the chicken thighs touch the hot iron, do not move them for at least 5-6 minutes to allow the crust to fully develop and naturally release from the pan.
By following these steps, you ensure that the chicken thighs provide a sturdy, textured base that can hold up to a heavy glaze without losing their structural integrity. This is the same technique we recommend when preparing our Asian jalapeno chicken, where texture is paramount to the overall experience.
Foundational Ingredients for the Ultimate Amber Honey Garlic Sauce
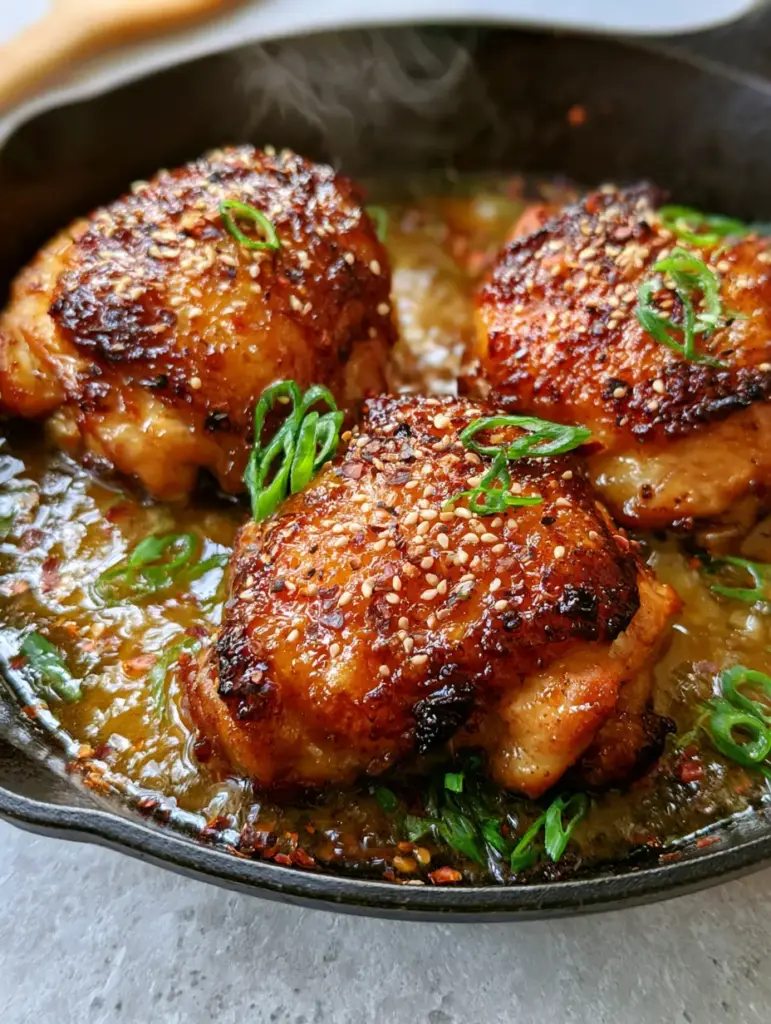
A great glaze is more than just sugar; it is a balance of viscosity, acidity, and umami. For these chicken thighs, we are aiming for a thick, glossy, translucent amber honey garlic sauce that pools slightly around the base, just like in our professional food photography blueprint.
Boneless Skinless Chicken Thighs (1.5 lbs / 680g): The dark meat provides the necessary fat content to stay juicy under high-heat searing, unlike leaner breasts.
Raw Honey (1/3 cup / 115g): Honey acts as the primary sweetener and the thickening agent that creates that translucent, amber gloss.
Fresh Garlic (4-5 cloves / 25g): Finely minced garlic provides the aromatic backbone; it should be softened but not burnt to avoid bitterness.
Low-Sodium Soy Sauce (2 tbsp / 30ml): This adds salt and depth of color, helping achieve that deep “amber” hue without making the dish overly salty.
Rice Vinegar (1 tbsp / 15ml): The acidity cuts through the heavy sweetness of the honey, balancing the palate and keeping the dish from feeling cloying.
Toasted White Sesame Seeds (1 tsp / 3g): These provide a nutty crunch and a precise visual scatter that contrasts against the dark glaze.
Fresh Green Scallions (2 stalks / 20g): Must be bias-cut (diagonal) to provide the “bright green” aesthetic and a fresh, onion-like bite that cuts through the richness.
Dried Red Chili Flakes (1/2 tsp / 1g): These tiny flecks add a subtle heat and a pop of red color that completes the visual profile of the chicken thighs.
Cornstarch (1 tsp / 3g): When whisked into the sauce, this ensures a “thick, glossy” finish that clings to the meat rather than running off into the pan.
Essential Kitchen Gear for Professional-Level Searing
To replicate the visual result of a “seasoned black cast iron skillet” with “caramelized edges,” your choice of equipment is just as important as your choice of ingredients. You need tools that can handle high heat and provide even distribution.
12-inch Cast Iron Skillet: The heavy bottom and walls of a cast iron pan create a mini-oven effect while providing the best searing surface available for chicken thighs.
High-Heat Silicone Tongs: Essential for flipping the meat without tearing the developing crust or scratching the seasoning of your pan.
Splatter Guard: Because we are searing at high temperatures, a splatter guard keeps your light-grey stone countertops clean while allowing steam to escape.
Sharp Chef’s Knife: You will need this to achieve those “very thin bias-cut” scallions that decorate the final dish.
If you enjoy the process of pan-searing and then finishing with a glaze, you might also love our technique for pork bites with creamy bell pepper sauce, which utilizes similar high-heat principles.
A Step-by-Step Masterclass in High-Heat Pan Roasting
Creating world-class chicken thighs requires a rhythmic approach to cooking. We will start with a cold prep, move to a high-heat sear, and finish with a gentle glaze reduction to ensure the sauce stays translucent and glossy.
Phase 1: Preparing the Protein
Remove your chicken thighs from the refrigerator at least 15 minutes before cooking. Pat them exceptionally dry with paper towels. Season both sides generously with kosher salt and cracked black pepper. For an even more “crackling” crust, lightly dust the exterior with a tiny pinch of cornstarch; this absorbs any microscopic surface moisture.
Phase 2: The High-Heat Sear
Place your cast iron skillet over medium-high heat. Add 2 tablespoons (30ml) of high-smoke point oil. Wait until the oil is shimmering and just starting to wisps of smoke appear. Carefully lay the chicken thighs into the pan, moving away from you to avoid splashes. Press down slightly with your tongs to ensure maximum surface contact. Sear for 6-7 minutes without moving them until a deep, golden-brown crust forms.
Phase 3: The Flip and Aromatics
Flip the chicken thighs. The cooked side should look like the Midjourney prompt: “extreme golden-brown, seared, crackling crust.” Lower the heat to medium. Move the chicken to the edges of the pan and add the minced garlic to the center. Sauté for only 30-45 seconds until fragrant—do not let it turn dark brown.
Phase 4: Glazing to Perfection
Whisk together the honey, soy sauce, rice vinegar, and cornstarch. Pour the mixture into the skillet. The sauce will immediately begin to bubble and thicken. Use a spoon to continuously baste the chicken thighs with the amber liquid. As the sauce reduces, it will become thick, glossy, and translucent. Once it reaches a syrupy consistency and the chicken reaches an internal temperature of 165°F (74°C), remove the pan from the heat.
Phase 5: The Finishing Garnishes
While the chicken is still in the hot skillet, apply the “precise scatter” of garnishes. Sprinkle the toasted white sesame seeds across the top. Add the very thin, bias-cut bright green scallions and the tiny flecks of dried red chili flakes. The heat from the pan will slightly wake up the oils in the scallions and seeds without wilting them entirely.
Advanced Tips for Culinary Perfection
- The Temperature Sweet Spot: While 165°F (74°C) is the safety standard, chicken thighs are actually better at 175°F (79°C) as the extra heat further breaks down connective tissue, making them even more tender.
- The Honey Selection: Use a floral honey like Clover or Wildflower for a light amber color. Darker honeys like Buckwheat will turn the sauce almost black, which deviates from our “translucent amber” goal.
- Deglazing Logic: If the honey starts to caramelize too quickly (turning dark brown too fast), add a teaspoon of water or chicken stock to loosen the sauce and maintain that glossy translucency.
- Avoid Crowding: If your skillet isn’t large enough, cook the chicken thighs in two batches. Crowding causes the temperature to drop, leading to steamed meat instead of seared meat.
For those who prefer a “set it and forget it” approach to poultry, our crockpot chicken pasta offers a different but equally delicious way to enjoy tender chicken, though it sacrifices the crispy crust we’ve perfected here.
Strategic Storage and Meal Prep Longevity
While these chicken thighs are best served immediately to preserve the “crackling” crust, they do hold up remarkably well for meal prep due to the protective nature of the honey glaze. The sugar in the honey acts as a light preservative and keeps the meat moist during reheating.
Refrigerator: Store in an airtight container for up to 4 days. When reheating, use a toaster oven or a dry skillet rather than a microwave to help revive some of the crust’s texture.
Freezing: You can freeze the cooked chicken thighs for up to 3 months. However, the scallions will lose their “bright green” color and crisp texture upon thawing, so it is best to garnish fresh after reheating.
Flavorful Pairings to Complete Your Menu
To balance the sweet and savory profile of the honey garlic chicken thighs, you need sides that offer either a neutral base or a sharp, acidic contrast. A bed of fluffy jasmine rice is the classic choice to soak up the “pooled translucent amber sauce.”
If you are looking for a lower-carb option, these thighs pair beautifully with steamed bok choy or a crisp cucumber salad. For a full fusion-style spread, consider serving them alongside our ginger garlic chicken thigh bake for a variety of textures, or even our Asian jalapeno chicken for those who want an extra spicy kick.
If you’re in the mood for seafood instead, the glaze techniques used here are very similar to what we apply in our baked sweet chili salmon, which also relies on a balance of sugar and heat.
Common Questions from the Test Kitchen
Yes, but be careful not to overcook them. Breasts dry out quickly; sear them fast and reduce the glaze rapidly to ensure they stay juicy.
The key is to pat the meat bone-dry and use a high-heat cast iron skillet. A tiny dusting of cornstarch on the surface helps create a ‘crackling’ texture even without skin.
Only add the garlic after the chicken has been flipped and the heat has been lowered to medium. It only needs about 30-45 seconds to release its aroma.
We actually recommend a high-smoke point oil like avocado oil for the initial sear, as butter will burn at the temperatures needed for a golden-brown crust.
The sauce needs to reduce. If it’s still thin, simmer it for an extra 2 minutes or ensure you’ve added the cornstarch slurry mentioned in the recipe.
The Ultimate Skillet Honey Garlic Chicken Recipe
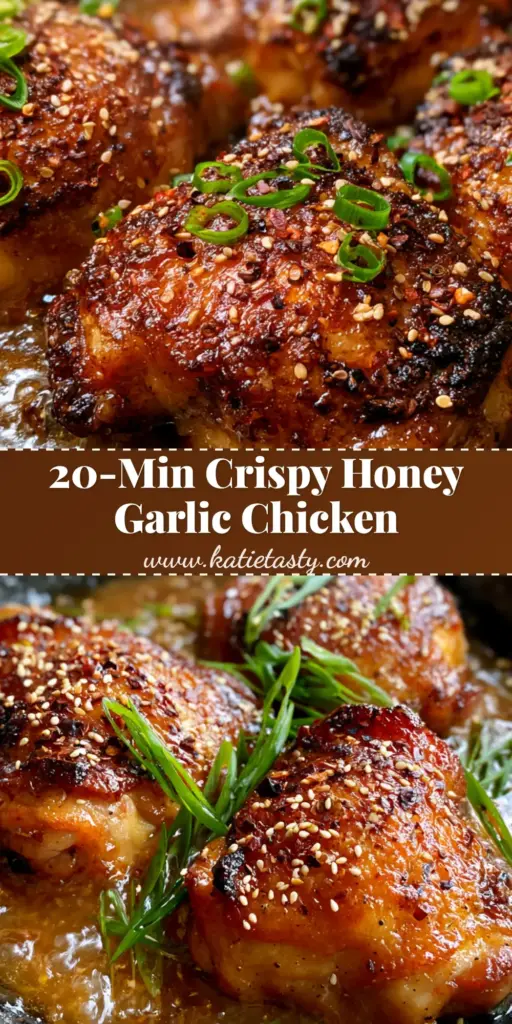
This recipe for chicken thighs delivers on every promise of the visual blueprint: a thick, glossy glaze, a shatteringly crisp crust, and a perfectly balanced flavor profile. It is a testament to what can be achieved with a single cast iron skillet and a few high-quality pantry staples. The contrast between the amber sauce and the bright green scallions makes this dish as beautiful as it is delicious.
Chicken Thighs with Crispy Honey Garlic Glaze and Toasted Sesame
Ingredients
Equipment
Method
- Pat the chicken thighs completely dry with paper towels. Season both sides with salt and pepper.
- In a small bowl, whisk together the honey, minced garlic, soy sauce, rice vinegar, and cornstarch.
- Heat oil in the cast iron skillet over medium-high heat until shimmering. Place chicken thighs in the pan and sear for 6-7 minutes until a deep golden-brown crackling crust forms.
- Flip the thighs. Lower heat to medium. Pour the sauce mixture into the pan. Baste the chicken continuously as the sauce thickens into a glossy amber glaze.
- Once the internal temp is 165°F (74°C) and the sauce is translucent, remove from heat. Garnish with sesame seeds, scallions, and chili flakes.
Notes
Use a cast iron skillet for the best heat retention and caramelized edges.
Closing & Call to Action
Mastering chicken thighs in a cast iron skillet is a fundamental skill that will elevate your entire weeknight rotation. The combination of the honey garlic reduction and the high-heat sear creates a dish that is visually stunning and deeply satisfying. We encourage you to try this technique and see the “extreme golden-brown” results for yourself.
If you enjoyed this recipe, please leave a comment below and let us know how your sear turned out! Don’t forget to sign up for our newsletter for more culinary masterclasses and share this recipe with your friends on Pinterest so they can master the art of the perfect glaze too.