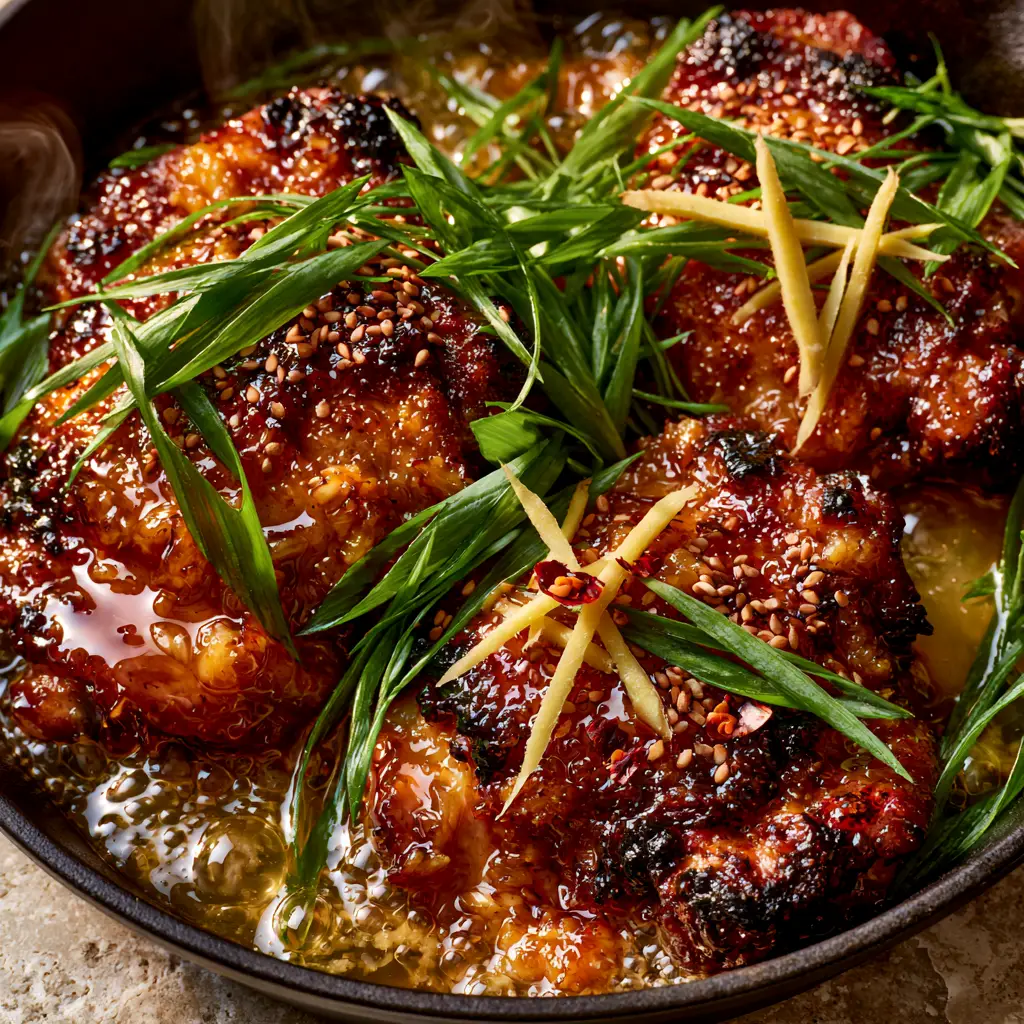
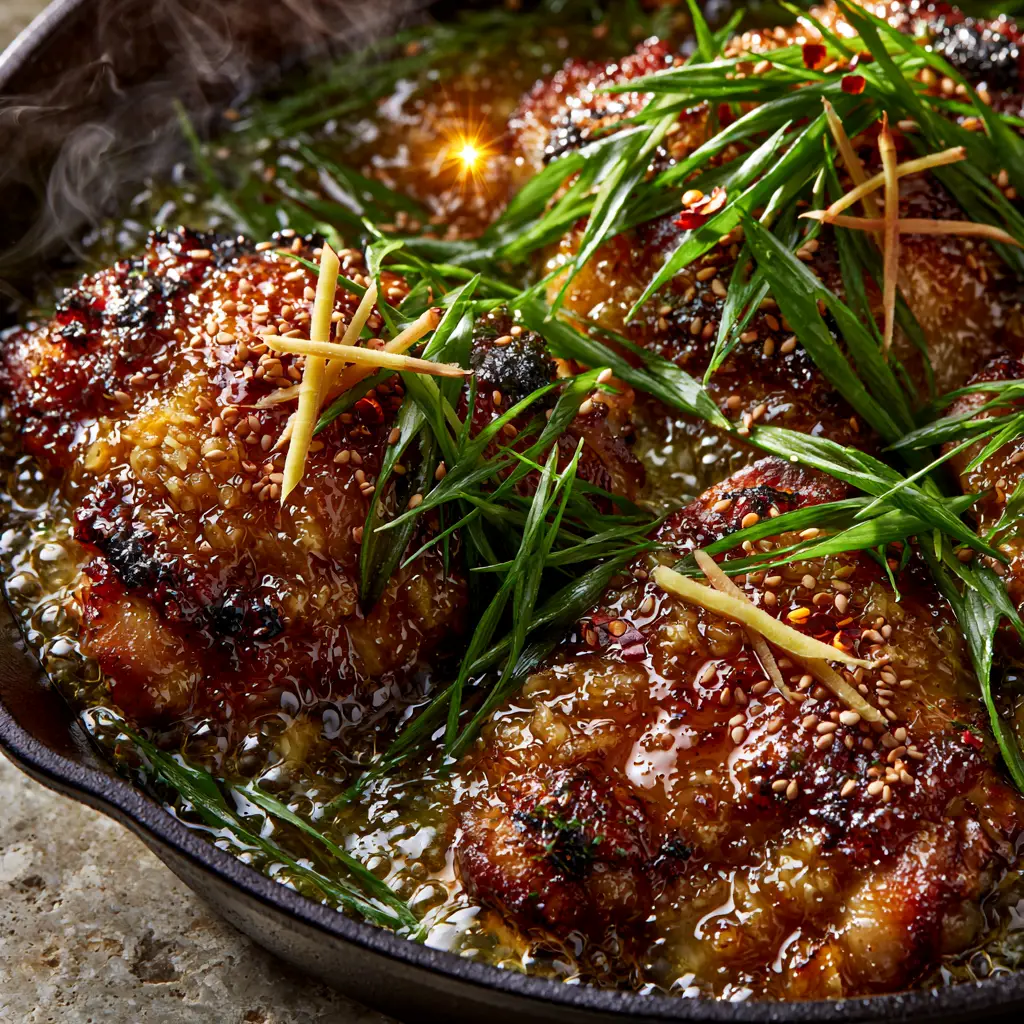
There is a specific kind of culinary magic that happens when high heat meets a honey-based glaze in a cast iron skillet. The Ginger Garlic Chicken Thigh Bake is the personification of that magic. Imagine pulling a heavy, matte black pan from the oven to find chicken thighs with skin so crispy it crackles, drenched in a translucent amber-colored sauce that is still aggressively bubbling and glistening under the kitchen lights.
This recipe isn’t just about feeding a family; it is about a sensory experience. The aroma of toasted sesame, the sharp bite of julienned ginger, and the savory depth of rendered chicken fat droplets create a profile that is both sophisticated and incredibly comforting. If you have been searching for a way to elevate your weeknight dinner rotation, this sticky, charred, and deeply flavorful bake is the answer.
Every element of this dish is designed to pop. From the vibrant green of the bias-cut scallions to the white speckled toasted sesame seeds, the visual appeal is as intense as the flavor. Let’s dive into why this specific preparation of the Ginger Garlic Chicken Thigh Bake stands out from every other recipe you have tried before.
The Visual and Textural Allure of Sticky Ginger Chicken
- The Amber Glaze: We achieve a thick, honey-soy-ginger reduction that clings to the meat rather than pooling at the bottom of the pan.
- Crispy Skin Science: By searing bone-in, skin-on thighs first, we ensure a deeply browned crust with visible charred edges that hold up under the heavy glaze.
- Aromatic Depth: Sautéed minced garlic bits and micro-grated ginger are infused directly into the sauce, while raw julienned ginger matchsticks are added at the end for a fresh, spicy crunch.
- Specularity and Gloss: The high-gloss finish on the sauce isn’t just for photos; it indicates a perfectly emulsified reduction of honey and rendered fat.
Essential Ingredients for Your Ginger Garlic Chicken Thigh Bake
6 (approx. 2.5 lbs / 1.1kg) Bone-In, Skin-On Chicken Thighs: This cut is essential for flavor and moisture. The skin provides the fat necessary to create those beautiful rendered droplets in the sauce, while the bone ensures the meat stays juicy during the high-heat bake.
1/4 cup (60ml) Raw Honey: Honey provides the sugars needed for the “sticky” factor. It creates that translucent amber glow and helps the sauce achieve a bubbling, glistening texture as it reduces in the oven.
3 tbsp (45ml) Low-Sodium Soy Sauce: This provides the salt and the deep umami base. It balances the sweetness of the honey and contributes to the deeply browned color of the chicken skin.
2-inch (5cm) Knob of Fresh Ginger: We use this in two ways: half is micro-grated into the glaze for cooked-in flavor, and the other half is julienned into thin matchsticks for a raw, pungent garnish.
6 Cloves of Garlic: Minced finely, these garlic bits become “confited” in the chicken fat and honey, clinging to the nooks and crannies of the crispy skin.
1 tbsp (15ml) Avocado Oil: Use a high-smoke point oil for the initial sear. This allows us to get those charred edges without the oil breaking down and smoking out your kitchen.
1 tsp (2g) Dried Red Chili Flakes: These provide a subtle background heat and a vibrant pop of red against the amber sauce, cutting through the richness of the chicken fat.
Garnish Essentials: You will need 3 large green onions (scallions), bias-cut for visual height, and 1 tbsp (9g) of toasted white sesame seeds for a nutty finish.
The Professional Kitchen Kit: Tools for Success
To achieve the result seen in our visuals, a matte black cast iron skillet is the preferred vessel. Cast iron retains heat more efficiently than stainless steel, which is crucial for getting that “extreme close-up” worthy sear and the bubbling reduction. If you don’t have cast iron, a heavy-bottomed oven-safe frying pan will suffice.
You will also need a microplane or fine grater. Micro-grating the ginger ensures it dissolves into the sauce, providing flavor without the fibrous texture. Finally, a sharp chef’s knife is non-negotiable for achieving those delicate julienned ginger matchsticks and perfectly angled scallion slices.
Mastering the Sear: Step-by-Step Instructions
Phase 1: Preparing the Chicken for Maximum Crunch
Pat the chicken thighs bone-dry with paper towels. Any moisture on the skin will create steam, preventing the deep browning we are looking for. Season both sides generously with kosher salt and black pepper.
Heat your cast iron skillet over medium-high heat with the avocado oil. Once the oil is shimmering (almost at the smoke point), place the thighs skin-side down. Do not crowd the pan; work in batches if necessary to ensure the skin sears rather than steams.
Phase 2: Achieving the Deeply Browned Crust
Leave the chicken undisturbed for 6-8 minutes. You are looking for a deep, mahogany brown color and visible charred edges. This is the foundation of the Ginger Garlic Chicken Thigh Bake. If you love this technique, you should apply it to my perfect crispy chicken thighs guide as well.
While the chicken sears, whisk together the honey, soy sauce, micro-grated ginger, and half of the minced garlic in a small bowl. This is your base glaze which will transform into a thick, translucent amber coating.
Phase 3: The Oven Transformation
Flip the chicken thighs so they are skin-side up. Pour the honey-ginger mixture over the chicken and into the pan. Use a spoon to ensure every inch of the skin is coated. Transfer the skillet to a preheated oven at 400°F (200°C).
Bake for 15-20 minutes. Halfway through, use a spoon to baste the chicken with the juices from the bottom of the pan. You want to see the sauce thickening and starting to bubble aggressively around the meat. This process is very similar to how I develop the glaze in my Asian Jalapeño Chicken recipe.
Culinary Forensic Secrets: Achieving the Specular Highlight
The “specular highlight” mentioned in professional food photography refers to the way light reflects off a glossy surface. In this Ginger Garlic Chicken Thigh Bake, that gloss comes from the emulsification of honey and rendered chicken fat. If your sauce is too thin, it won’t reflect light; if it’s too thick, it will look dull.
If you find your sauce is still too watery after the baking time, remove the chicken and place the skillet back on the stovetop over high heat for 2 minutes. This “hard reduction” will quickly turn the liquid into a thick, sticky amber syrup that clings to the meat with hyper-realistic texture.
Expert Tips for the Perfect Bake
- Temper Your Meat: Let the chicken sit at room temperature for 15 minutes before searing. Cold meat drops the pan temperature, which ruins your chances of getting those crispy, charred edges.
- The Ginger Contrast: Don’t skip the raw julienned ginger at the end. The cooked ginger provides the base note, but the raw matchsticks provide the “high note” and a fresh textural contrast.
- Watch the Sugar: Honey can burn quickly. If you notice the edges of the pan getting too dark before the chicken is cooked through, add a splash of water or rice vinegar to loosen the glaze.
- Internal Temp: Use a meat thermometer. Chicken thighs are best at 175°F (80°C) rather than the standard 165°F; the extra temperature helps break down connective tissue, making them “fall-apart” tender.
Flavor Pairings and Serving Suggestions
This dish is quite rich, so you want to serve it with something that can absorb the extra glaze. A bed of jasmine rice or quinoa is classic. For a lower-carb option, cauliflower rice works beautifully to soak up the rendered chicken fat and honey reduction.
For a side dish that complements the aromatics, try my Garlic Mushrooms or a simple stir-fry. If you enjoy the pork equivalent of this flavor profile, my Ginger Lime Pork is another excellent choice for your weekly meal plan.
Frequently Asked Questions
It is best served fresh for the skin’s crispiness. However, you can prep the glaze and julienne the ginger up to 24 hours in advance.
You can, but breasts dry out faster and lack the skin-on fat needed to create the glistening sauce. Reduce the oven time to 12-15 minutes to prevent overcooking.
While cast iron provides the best char and heat retention, any heavy-bottomed, oven-safe stainless steel or copper pan will work for this recipe.
The secret is the honey and the reduction time. If your sauce is thin, simmer it on the stovetop for 2-3 minutes after baking until it reaches a syrupy, amber consistency.
Yes! The raw julienned ginger provides a fresh, spicy contrast to the sweet, cooked glaze, elevating the dish from a simple bake to a multi-dimensional meal.
The Complete Ginger Garlic Chicken Thigh Bake Recipe
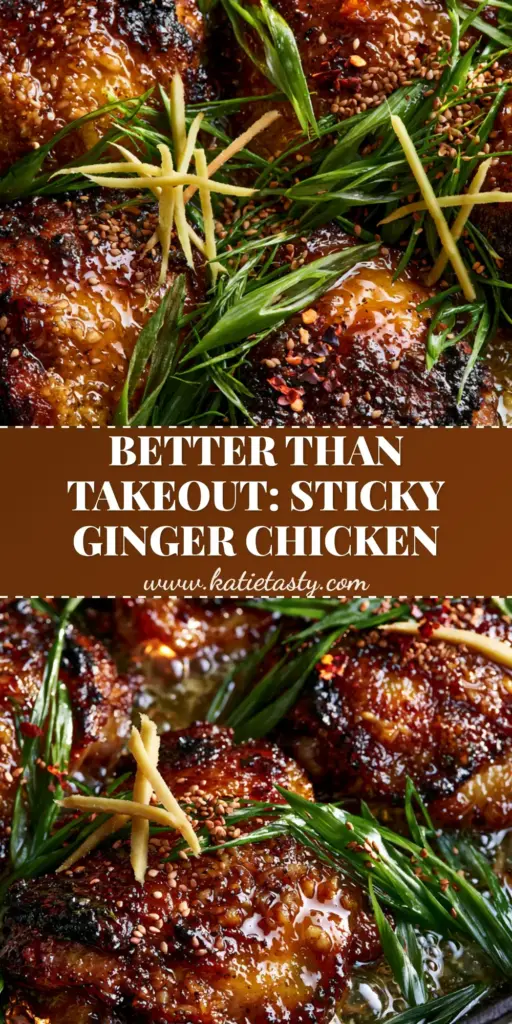
Ginger Garlic Chicken Thigh Bake: The Ultimate Sticky One-Pan Dinner
Ingredients
Equipment
Method
- Pat chicken dry and season with salt and pepper. Heat oil in cast iron skillet over medium-high heat.
- Sear chicken skin-side down for 6-8 minutes until deeply browned with charred edges.
- Whisk honey, soy, grated ginger, and half the garlic. Flip chicken and pour glaze over skin.
- Bake at 400°F (200°C) for 15-20 minutes, basting halfway through until sauce is bubbling and translucent amber.
- Top with julienned ginger matchsticks, scallions, sesame seeds, and chili flakes before serving.
Notes
Use the remaining glaze in the pan as a sauce for rice.
Final Thoughts on This Sticky Skillet Masterpiece
The Ginger Garlic Chicken Thigh Bake is a testament to how simple ingredients, when treated with the right culinary techniques, can produce a restaurant-quality result. The combination of the crispy skin, the bubbling amber glaze, and the punchy aromatics creates a dish that is as visually stunning as it is delicious.
I would love to see how your skillet looks! Tag me in your photos and let me know if you achieved those perfect charred edges. For more dinner inspiration, follow me on Pinterest and subscribe to the newsletter for weekly recipe drops.