The spinach apple chickpea salad is the ultimate intersection of vibrant color, contrasting textures, and sophisticated flavors. If you are looking for a dish that looks like it stepped right out of a high-end culinary magazine—or a perfectly lit smartphone photo on a neutral linen backdrop—this is the recipe for you.
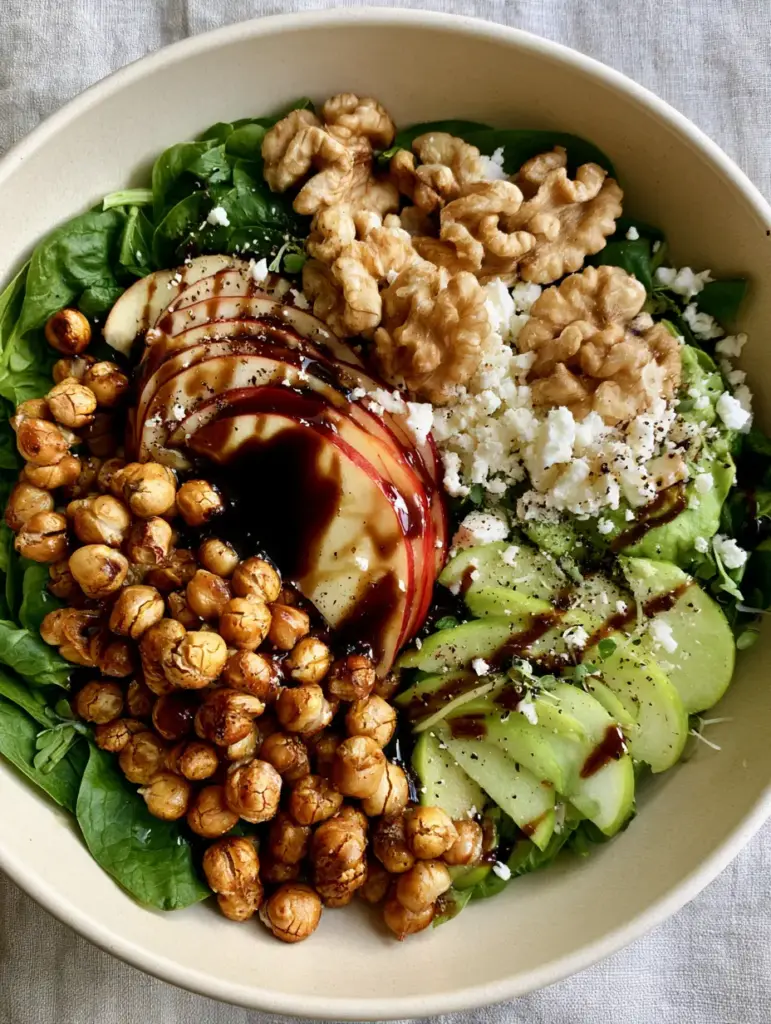
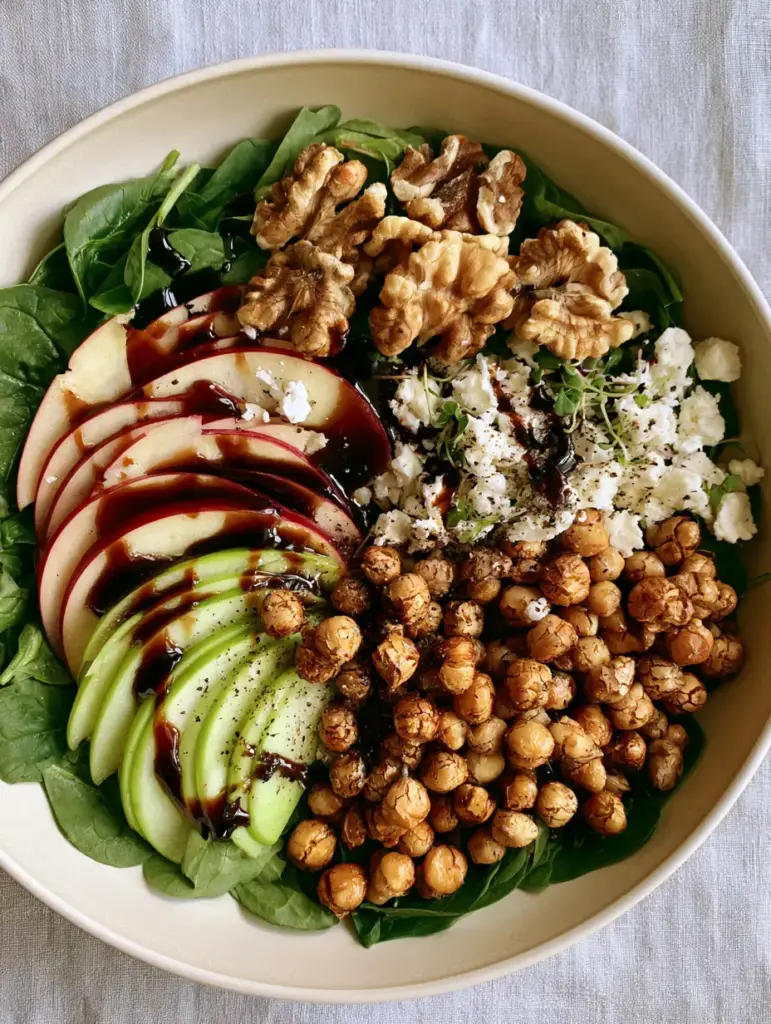
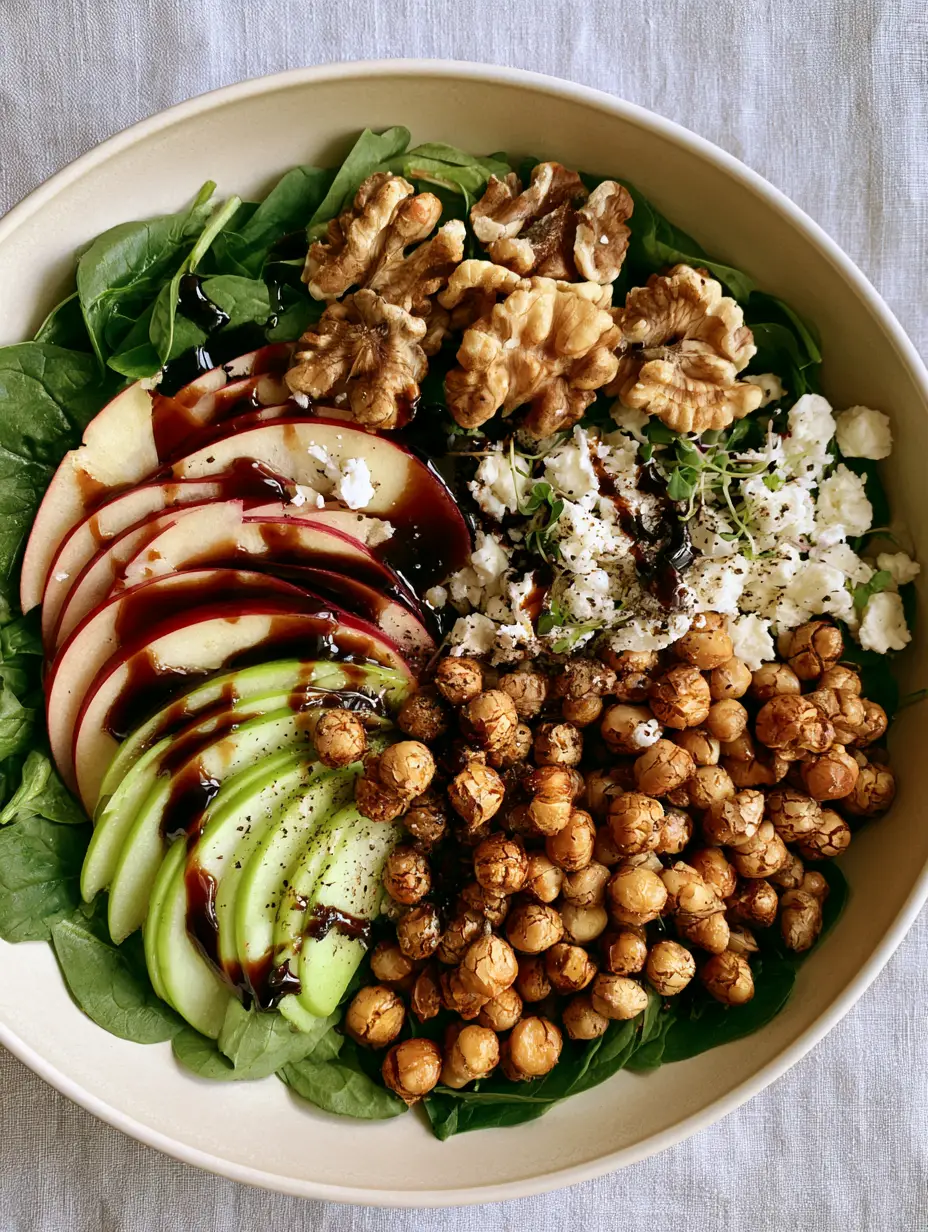
This salad isn’t just a side dish; it is a visual masterpiece featuring a dense foundation of dark green baby spinach, topped with paper-thin crescents of dual-toned apples and golden, oven-roasted chickpeas. The final touch, a thick mahogany-colored maple balsamic glaze, creates a glossy finish that makes every ingredient pop.
Whether you are hosting a formal dinner or prepping a nutritious lunch, the structural integrity of this salad relies on the crunch of the roasted legumes and the tart snap of the fruit. It is a masterclass in balancing sweet, savory, and acidic notes in a single bowl.
Why This Vibrant Spinach Apple Chickpea Salad Works
- Textural Contrast: The combination of crunchy roasted chickpeas, buttery toasted walnuts, and crisp, paper-thin apple slices provides a satisfying mouthfeel in every bite.
- Visual Brilliance: Using both red Honeycrisp and green Granny Smith apples creates a stunning color palette against the deep emerald spinach.
- Glossy Finishing: The maple balsamic vinaigrette is reduced to a thick, mahogany glaze that clings to the ingredients rather than pooling at the bottom of the bowl.
- Satiety Factor: Between the plant-based protein in the chickpeas and the healthy fats in the walnuts and feta, this salad is surprisingly filling.
Essential Ingredients for the Perfect Crunch and Zest
To achieve the specific visual and flavor profile of this spinach apple chickpea salad, every ingredient serves a forensic purpose. We don’t just toss things in a bowl; we build layers of flavor.
The Foundational Produce
Baby Spinach: 5 oz (142g) of fresh baby spinach forms the dense, dark green foundation. Ensure it is thoroughly dried so the dressing doesn’t become watery.
Honeycrisp Apple: 1 medium (approx. 180g) red-skinned Honeycrisp provides a honey-like sweetness and a bright red visual pop. Slice these into paper-thin crescents to ensure they drape elegantly over the greens.
Granny Smith Apple: 1 medium (approx. 180g) green Granny Smith adds the necessary tartness to cut through the maple sweetness. The vibrant green skin offers a beautiful contrast to the red Honeycrisp.
The Roasted and Toasted Elements
Chickpeas (Garbanzo Beans): 1 can (15 oz / 425g) of chickpeas, drained, rinsed, and patted bone-dry. These are roasted until golden-brown and slightly cracked for maximum crunch.
Walnut Halves: 1/2 cup (60g) of raw walnut halves. Toasting them brings out their natural oils, creating a “buttery” flavor and a darker, toasted visual profile.
Extra Virgin Olive Oil: 2 tbsp (30ml) for roasting the chickpeas. This foundational fat is essential for achieving the Maillard reaction (browning) in the oven.
The Flavor Finishers
Feta Cheese: 1/3 cup (50g) of creamy white feta cheese. The crumbles provide a salty, tangy counterpoint to the maple glaze.
Maple Balsamic Glaze: A combination of 1/4 cup (60ml) balsamic vinegar and 2 tbsp (30ml) pure maple syrup. This is whisked and reduced until it reaches a thick, mahogany, glossy consistency.
Fresh Cracked Black Pepper: A generous dusting of coarse black pepper provides a sharp, aromatic finish that cuts through the creaminess of the cheese.
Micro-herb Garnish: A small handful of tiny micro-herb sprigs (like micro-arugula or micro-cilantro) adds a professional, high-angle photo finish.
Professional Culinary Equipment Needed
Achieving the forensic accuracy of our visual blueprint requires the right tools. You cannot get those paper-thin apple crescents with a dull steak knife.
- Large Shallow Matte Cream Bowl: The wide surface area is essential for layering the ingredients so they are all visible, rather than buried in a deep bowl.
- Mandoline Slicer: Use this on the thinnest setting to achieve the “paper-thin” crescents of Honeycrisp and Granny Smith apples.
- Rimmed Baking Sheet: For roasting the chickpeas. The rim prevents them from rolling off when you shake the pan.
- Small Heavy-Bottomed Saucepan: Essential for reducing the balsamic vinegar and maple syrup into a thick, glossy glaze without burning it.
Step-by-Step Instructions for Culinary Success
Preparing the Oven-Roasted Golden Chickpeas
Preheat your oven to 400°F (200°C). The high heat is critical for evaporating the moisture within the chickpeas to create that “slightly cracked, crunchy exterior” described in our visual prompt.
Thoroughly dry the chickpeas using a clean kitchen towel; any residual moisture will steam the beans rather than roast them. Toss the dried chickpeas with 1 tbsp (15ml) of olive oil and a pinch of salt on the baking sheet.
Roast for 20-25 minutes, shaking the pan halfway through. Look for a deep golden-brown color and small visible cracks on the surface. Once done, remove from the oven and let them cool slightly to further crisp up.
Toasting the Buttery Walnut Halves
While the chickpeas roast, place the walnut halves in a dry skillet over medium heat. Do not add oil; the walnuts contain enough natural fats to toast themselves.
Stay vigilant. Toast for 3-5 minutes, tossing frequently, until they become fragrant and turn a shade darker. Remove them from the heat immediately to prevent the delicate oils from turning bitter.
Slicing the Dual-Toned Apple Crescents
To maintain the “vibrant” look, slice your apples just before assembly. Use a mandoline or a very sharp chef’s knife to create paper-thin crescents, keeping the skin on for that bright red and green visual contrast.
Pro Tip: To prevent oxidation, you can lightly toss the slices in 1 tsp (5ml) of lemon juice, though the acidity of the balsamic glaze will also help preserve their color.
Creating the Glossy Maple Balsamic Glaze
In a small saucepan, combine the balsamic vinegar and maple syrup. Bring to a gentle simmer over medium-low heat. Continue to simmer for 5-8 minutes, stirring occasionally.
The glaze is ready when it coats the back of a spoon and has reduced by about half. It should be a dark mahogany color and appear thick and glossy. If you prefer a lighter salad, you can skip the reduction and use it as a standard vinaigrette by whisking in 2 tbsp (30ml) of olive oil.
Expert Tips for the Ultimate Spinach Apple Chickpea Salad
- Dry Your Greens: A salad spinner is your best friend. Any water left on the spinach will repel the glossy glaze, causing it to slide off the leaves.
- Temperature Control: Do not add the hot roasted chickpeas directly to the spinach, or the leaves will wilt. Let them cool for at least 5 minutes.
- Glaze Consistency: If your glaze becomes too thick as it cools, whisk in a teaspoon of warm water to loosen it back to a “drizzlable” state.
- Layering Strategy: Build the foundation of spinach first, then “nestle” the apple slices among the leaves rather than just dumping them on top. This creates the “layered” look from the Midjourney prompt.
Storage and Meal Prep Advice
This spinach apple chickpea salad is best enjoyed immediately after assembly to maintain the crunch of the chickpeas and the crispness of the apples. If you need to store it, keep the components separate.
The roasted chickpeas can be stored in an airtight container at room temperature for up to 2 days to maintain their crunch. The maple balsamic glaze can be refrigerated for up to 2 weeks. If you are looking for other prep-ahead meals, consider our strawberry cheesecake overnight oats for a quick breakfast.
What to Serve With This Vibrant Salad
This salad serves as a magnificent starter or a light lunch on its own, but it also pairs beautifully with hearty proteins. Try serving it alongside Huli Huli Chicken for a sweet and smoky tropical pairing.
If you prefer a more Italian-inspired spread, this salad offers a crisp contrast to bruschetta chicken or a comforting bowl of garlic butter noodles. For those who love a bit of crunch as a side, these baked cottage cheese chips add an extra layer of protein and texture to the meal.
Frequently Asked Questions
They should be crunchy and slightly cracked on the outside but still have a bit of a firm, nutty bite on the inside. If they are too hard, reduce the roasting time by 2-3 minutes.
Yes! The salad is naturally vegan if you omit the feta cheese or substitute it with a plant-based almond or cashew-based feta alternative.
You can, but store-bought glazes often contain thickeners and stabilizers. Making the glaze at home with maple syrup and balsamic vinegar provides a much cleaner, more vibrant flavor.
The best way is to slice them just before serving. You can also toss the slices in a little lemon juice or submerge them in cold salted water for 5 minutes before drying and adding to the salad.
We recommend a combination of Honeycrisp for sweetness and Granny Smith for tartness. The dual colors also provide the best visual contrast against the green spinach.
The Ultimate Spinach Apple Chickpea Salad Recipe
Spinach Apple Chickpea Salad with Maple Balsamic Glaze
Ingredients
Equipment
Method
- Preheat oven to 400°F (200°C). Dry chickpeas thoroughly, toss with oil and salt, and spread on a baking sheet.
- Roast for 20-25 minutes until golden-brown and slightly cracked. Let cool for 5 minutes.
- Toast walnut halves in a dry skillet over medium heat for 3-5 minutes until fragrant.
- Simmer balsamic vinegar and maple syrup in a saucepan until reduced by half and glossy.
- Place spinach in a shallow bowl. Layer red and green apple crescents, roasted chickpeas, walnuts, and feta.
- Drizzle the thick maple balsamic glaze in ribbons. Top with black pepper and micro-herbs.
Notes
Slice apples immediately before serving to prevent browning.
Closing & Call to Action
Making a restaurant-quality spinach apple chickpea salad is all about the details—the thinness of the apples, the crunch of the roasted chickpeas, and that signature glossy drizzle. This recipe proves that healthy eating can be both visually stunning and incredibly delicious.
If you enjoyed this recipe, please leave a comment below and let us know how your roasted chickpeas turned out! Don’t forget to share your creations and follow us on Pinterest for more culinary inspiration.