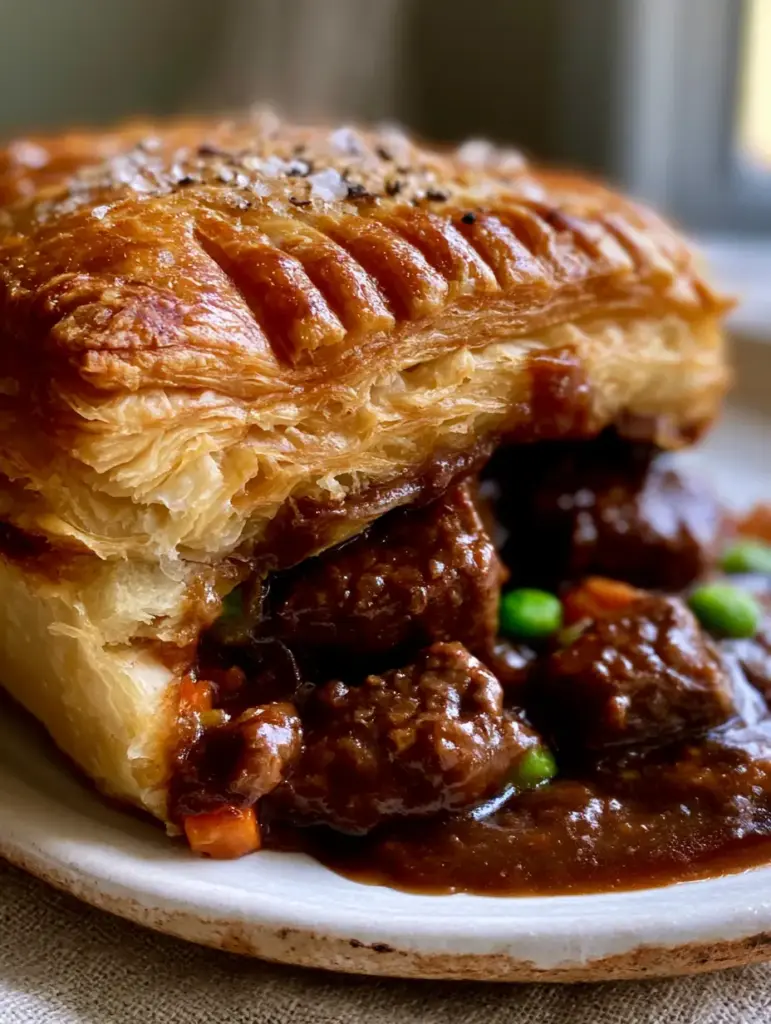
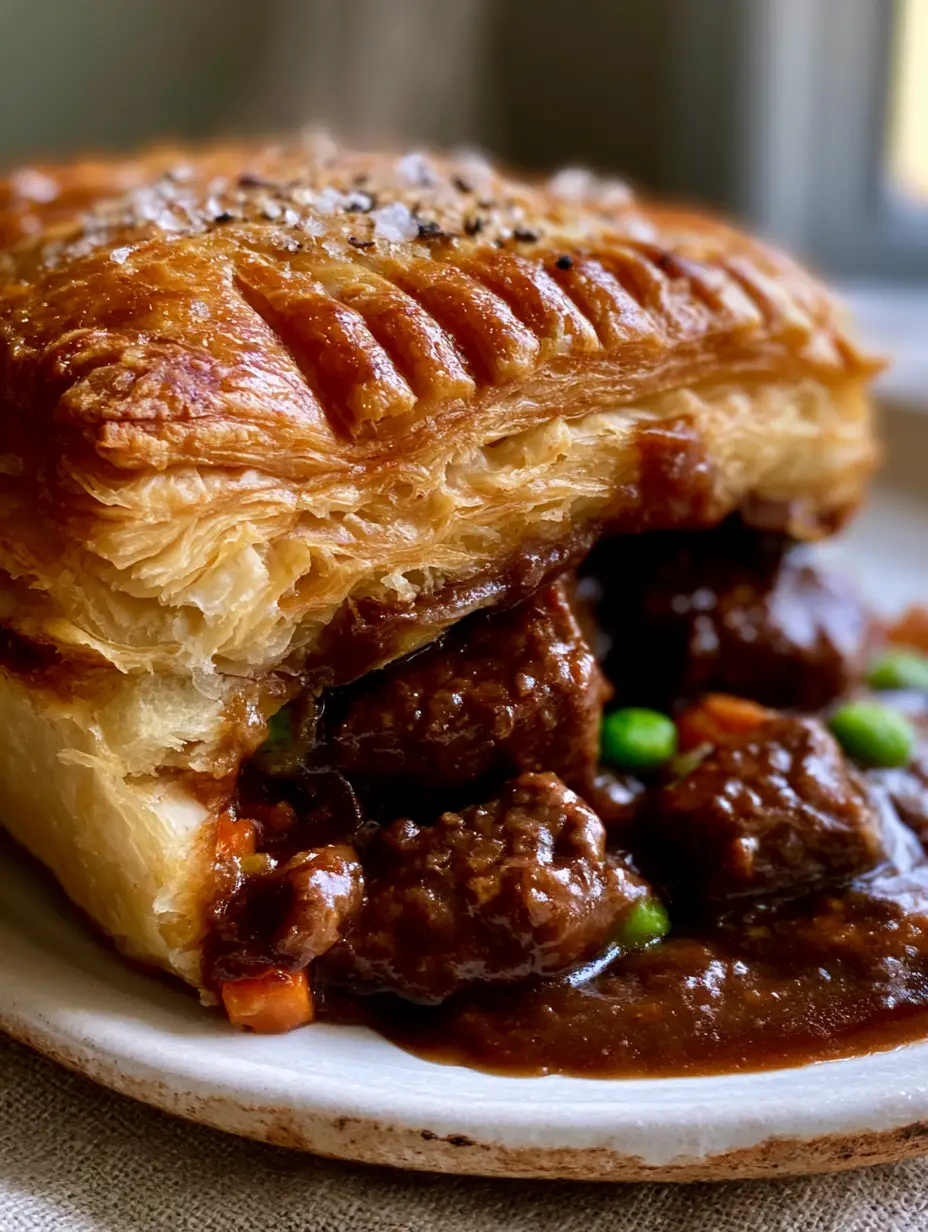
There is nothing quite like the first crackle of a perfectly baked Meat Pie. When your fork hits that golden-brown puff pastry, sending shards of buttery crust flying, you know you are in for a culinary experience that defines comfort. This isn’t just a simple dinner; it is a masterclass in textures, from the crunch of flaky sea salt on top to the tender, slow-cooked beef chunks swimming in a mahogany gravy that clings to every bite.
In this guide, we are diving deep into the science of the perfect savory pie. We will ensure your bottom crust stays crisp and dry—never soggy—while your filling achieves that elusive, glossy dark brown hue that signals deep, caramelized flavor. Whether you are a seasoned baker or a home cook looking to level up your weekend braises, this Meat Pie will become your new signature dish.
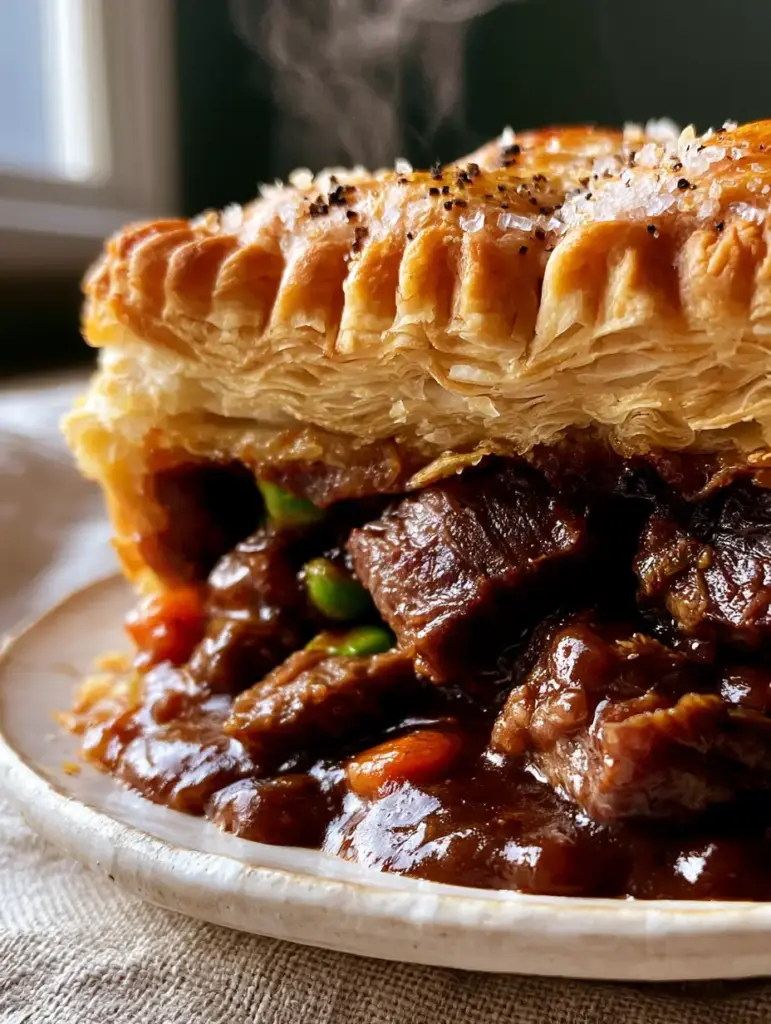
Imagine a handheld slice, steam rising softly from the center, revealing vibrant specks of orange carrots and bright green peas nestled in a thick, savory sauce. That is the visual promise of this recipe, and we are going to achieve it using professional culinary techniques tailored for your home kitchen.
The Anatomy of a Flawless Savory Beef Pie
To achieve the result seen in high-end food photography, we must focus on specific structural elements. A Meat Pie is only as good as the sum of its parts, and each component serves a visual and textural purpose.
- The Mahogany Gravy: This isn’t a pale brown sauce; it is a deep, dark mahogany achieved through a rigorous searing process and a long, slow braise.
- The Flaky Architecture: We utilize high-quality puff pastry, treated with an egg wash to reach a deep golden-brown finish that shimmers under natural light.
- The Visual Contrast: Diced steamed carrots and garden peas aren’t just for flavor; they provide the essential pops of color against the rich meat.
- The Finishing Touches: A light dusting of flaky sea salt and cracked black pepper adds both a tactile crunch and a professional aesthetic.
Essential Elements for a Rich Beef Filling
2 lbs (907g) Beef Chuck: This cut is essential for braising because its connective tissue breaks down into gelatin, providing the “glossy” finish to your gravy. Cut these into 1-inch (2.5cm) cubes to ensure they remain chunky and visible in the final slice.
2 tbsp (30ml) Neutral Oil: You need an oil with a high smoke point, like avocado or grapeseed, to achieve the deep sear required for the Maillard reaction. This sear is the foundation of our mahogany color.
1 large (150g) Yellow Onion: Finely diced, the onion melts into the sauce, providing a savory backbone without distracting from the beef chunks.
3 cloves (15g) Garlic: Freshly minced garlic adds an aromatic depth that complements the earthy thyme. If you enjoy building layers of flavor, you might even find these aromatics reminiscent of the base used in our pot-roast-soup.
2 cups (480ml) Beef Bone Broth: Using a high-quality bone broth provides the collagen necessary for a gravy that is naturally thick and rich. Avoid standard “stock” if you want that professional gloss.
1 cup (240ml) Dry Red Wine: A Cabernet or Merlot helps deglaze the pan and adds the acidic complexity needed to balance the richness of the puff pastry. This technique is similar to many traditional greek-dishes that rely on slow-simmered meats.
1 cup (150g) Diced Carrots: These should be cut into uniform 1/2-inch (1.2cm) cubes to ensure they steam perfectly and retain their orange vibrancy. Similarly, we use precise vegetable prep in our carrot-muffins to ensure even distribution.
1 cup (150g) Frozen Garden Peas: Always add these at the very end. Overcooking peas turns them grey, and we want that “bright green” pop mentioned in the visual blueprint.
1 pack (397g) High-Quality Puff Pastry: Look for an all-butter variety. The layers of fat are what create the visible “buttery layers” that rise during the bake.
1 Egg + 1 tbsp (15ml) Water: This egg wash is the secret to the “golden-brown” finish. It acts as a protein-rich varnish that browns beautifully in the oven’s heat.
Fresh Thyme, Flaky Sea Salt, and Cracked Black Pepper: These are your finishing “seasoning entities.” The thyme sprig garnish adds an organic, fresh element to the rustic presentation.
Tools for Achieving the Perfect Pastry Rise
To master the Meat Pie, you need more than just ingredients; you need the right heat conductors. A heavy-bottomed Dutch oven is non-negotiable for the beef braise, as it maintains the steady, low heat required to soften the chuck without drying it out.
For the baking stage, a light-colored metal pie tin or individual ceramic ramekins work best. If you are using a ceramic plate for serving, ensure it is pre-warmed. A sharp serrated knife is also essential for that “clean slice” look, allowing you to cut through the pastry without crushing the delicate layers.
Mastering the Art of the Slow-Braised Filling
Step 1: Developing the Mahogany Base
Pat your beef cubes completely dry with paper towels. Season them generously with salt. Heat your oil in the Dutch oven over medium-high heat until it shimmers. Sear the beef in batches, ensuring each side develops a dark, crusty brown exterior. Do not crowd the pan, or the meat will steam instead of sear.
Step 2: Deglazing and Aromatics
Remove the beef and add your diced onions. Cook until translucent, scraping the bottom of the pan to release the “fond” (those flavorful brown bits). Add the garlic and thyme, stirring for 60 seconds until fragrant. Pour in the red wine, using a wooden spoon to vigorously scrape the bottom. This is where your mahogany gravy begins its life.
Step 3: The Long, Slow Simmer
Return the beef to the pot and add the beef broth. Bring to a gentle boil, then reduce heat to the lowest setting. Cover and simmer for 90 to 120 minutes. You are looking for a sensory cue: the beef should be “fork-tender” but still holding its cuboid shape. It shouldn’t be shredded like a slow-cooker-swiss-chicken dish.
Step 4: Achieving the Perfect Gravy Consistency
Once the beef is tender, the liquid should be reduced and thick. If it is too thin, whisk 1 tbsp (8g) of cornstarch with a little cold water and stir it in, simmering for another 5 minutes. The gravy should be glossy and coat the back of a spoon. Fold in your diced carrots and peas during the last 5 minutes of simmering so they stay intact and bright.
Engineered Success: The Pastry Construction
Constructing the Pie Layers
Allow your filling to cool slightly before adding the pastry. If the filling is boiling hot, it will melt the butter in the puff pastry immediately, leading to a flat, greasy crust rather than a flaky one. Roll out your puff pastry on a lightly floured surface. For a professional look, ensure the pastry is 1/8 inch (3mm) thick.
The Secrets to a Non-Soggy Bottom
If you are making a full double-crust Meat Pie, blind bake the bottom crust for 10 minutes before adding the filling. Alternatively, use a high-heat setting (400°F/200°C) and place your pie on the lowest rack of the oven. This ensures the bottom gets immediate heat, setting the dough before the gravy can soak in.
Visual Finishing Touches
Drape the top pastry over the filling, crimping the edges tightly. Brush the entire surface with your egg wash. Just before sliding it into the oven, sprinkle the flaky sea salt and cracked black pepper over the top. This creates the “light dusting” effect that highlights the pastry ridges.
Expert Tips for the Ultimate Meat Pie
- Chill the Pastry: Keep your puff pastry in the fridge until the very second you are ready to use it. Cold butter equals maximum lift.
- The Steam Vent: Always cut 2-3 small slits in the top crust. This allows steam to escape, preventing the pastry from becoming soggy from the inside out.
- Patience is a Virtue: Let the pie rest for 10-15 minutes after baking. This allows the gravy to set, ensuring that when you slice it in half, the filling stays together rather than running all over the plate.
- Color Grading: If the pastry is browning too quickly, loosely tent it with foil. We want “golden-brown,” not charred.
Storage, Reheating, and Freezing Protocols
This Meat Pie stores exceptionally well. Keep leftovers in an airtight container in the refrigerator for up to 3 days. To maintain the flaky texture, always reheat in the oven or an air fryer at 350°F (175°C) for 10 minutes. Avoid the microwave, as it will turn your beautiful pastry into a soft, rubbery mess.
You can also freeze these pies unbaked. Simply assemble the pie, wrap it tightly in plastic wrap and foil, and freeze for up to 3 months. Bake directly from frozen, adding an extra 15-20 minutes to the cooking time.
Delicious Pairings to Complete the Meal
While this Meat Pie is a meal unto itself, it pairs beautifully with light, acidic sides to balance the richness. A crisp green salad or even a side of cold-stuffed-mini-peppers provides a refreshing contrast. If you’re hosting a larger gathering, consider serving this alongside other savory handhelds like a traditional spanakopita-recipe.
For dessert, keep the oven warm and bake a batch of melted-butter-chocolate-chip-cookies or even some decadent cinnamon-roll-cheesecake-cookies to round out the comfort food theme.
Frequently Asked Questions
Absolutely. In fact, making the filling a day ahead allows the flavors to deepen and ensures it is completely cold before assembly, which helps the puff pastry rise even better.
Yes, store-bought puff pastry works excellent. For the best flavor and visual ‘buttery layers,’ look for an ‘all-butter’ variety in the freezer section.
Avoid overcooking the vegetables during the braising process. Add the diced carrots and peas during the final 5-10 minutes of simmering so they remain vibrant and hold their shape.
To avoid a soggy bottom, ensure your beef filling has cooled slightly before adding the pastry. Additionally, bake the pie on the lowest rack of the oven at a high temperature (400°F/200°C) to set the bottom crust quickly.
The secret is the Maillard reaction. You must sear the beef chunks in batches until they are deeply browned and use a combination of red wine and high-quality beef bone broth to deglaze the pan.
The Ultimate Meat Pie Recipe
Meat Pie with Slow-Braised Beef and Flaky Golden Pastry
Ingredients
Equipment
Method
- Pat beef dry and sear in oil in a Dutch oven over medium-high heat until a deep mahogany crust forms. Work in batches.
- Sauté onions and garlic in the same pot until softened. Deglaze with red wine, scraping the fond.
- Add broth and thyme. Simmer covered for 90-120 minutes until beef is tender. Stir in carrots and peas in the last 5 minutes.
- Preheat oven to 400°F (200°C). Pour cooled filling into a pie dish. Top with rolled puff pastry.
- Brush with egg wash, sprinkle with sea salt and pepper. Bake for 25-30 minutes until golden brown and flaky.
Notes
Use all-butter puff pastry for the best visual layers.
Closing & Call to Action
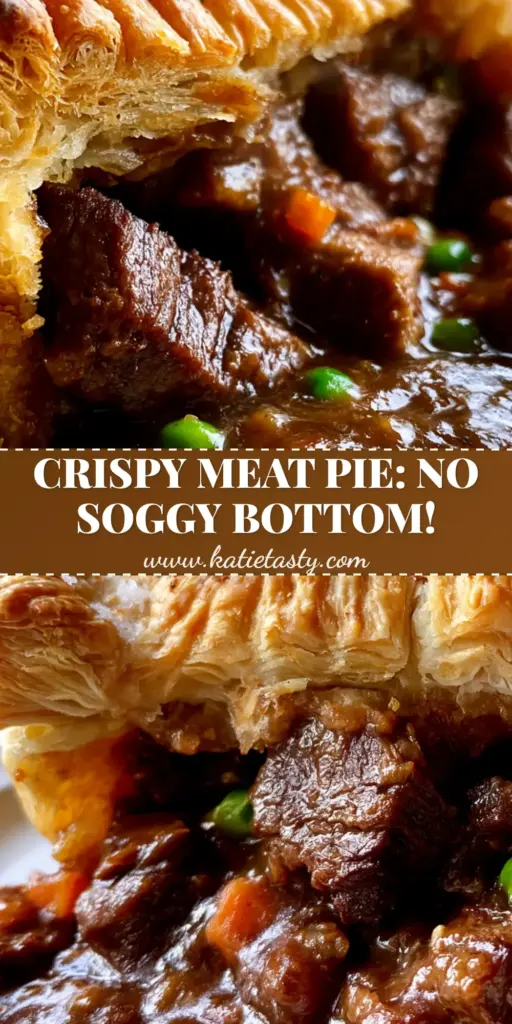
Mastering the Meat Pie is a rite of passage for any serious home cook. The combination of slow-braised beef and shattering layers of pastry is a testament to the beauty of traditional cooking techniques. If you enjoyed this deep dive into savory baking, please leave a comment below and let us know how your gravy turned out!
Don’t forget to share your creations and follow us on Pinterest for more visually stunning recipe inspiration. Happy baking!