Mastering the art of chocolate peanut butter macarons is a culinary rite of passage that yields a reward unlike any other. These aren’t just cookies; they are a sophisticated balance of textures, featuring a delicate, crisp shell that gives way to a dense, chewy crumb.
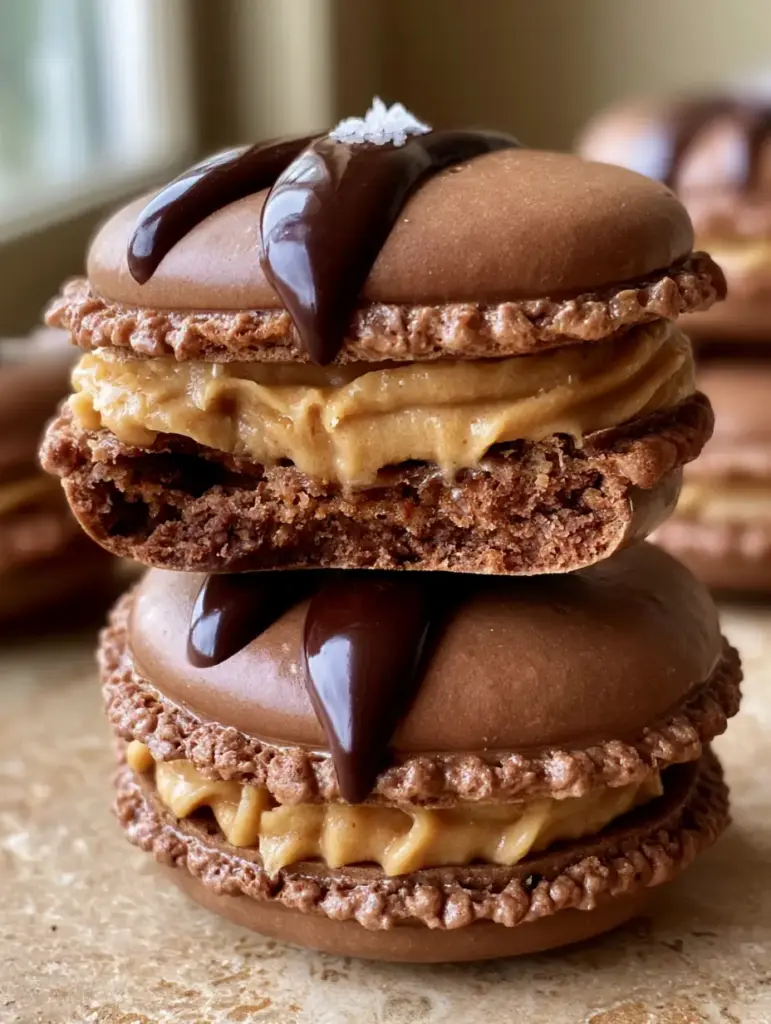
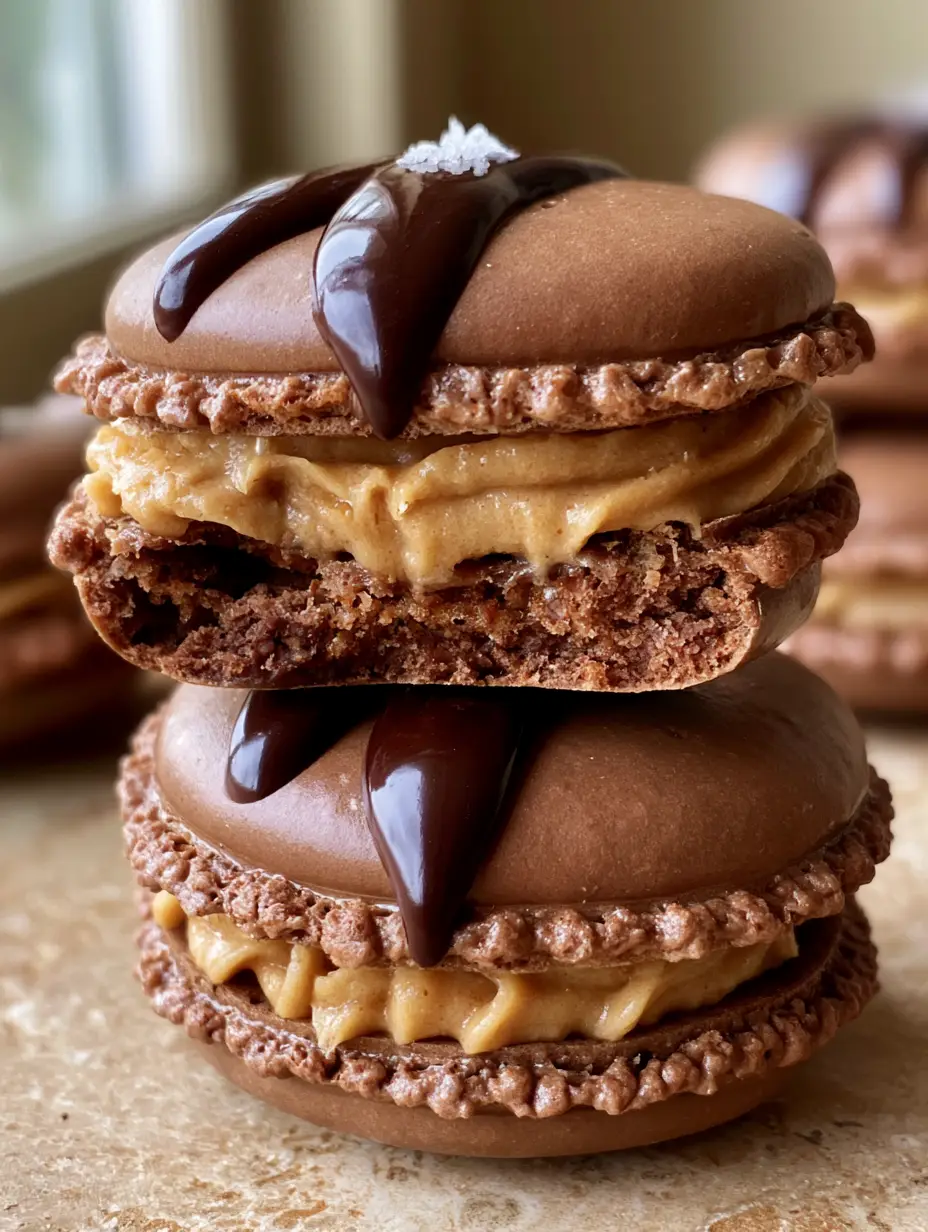
Imagine biting into a perfectly smooth, glossy chocolate shell, followed by the salt-sweet punch of a velvety peanut butter buttercream. The experience is finished with a glossy dark chocolate drizzle and a crystalline crunch of flaky sea salt, just like you’d see in a professional pâtisserie window.
Whether you are a seasoned baker or a curious novice, this guide will walk you through every scientific nuance required to achieve those elusive ruffled feet and a full, hollow-free interior. Let’s dive into the technical details that transform simple egg whites and sugar into these iconic French treats.
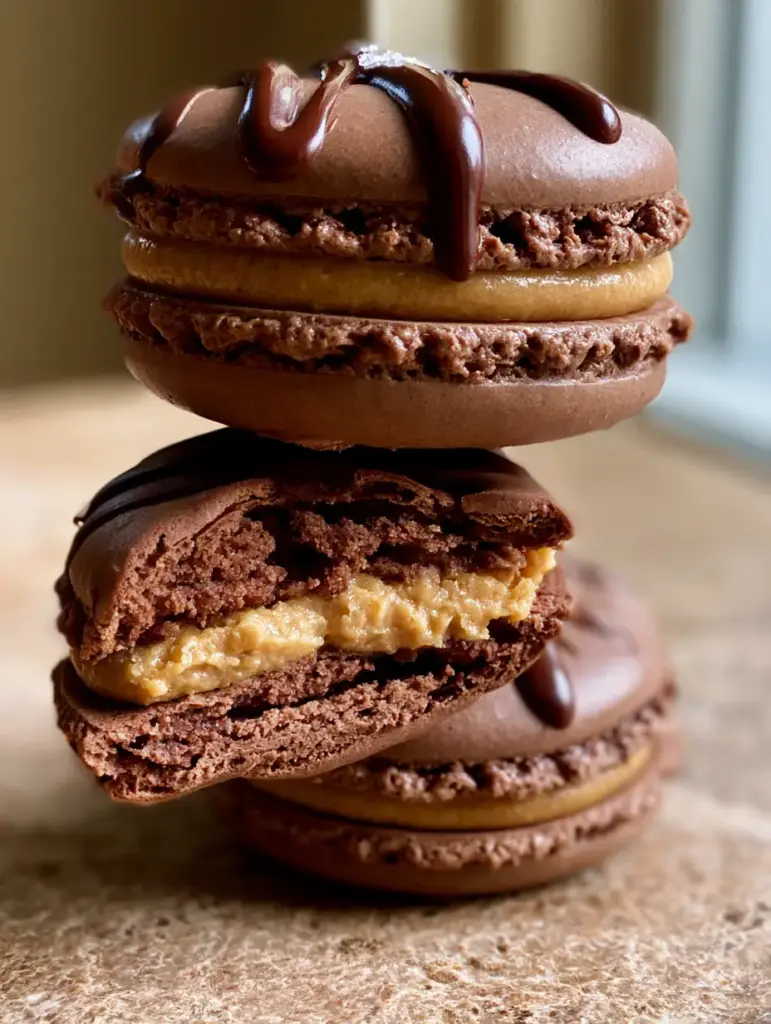
The Anatomy of the Perfect Chocolate Peanut Butter Macaron
- The Shell: A smooth, glossy chocolate exterior with a distinct “pied” or ruffled foot at the base.
- The Texture: A perfectly baked, chewy interior with no hollow space between the crumb and the shell.
- The Filling: A thick, smooth, and velvety peanut butter buttercream that holds its shape under the weight of the shell.
- The Finish: A professional-grade glossy dark chocolate drizzle and a tiny sprinkle of flaky sea salt for flavor contrast.
The Secret Palette: Essential Ingredients for Success
Every ingredient in chocolate peanut butter macarons serves a functional purpose beyond just flavor. We use Dutch-processed cocoa powder for a deep, dark hue and a smoother flavor profile compared to natural cocoa.
Superfine Almond Flour: 1 ¾ cups (175g).
This provides the structural foundation; it must be blanched and finely ground to ensure the shells remain smooth and glossy rather than gritty.
Powdered Sugar: 1 ¾ cups (210g).
Also known as confectioners’ sugar, this contains a small amount of cornstarch which helps stabilize the shell during the drying process.
Dutch-Processed Cocoa Powder: ¼ cup (25g).
This adds the rich chocolate color and flavor without the acidity of natural cocoa, which could interfere with the delicate meringue chemistry.
Aged Egg Whites: 3 large (approx. 100g).
Egg whites that have been “aged” in the fridge for 24 hours lose some moisture, resulting in a more concentrated protein structure for a stable meringue.
Granulated Sugar: ½ cup (100g).
This dissolves into the egg whites to create the glossy, stiff peaks required for the French meringue method.
Cream of Tartar: ¼ tsp (1g).
An acidic stabilizer that prevents the egg whites from over-beating and helps maintain the structure of the ruffled feet.
Creamy Peanut Butter: ½ cup (135g).
Use a high-quality, emulsified creamy peanut butter for the filling to ensure the buttercream remains velvety and doesn’t separate.
Unsalted Butter: ½ cup (115g), softened.
This forms the base of the buttercream; ensure it is at room temperature to avoid lumps in your velvety filling.
Dark Chocolate Chips: ¼ cup (45g).
High-quality chocolate with at least 60% cocoa solids will provide the best gloss for the final drizzle.
Flaky Sea Salt: For garnish.
A tiny sprinkle of Maldon or similar salt cuts through the richness of the peanut butter and chocolate perfectly.
Essential Tools for Macaron Precision
Achieving the visual result of a “close-up handheld smartphone photo” worthy macaron requires more than just a whisk. You will need a digital kitchen scale, as volume measurements are too imprecise for this delicate pastry.
A fine-mesh sieve is mandatory for sifting the almond flour and cocoa powder to prevent “bumpy” shells. You will also need a piping bag fitted with a large round tip (like an Ateco 804) to pipe the shells and the filling consistently.
Finally, a heavy-duty baking sheet lined with a silicone mat or high-quality parchment paper is essential. These materials distribute heat evenly, which is the secret to preventing the bottoms of your chocolate peanut butter macarons from browning too quickly.
Mastering the Macaronage: A Step-by-Step Guide
Sifting and Preparing the Dry Base
In a large bowl, sift together the superfine almond flour, powdered sugar, and Dutch-processed cocoa powder. Repeat this process twice to ensure there are no clumps, as even a tiny lump of almond can cause the shell to crack.
If you find large bits of almond left in the sieve, discard them and replace them with an equal weight of fresh almond flour. Set this dry mixture aside while you prepare the meringue.
Achieving the Perfect French Meringue
Place your aged egg whites and cream of tartar in a clean, grease-free glass or metal bowl. Whisk on medium speed until soft peaks form, then slowly rain in the granulated sugar one tablespoon at a time.
Increase the speed to medium-high and whisk until stiff, glossy peaks form. You’ll know it’s ready when the meringue stands straight up on the whisk and doesn’t flop over, looking like thick, white shaving cream.
The Art of the Fold (Macaronage)
Gently fold the dry ingredients into the meringue using a silicone spatula. Use a “cut and fold” motion, scraping the sides and bottom of the bowl frequently.
Continue folding until the batter reaches a “lava-like” consistency. When you lift the spatula, the batter should fall in a continuous ribbon and disappear back into the rest of the batter after about 10-15 seconds.
Piping and the Crucial “Tap”
Transfer the batter to a piping bag and pipe 1.5-inch (3.8cm) circles onto your prepared baking sheets. Hold the bag vertically and squeeze from the top to ensure even circles.
Once piped, firmly tap the baking sheet against the counter 4-5 times. This releases trapped air bubbles, which is the key to ensuring a “perfectly baked, chewy interior with no hollow space.”
The Resting Phase for Ruffled Feet
Let the piped shells sit at room temperature for 30-60 minutes. You are waiting for a “skin” to form on the surface; the shells should no longer be sticky when touched lightly with a finger.
This skin forces the air to escape through the bottom during baking, creating the classic ruffled feet described in our visual blueprint.
Baking for a Chewy, Dense Crumb
Preheat your oven to 300°F (150°C). Bake one sheet at a time in the center of the oven for 15-18 minutes. The macarons are done when the shells are set and don’t “wiggle” when you gently touch the top.
Allow the shells to cool completely on the baking sheet before attempting to peel them off. If they are even slightly warm, the centers may stick to the mat, ruining that dense, chewy interior we worked so hard for.
Crafting the Velvety Peanut Butter Buttercream
While the shells cool, whip the softened butter and creamy peanut butter together until pale and fluffy. This usually takes about 3-5 minutes of high-speed mixing.
Slowly add the powdered sugar and a splash of heavy cream, continuing to whip until the frosting is thick, smooth, and velvety. If you find the flavor too sweet, add a tiny pinch of salt to balance it out.
If you enjoy this combination, you might also want to try my protein peanut butter cheesecake cups for a different take on this classic duo.
Assembly and the Final Glossy Drizzle
Pair the cooled macaron shells by size. Pipe a generous dollop of peanut butter buttercream onto the flat side of one shell and gently press a second shell on top until the filling reaches the edges.
Melt the dark chocolate chips with a teaspoon of coconut oil in the microwave in 20-second bursts. Stir until glossy and smooth.
Using a spoon or a small piping bag, create a light drizzle across the top of the macarons. Immediately sprinkle a tiny pinch of flaky sea salt onto the wet chocolate so it adheres.
Expert Tips for Success
- Watch the Humidity: Macarons hate moisture. If it’s a very rainy day, your shells may take twice as long to dry or may not form a skin at all.
- Clean Your Bowl: Any trace of fat or oil in your mixing bowl will prevent the egg whites from whipping. Wipe your bowl with a little lemon juice or white vinegar before starting.
- The Maturity Secret: Macarons actually taste better after 24 hours in the fridge! This “maturation” process allows the filling to soften the shell slightly, creating that perfect chewy texture.
- Sift, Sift, Sift: To get the smooth, glossy chocolate-colored shells seen in the photos, don’t skip the double sifting of the dry ingredients.
Storage, Reheating & Freezing
Store your finished chocolate peanut butter macarons in an airtight container in the refrigerator for up to 5 days. For the best texture, let them sit at room temperature for 20 minutes before serving.
These also freeze beautifully! Place them in a single layer in a freezer-safe container for up to 2 months. Thaw them overnight in the refrigerator before enjoying.
What to Serve With This Decadent Treat
These macarons are a rich dessert, so they pair beautifully with a cup of dark roast coffee or a glass of cold milk. If you’re hosting a dessert party, they look stunning next to gingerbread macarons for a seasonal contrast.
For those looking for a savory balance before dessert, a light meal like a simple spinach salad recipe or a bowl of garlic butter noodles provides a wonderful palate cleanser.
Frequently Asked Questions
It is best to use a standard emulsified creamy peanut butter. Natural varieties that require stirring often separate, which can make your velvety buttercream oily and unstable.
Yes, Dutch-processed cocoa is recommended because it is pH-neutral. Natural cocoa powder is acidic and can react with the egg whites, causing the shells to crack or fail to rise correctly.
The ruffled feet (the ‘pied’) are created by letting the piped macarons rest until a dry skin forms on top. This forces the steam to escape out the bottom during baking, pushing the shell upward.
This refers to the batter’s flow. When lifted, it should fall in a slow, continuous ribbon that takes about 10-15 seconds to fully merge back into the rest of the batter in the bowl.
Hollow shells are usually caused by over-beating the meringue or under-folding the batter (macaronage). Ensuring you tap the tray firmly to release air bubbles also helps create a dense crumb.
The Ultimate Chocolate Peanut Butter Macaron Recipe
Chocolate Peanut Butter Macarons with Velvety Buttercream and Dark Chocolate Drizzle
Ingredients
Equipment
Method
- Sift almond flour, powdered sugar, and cocoa powder together twice to ensure a smooth texture.
- Whisk egg whites and cream of tartar to soft peaks, then slowly add granulated sugar while whisking to stiff, glossy peaks.
- Fold dry ingredients into meringue until the batter flows like lava and forms a slow-disappearing ribbon.
- Pipe 1.5-inch circles, tap tray firmly to release air, and let rest for 30-60 minutes until a skin forms.
- Bake at 300°F (150°C) for 15-18 minutes until set and not wiggling.
- Whip butter and peanut butter until fluffy, then mix in powdered sugar and cream until velvety.
- Pipe filling onto half the shells and sandwich with remaining shells.
- Drizzle with melted dark chocolate and sprinkle with flaky sea salt.
Notes
Ensure your almond flour is 'superfine' to achieve the glossy shell look.
Closing & Call to Action
Mastering chocolate peanut butter macarons is a journey of precision and passion. The combination of the salty peanut butter and the rich chocolate shells creates a flavor profile that is truly world-class. If you’ve enjoyed this technical deep-dive, please leave a comment below and let me know how your ruffled feet turned out!
Don’t forget to share your creations and follow me on Pinterest for more culinary forensics and high-RPM recipes. Happy baking!