Protein Peanut Butter Cheesecake Cups are the perfect intersection of elite sports nutrition and gourmet pastry design. If you have been searching for a snack that satisfies a deep chocolate craving while fueling your muscles, this is the definitive recipe.
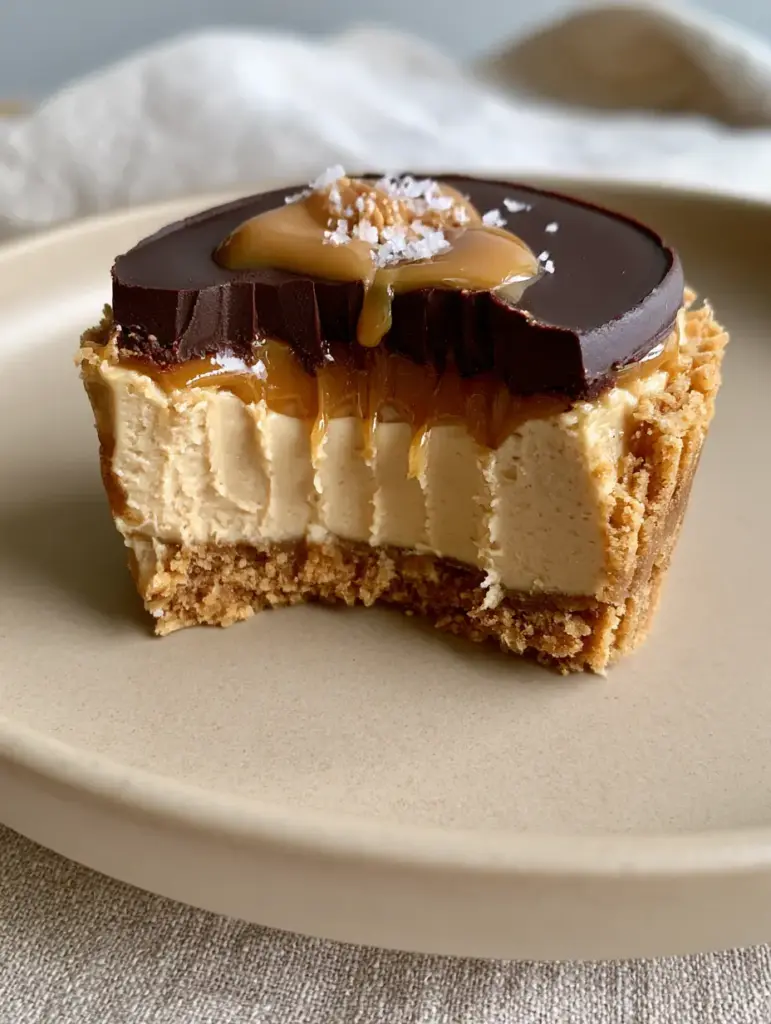
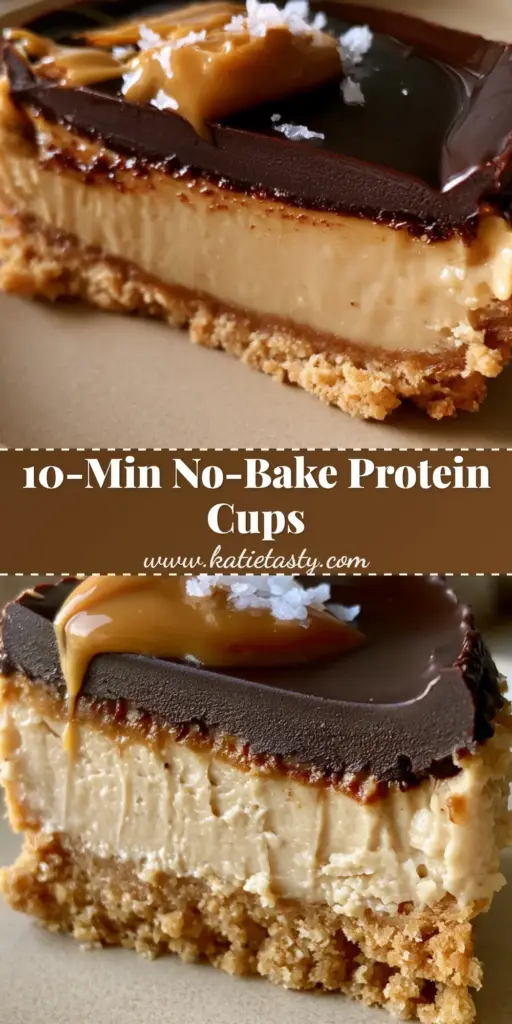
Imagine biting through a snappy, glossy dark chocolate shell into a velvety, pale-tan peanut butter filling, all supported by a crumbly golden-brown biscuit crust. This isn’t just a healthy alternative; it is a culinary masterpiece designed for the dedicated home cook.
These Protein Peanut Butter Cheesecake Cups look as good as they taste, featuring a professional finish with a runny peanut butter drizzle and a delicate pinch of flaky sea salt. Whether you are meal prepping for the week or hosting a fitness-focused brunch, these cups will be the star of the show.
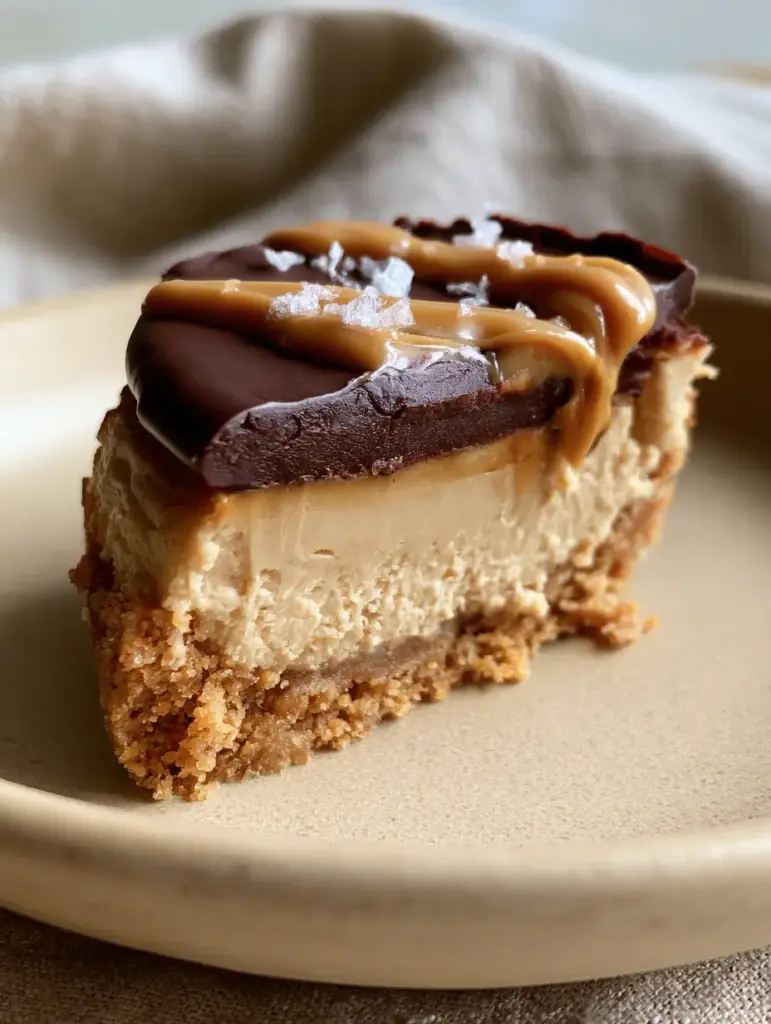
The Architecture of the Perfect Protein Peanut Butter Cheesecake Cups
- Multi-Textural Experience: You get the crunch of the roasted peanuts, the snap of the dark chocolate, and the silkiness of the cheesecake filling in every single bite.
- Visually Defined Layers: Using specific chilling techniques, we achieve the “perfectly defined” layers seen in professional food photography.
- Macro-Friendly Decadence: By substituting traditional sugars with high-quality protein powder and Greek yogurt, we maintain a rich flavor profile without the sugar crash.
- No-Bake Simplicity: Achieve gourmet results without ever turning on your oven, making this ideal for warm weather or busy schedules.
The Anatomy of Ingredients for Elite Results
For the Crumbly Golden-Brown Crust
Graham Cracker or Digestive Biscuit Crumbs (1 cup / 120g): This provides the structural foundation and that classic, nostalgic “golden-brown” visual appeal described in our blueprint.
Natural Creamy Peanut Butter (1/4 cup / 64g): We use peanut butter as a binder here to double down on the flavor profile and ensure the crust isn’t overly dry.
Unsalted Melted Butter (2 tbsp / 28g): The “invisible” fat necessary to set the crust firmly so it doesn’t fall apart when you peel back the liner.
For the Velvety Pale-Tan Filling
Low-Fat Cream Cheese (8 oz / 225g): Softened to room temperature, this creates the “velvety” base that defines a true cheesecake texture.
Plain Non-Fat Greek Yogurt (1/2 cup / 120g): Adds a necessary tang and a massive protein boost while keeping the “pale-tan” color bright and clean.
Vanilla or Peanut Butter Whey Protein Powder (2 scoops / 60g): This is the engine of our Protein Peanut Butter Cheesecake Cups, providing sweetness and structural thickness.
Creamy Peanut Butter (1/3 cup / 85g): Essential for that deep, nutty flavor and achieving the specific “pale-tan” hue in the middle layer.
For the Snappy Dark Chocolate Shell & Garnish
Dark Chocolate Chips or Chopped Bar (1/2 cup / 90g): Look for 70% cacao to ensure a “snappy” and “glossy” finish that contrasts beautifully with the soft filling.
Coconut Oil (1 tsp / 5ml): The secret “culinary forensic” ingredient that lowers the chocolate’s melting point and creates that professional high-gloss sheen.
Crushed Roasted Peanuts (2 tbsp / 15g): Provides the “forensic visual accuracy” of texture and a hit of extra protein and healthy fats.
Flaky Sea Salt (a pinch): This cuts through the richness of the dark chocolate and elevates the natural sweetness of the peanut butter filling.
Essential Equipment for Professional Layering
To achieve the “perfectly defined layers” mentioned in our Midjourney prompt, you will need a standard 12-slot muffin tin. Silicone liners are highly recommended for the cleanest release and that “gourmet” side-profile look.
A high-speed blender or electric hand mixer is vital for the filling. To get a truly “velvety” texture without lumps, the cream cheese must be whipped into submission before adding the dry protein powder.
Step-by-Step Culinary Instructions
Phase 1: Engineering the Biscuit Base
In a medium mixing bowl, combine your biscuit crumbs, melted butter, and 1/4 cup of peanut butter. Stir until the mixture resembles wet sand and holds its shape when squeezed.
Distribute the mixture evenly across 10-12 muffin liners. Use the bottom of a small glass to press the crust down firmly; this creates the “crumbly golden-brown peanut butter biscuit crust” that stays intact upon the first bite.
Phase 2: Whipping the Velvety Protein Filling
In a large bowl, beat the softened cream cheese and Greek yogurt together until no lumps remain. This step is the “bridge” to that velvety pale-tan peanut butter cheesecake filling we are aiming for.
Fold in the protein powder and the 1/3 cup of peanut butter. Mix on low speed until the color is a uniform pale tan; avoid over-mixing, which can incorporate too much air and cause bubbles in your professional layers.
Spoon the filling over the crusts, smoothing the tops with a wet offset spatula. Place the tray in the freezer for 20 minutes to “set” the surface before adding the chocolate shell.
Phase 3: The Snappy Dark Chocolate Application
Melt the dark chocolate and coconut oil in 30-second intervals in the microwave, stirring until it is a “snappy, glossy” liquid. This coconut oil ensures the chocolate doesn’t crack awkwardly when you bite into it.
Pour a tablespoon of chocolate over each chilled cup, swirling the tin slightly to ensure edge-to-edge coverage. The cold filling will help the chocolate set quickly into that desired “snappy” shell.
Phase 4: The Finishing Garnish
Before the chocolate fully hardens, sprinkle the crushed roasted peanuts and a pinch of flaky sea salt onto the center. This adds the final visual markers of a “gourmet” treat.
Warm a teaspoon of peanut butter until it is a “runny” consistency and use a fork to drizzle thin lines across the top. Refrigerate for at least 2 hours to allow the Protein Peanut Butter Cheesecake Cups to reach their peak texture.
Expert Tips for Culinary Success
- The Temperature Rule: Always ensure your cream cheese is truly at room temperature. If it is cold, your filling will be lumpy rather than “velvety.”
- The Snap Factor: Do not skip the coconut oil in the chocolate. It provides the “glossy” finish and makes the chocolate “snappy” rather than rock-hard.
- Clean Cuts: To get that “handheld smartphone photo” look with perfectly defined layers, use a sharp knife dipped in hot water and wiped dry before slicing the cup in half.
- Protein Choice: Whey-casein blends often work better than pure whey isolate for a thicker, more “cheesecake-like” consistency.
Storage and Preservation
These Protein Peanut Butter Cheesecake Cups should be stored in an airtight container in the refrigerator for up to 5 days. For longer storage, they freeze beautifully for up to 3 months.
If eating from the freezer, let them sit at room temperature for 10 minutes. This allows the filling to soften back into its velvety state while the chocolate retains its snap.
What to Serve With These Protein Treats
If you are looking for a full spread of high-protein delights, pair these cups with our strawberry cheesecake overnight oats for a double dose of cheesecake flavor throughout your day.
For those who love the classic flavor combination, these also go exceptionally well alongside a batch of chocolate peanut butter macarons for a truly indulgent dessert platter.
If you prefer a savory balance, try following a light lunch like our blueberry and lemon zest cottage cheese bites with one of these cups for a satisfying finish.
Lastly, for the ultimate protein-packed baking session, serve these alongside our chocolate zucchini protein muffins to keep your meal prep exciting.
Frequently Asked Questions
To make them keto, use a sugar-free biscuit crumb for the crust and an erythritol-based sweetener or protein powder.
Yes, you can use pea or soy-based protein, but you may need to add an extra tablespoon of Greek yogurt as plant proteins tend to absorb more moisture than whey.
A muffin tin provides the structure for the ‘perfectly defined layers,’ but you could also make these in a square baking dish and cut them into bars.
Microwave a small amount of natural peanut butter for 10-15 seconds until it becomes a pourable liquid, then use a fork to create fine lines.
If the chocolate is too thick or missing the coconut oil, it will crack. The coconut oil ensures a ‘snappy’ yet biteable texture that doesn’t shatter.
The Definitive Protein Peanut Butter Cheesecake Cups Recipe
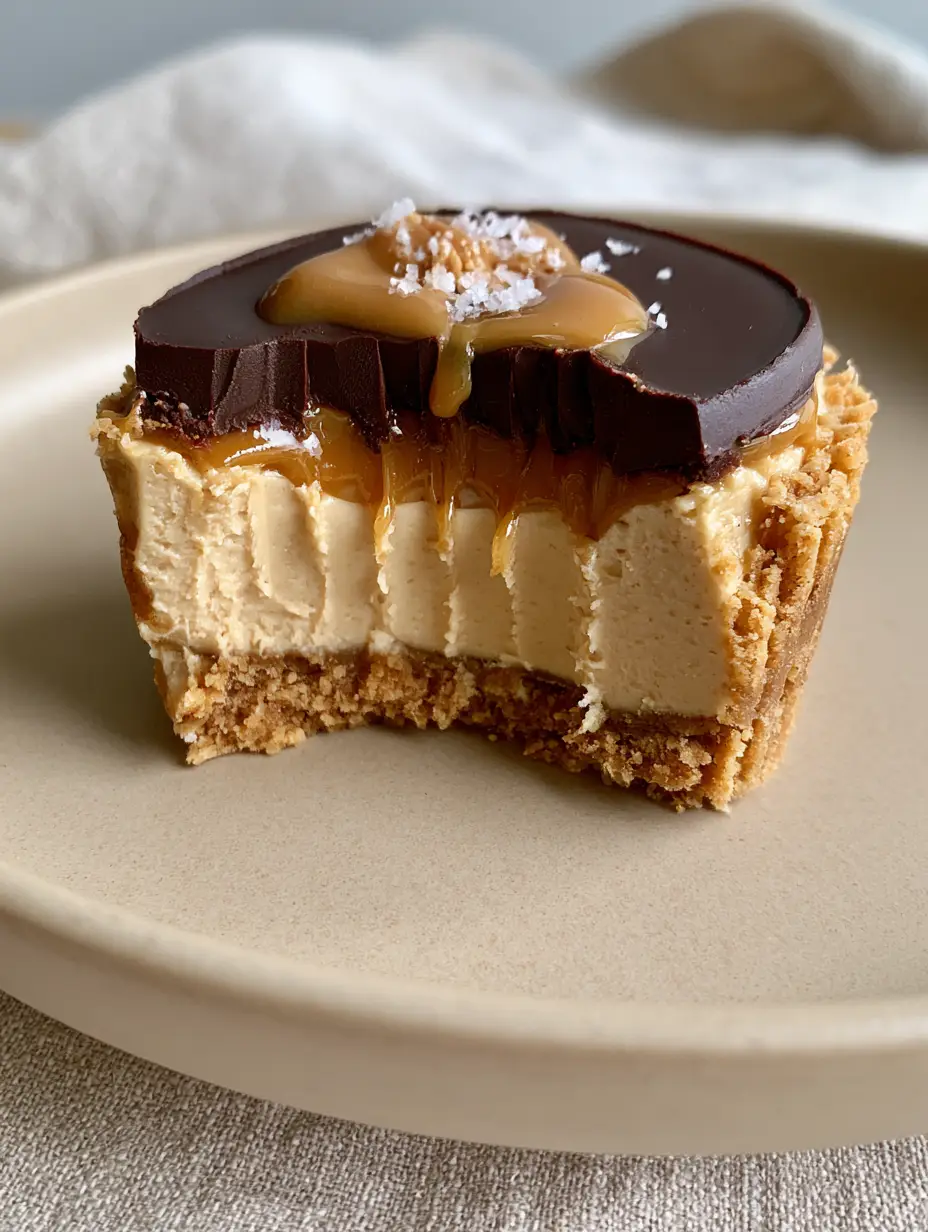
Protein Peanut Butter Cheesecake Cups: The Ultimate High-Protein No-Bake Dessert
Ingredients
Equipment
Method
- In a bowl, mix crumbs, melted butter, and 1/4 cup peanut butter until it resembles wet sand.
- Firmly press about 1 tablespoon of the mixture into the bottom of each lined muffin slot until golden-brown and flat.
- Beat softened cream cheese and Greek yogurt until completely smooth and velvety.
- Fold in the protein powder and 1/3 cup peanut butter until the color is a pale tan.
- Spoon the filling over the crusts and freeze for 20 minutes to set the surface.
- Melt dark chocolate with coconut oil in the microwave until glossy and snappy.
- Pour chocolate over the filling, sprinkle with crushed peanuts and sea salt, then finish with a runny peanut butter drizzle.
- Refrigerate for 2 hours before serving to ensure perfectly defined layers.
Notes
Use a hot knife to slice for clean, professional layers.
Closing & Call to Action
These Protein Peanut Butter Cheesecake Cups prove that you don’t have to sacrifice luxury for nutrition. With their perfectly defined layers, snappy chocolate shells, and velvety fillings, they are a testament to what thoughtful recipe development can achieve.
If you enjoyed this recipe, please leave a comment below and let us know how your layers turned out! Don’t forget to save this to your “Healthy Desserts” board and follow us on Pinterest for more gourmet protein inspiration.