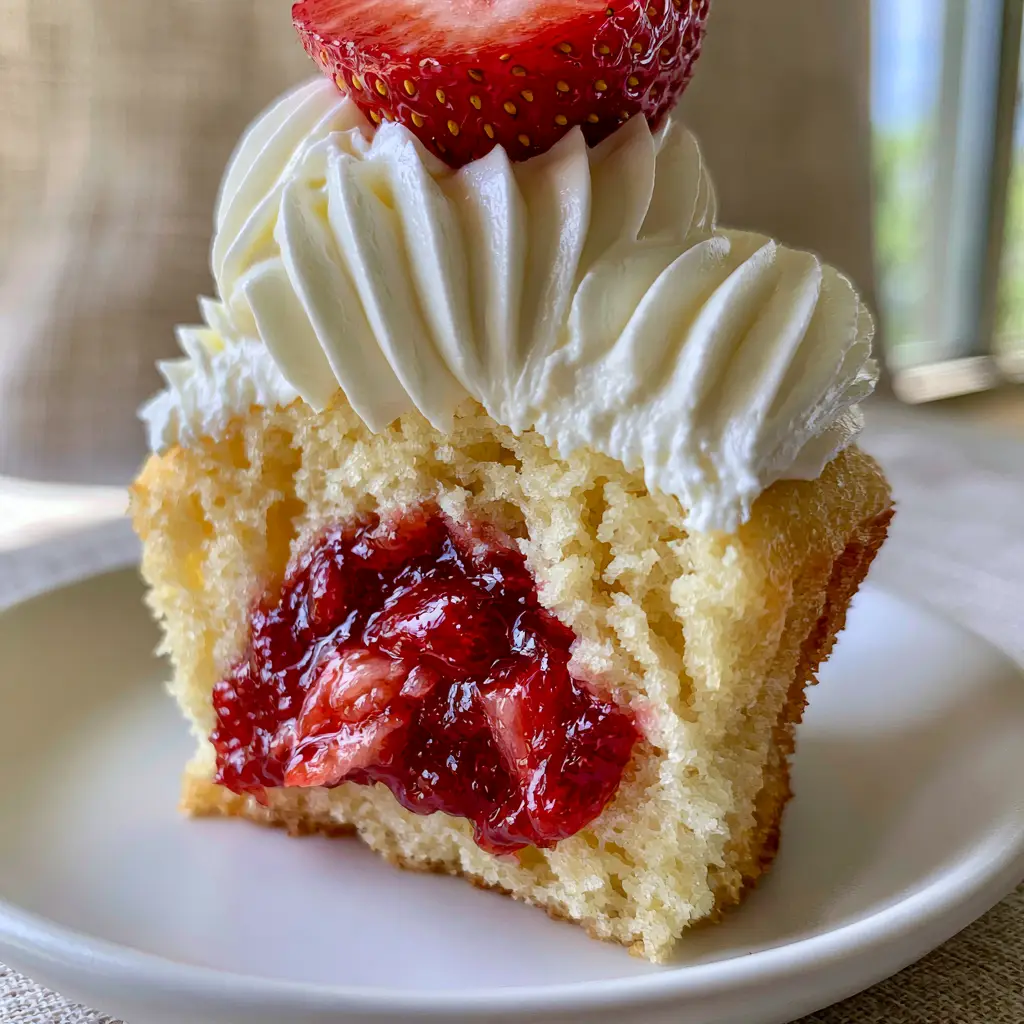
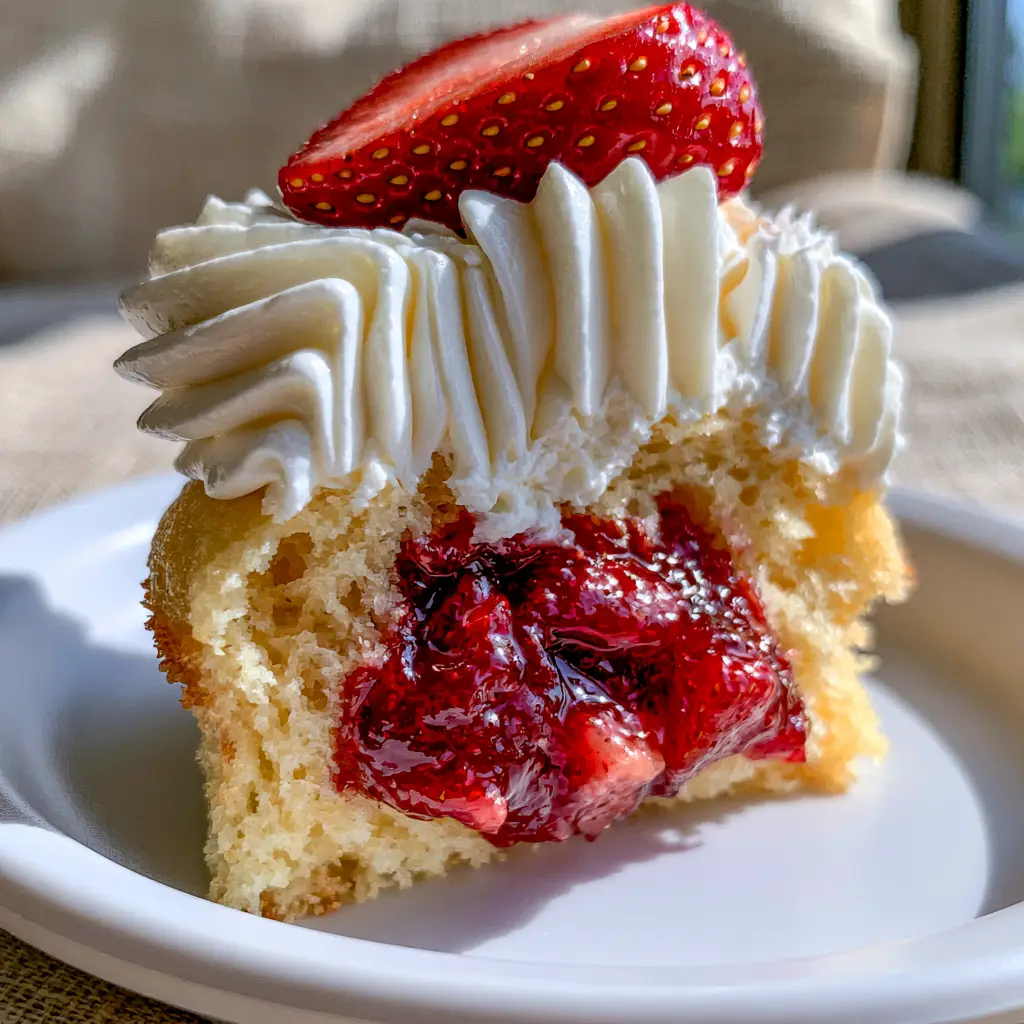
Imagine the ultimate summer dessert captured in a single, handheld masterpiece. These Strawberry Shortcake cupcakes are a culinary evolution of the classic American dessert, reimagined with a gourmet eye for texture and visual contrast. When you slice one vertically, you reveal a stunning architecture: a pale golden crumb, a glistening heart of fruit, and a snowy peak of stabilized cream.
This recipe is designed for those who appreciate the finer details of pastry science. We are moving away from heavy, oily batters and towards a sophisticated vanilla sponge that remains light and airy. The goal is a cupcake that feels like a cloud but carries the intense, concentrated flavor of a summer harvest.
Whether you are hosting a sun-drenched garden party or simply looking to master the art of the filled cupcake, this guide provides every sensory cue you need. From the sound of the mixer reaching stiff peaks to the glossy sheen of the final strawberry garnish, we are crafting more than a snack; we are building a visual and flavorful experience.
The Anatomy of a Perfect Gourmet Summer Cupcake
- The Fine-Crumb Foundation: A pale golden vanilla sponge with an airy, delicate texture that provides a sturdy yet light vessel for the filling.
- The Crimson Core: A thick, glistening strawberry jam reduction featuring visible fruit chunks for a rustic, high-end feel.
- Architectural Frosting: A snowy-white stabilized whipped cream crown that maintains sharp, crisp piping ridges even in warm weather.
- Visual Contrast: The interplay between the matte white ceramic plate and the glossy, seed-studded fresh strawberry halves.
- Structural Integrity: A sponge that stays bone-dry at the edges of the filling, preventing the dreaded soggy cupcake bottom.
Essential Elements for the Perfect Gourmet Cupcake
To achieve the “bone-dry edges” and “fine-crumb texture” seen in our visual blueprint, each ingredient serves a scientific purpose. We use specific fats and leaveners to ensure the sponge is pale golden rather than dark brown.
Cake Flour: 1.5 cups (185g) of cake flour is essential for that low-protein, fine-crumb texture. Unlike all-purpose flour, cake flour ensures the sponge remains delicate and airy.
Granulated Sugar: 1 cup (200g) provides sweetness while helping to aerate the butter during the creaming process. This creates the tiny air pockets necessary for a light sponge.
Unsalted Butter: 0.5 cups (115g) of softened butter adds richness and a tender mouthfeel. We use unsalted to have complete control over the flavor profile of the vanilla base.
Whole Milk: 0.5 cups (120ml) of room-temperature milk provides moisture. The fat content in whole milk contributes to the cupcake’s silky interior texture.
Egg Whites: 3 large egg whites (approx. 90ml) are used instead of whole eggs to keep the sponge “pale golden” and exceptionally light. The proteins in the whites provide structure without the weight of the yolks.
Baking Powder: 1.5 tsp (7g) acts as our primary leavener. This ensures the cupcakes rise evenly without creating large, unsightly holes in the crumb.
Pure Vanilla Paste: 1 tsp (5ml) offers those beautiful tiny black flecks and a deep, gourmet aroma. Paste provides a more intense flavor than standard extract.
Fresh Strawberries: 2 cups (300g) of hulled and chopped berries for the filling, plus extra halves for the garnish. Fresh fruit is non-negotiable for achieving that glistening, crimson jam look.
Heavy Whipping Cream: 1.5 cups (360ml) of cold cream forms the base of our architectural topping. It must be at least 36% milkfat to hold the sharp piping ridges described in the blueprint.
Mascarpone Cheese: 0.25 cups (60g) acts as our stabilizing agent. When whipped with the cream, it creates a “stiff, snowy-white” frosting that won’t wilt or lose its shape.
Professional Tools for Patisserie Results
Creating a cupcake that looks like a handheld smartphone photo requires the right equipment. You cannot achieve sharp piping ridges or a clean vertical slice without these specific tools.
A standard 12-cup muffin tin lined with high-quality paper liners ensures even heat distribution. For the filling, a small heavy-bottomed saucepan is required to reduce the strawberries into a thick, glistening jam without burning the natural sugars.
To achieve the “architectural swirl,” you will need a piping bag fitted with a large open-star tip (such as a 1M or 2D). A sharp serrated knife is also crucial for performing the vertical reveal slice without crushing the delicate sponge or smearing the cream.
Mastering the Pale Golden Vanilla Sponge
Step 1: The Creaming Method for Fine Crumb
Preheat your oven to 350°F (175°C). In a stand mixer, beat the softened butter and granulated sugar for at least 5 minutes. You are looking for a visual change: the mixture should turn from yellow to a pale ivory and appear fluffy.
Add the egg whites one at a time, ensuring each is fully incorporated. The batter should look smooth and emulsified. Stir in the vanilla paste; the aromatic scent of vanilla should be immediate and strong.
Step 2: Sifting and Folding
Sift the cake flour, baking powder, and a pinch of salt together. Alternately add the dry ingredients and the milk to the butter mixture, beginning and ending with the flour. Mix only until the last streak of flour disappears.
Over-mixing at this stage will develop gluten, turning your airy sponge into a bread-like texture. The batter should be thick, pale, and pourable, smelling strongly of sweet butter and vanilla.
Step 3: Precision Baking
Divide the batter evenly among the liners, filling them about two-thirds full. Bake for 18-20 minutes. Look for the visual cue: the tops should be springy to the touch and a very pale golden color—not deep brown.
Transfer the cupcakes to a wire rack immediately. They must be completely cool before you attempt to fill them, or the jam will soak into the edges, ruining the “bone-dry” look we are aiming for.
Crafting the Glistening Crimson Filling
Step 4: The Strawberry Reduction
In your saucepan, combine the chopped strawberries with 2 tbsp (25g) of sugar and a splash of lemon juice. Cook over medium heat, stirring frequently. Use a wooden spoon to slightly mash the berries, but leave visible “fruit chunks” for texture.
Simmer for 10-15 minutes until the liquid has evaporated and you are left with a deep-crimson, glistening reduction. It should be thick enough to hold its shape on a spoon. Let this jam cool completely in the refrigerator.
Engineered Stabilized Whipped Cream
Step 5: Achieving Sharp Piping Ridges
Place your whisk attachment and mixing bowl in the freezer for 10 minutes. Cold equipment is the secret to stiff peaks. Combine the cold heavy cream, mascarpone, and 0.5 cups (60g) of powdered sugar in the chilled bowl.
Start on low speed and gradually increase to medium-high. Watch for the sensory cues: the cream will move from bubbly to thick ribbons, and finally to stiff, architectural peaks. Stop mixing as soon as the ridges left by the whisk are sharp and defined.
Architectural Assembly and Presentation
Step 6: Filling and Piping
Using a small paring knife or a cupcake corer, remove the center of each cooled cupcake. Fill the cavity generously with the chunky crimson jam. Ensure the jam stays within the core so the surrounding sponge remains dry.
Fit your piping bag with the star tip and pipe a tall, stiff swirl of the stabilized cream. Start from the outside edge and spiral upward to create height. The ridges should be crisp and snowy-white, showing no signs of softening.
Step 7: The Final Gourmet Garnish
Place one glossy strawberry half, cut side facing forward, onto the peak of the cream. The tiny yellow seeds should be visible against the vibrant red flesh. Serve the cupcake on a clean, matte white ceramic plate to emphasize the gourmet aesthetic.
Pro Tips for Bakery-Standard Results
- Temperature Control: Ensure your egg whites and milk are at room temperature to prevent the batter from curdling, which preserves the airy texture.
- The “Dry Edge” Secret: Never fill the cupcakes while the jam is warm. The heat will cause the moisture to migrate into the sponge, making it soggy rather than bone-dry.
- Mascarpone Stability: If you don’t have mascarpone, a tablespoon of instant vanilla pudding mix can also help stabilize the cream for those sharp piping ridges.
- The Reveal Slice: To get the perfect vertical photo, chill the assembled cupcakes for 20 minutes before slicing with a hot, dry serrated knife.
Serving Suggestions and Menu Pairings
These Strawberry Shortcake cupcakes are a versatile dessert that fits perfectly into a summer-themed menu. If you are looking for a complete meal, consider starting with high-protein vegetarian meals or a refreshing mediterranean quinoa salad.
For a brunch setting, these cupcakes pair beautifully with fluffy greek yogurt waffles. If you are hosting a backyard BBQ, serve them alongside fresh summer vegetable side dishes and a creamy Mexican street corn salad to balance the sweetness of the fruit.
If you enjoy experimenting with flavored cupcakes, you might also love our floral lavender cupcakes or these naturally sweet sweet honey cupcakes.
Frequently Asked Questions
While you can, a homemade strawberry reduction provides the ‘chunky crimson’ look and glistening texture that store-bought versions lack. Homemade allows you to control the thickness so the sponge stays dry.
The secret is adding a stabilizer like mascarpone cheese or a small amount of gelatin. This ensures the whipped cream maintains those sharp, architectural piping ridges even at room temperature.
Ensure both the cupcake and the jam reduction are completely cold before assembly. Also, cook the jam until it is thick and syrupy rather than watery to prevent moisture migration.
Chill the assembled cupcakes for at least 20 minutes to set the cream and filling. Use a sharp serrated knife dipped in hot water and wiped dry to slice through the sponge and cream cleanly.
To achieve a pale golden color, avoid over-baking and use only egg whites instead of whole eggs. This prevents the yellow hue from the yolks and the deep browning that occurs with high fat and sugar levels.
The Ultimate Strawberry Shortcake Cupcakes Recipe
Strawberry Shortcake Cupcakes: A Gourmet Recipe for Airy Sponge and Crimson Jam
Ingredients
Equipment
Method
- Beat softened butter and sugar for 5 minutes until pale ivory and fluffy. Add egg whites one by one.
- Alternately fold in sifted dry ingredients and milk. Bake at 350°F (175°C) for 18-20 minutes until pale golden.
- Simmer chopped strawberries, sugar, and lemon juice until thick and glistening with visible chunks. Chill completely.
- Whisk cold heavy cream, mascarpone, and powdered sugar until stiff, sharp architectural peaks form.
- Core the cupcakes, fill with jam, and pipe a tall swirl of cream. Top with a glossy strawberry half.
Notes
Chill the mixing bowl and whisk before making the whipped cream to ensure maximum stability.
Closing & Call to Action
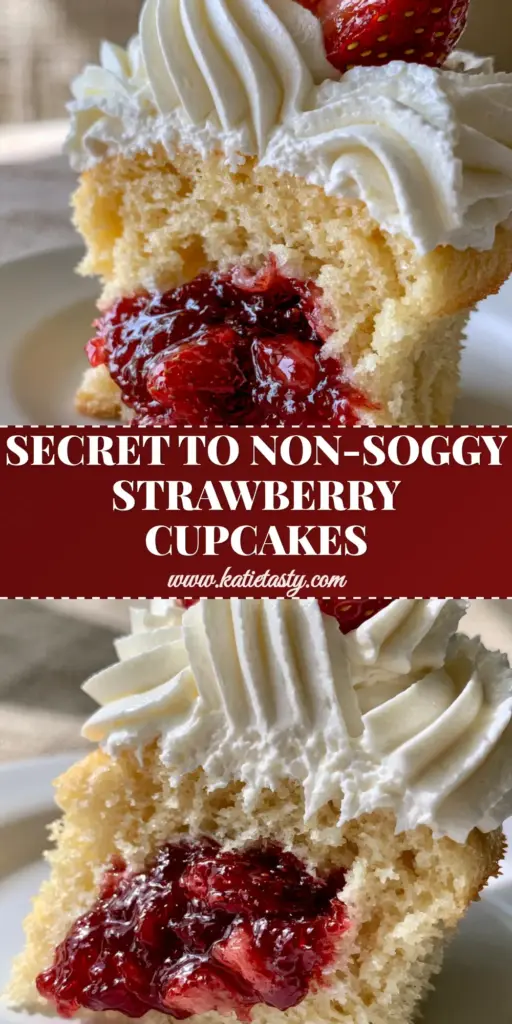
Mastering these Strawberry Shortcake cupcakes brings the sophistication of a gourmet bakery into your home kitchen. The contrast of the airy sponge against the glistening crimson jam is a sensory delight that is as beautiful to look at as it is to eat. If you enjoyed this deep dive into pastry textures, please leave a comment below and share your results! Don’t forget to pin this recipe to your dessert boards on Pinterest so you can find it for your next summer gathering.