Greek Yogurt Waffles are the gold standard for anyone seeking a breakfast that balances indulgent texture with high-quality protein. If you have been searching for a waffle that offers a shattering crisp exterior and a cloud-like, airy interior, this recipe is your final destination. These waffles leverage the thick, creamy power of Greek yogurt to create a batter that is far superior to traditional milk-based versions.
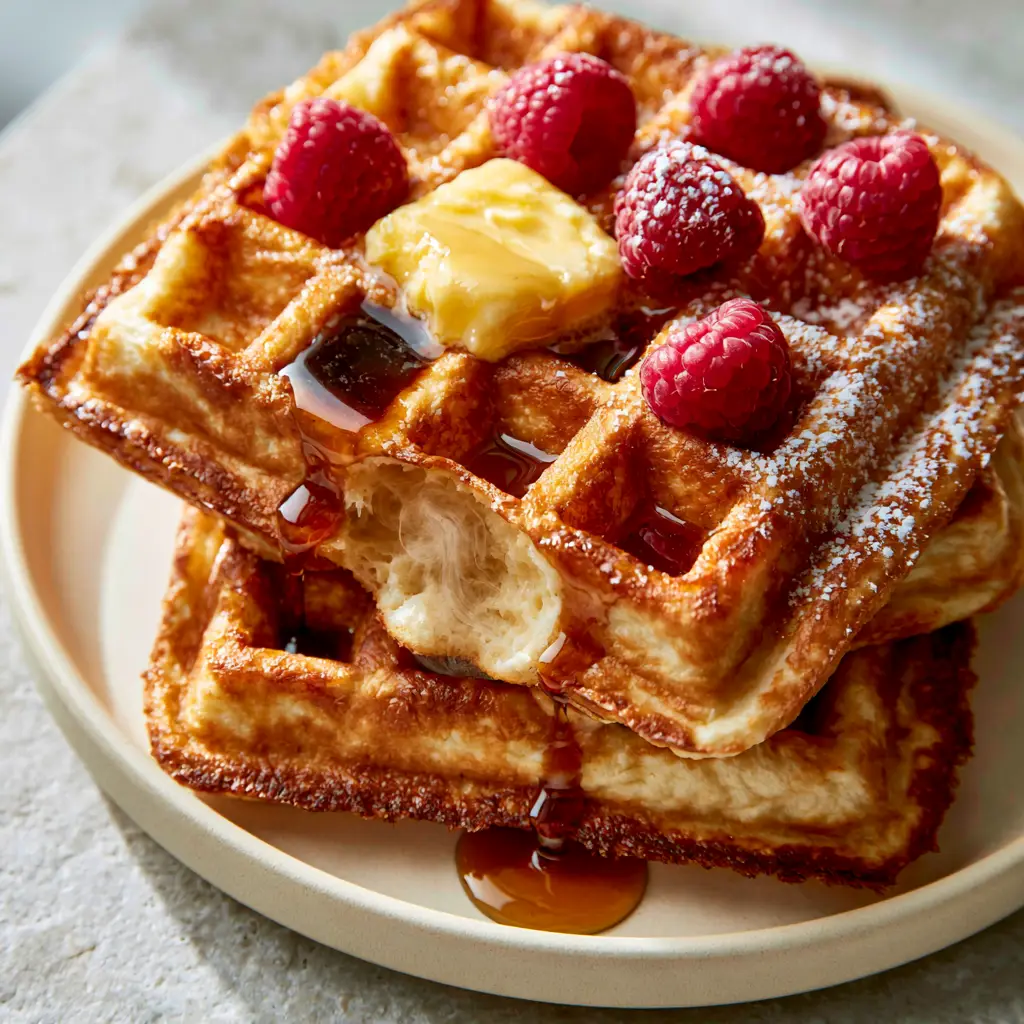
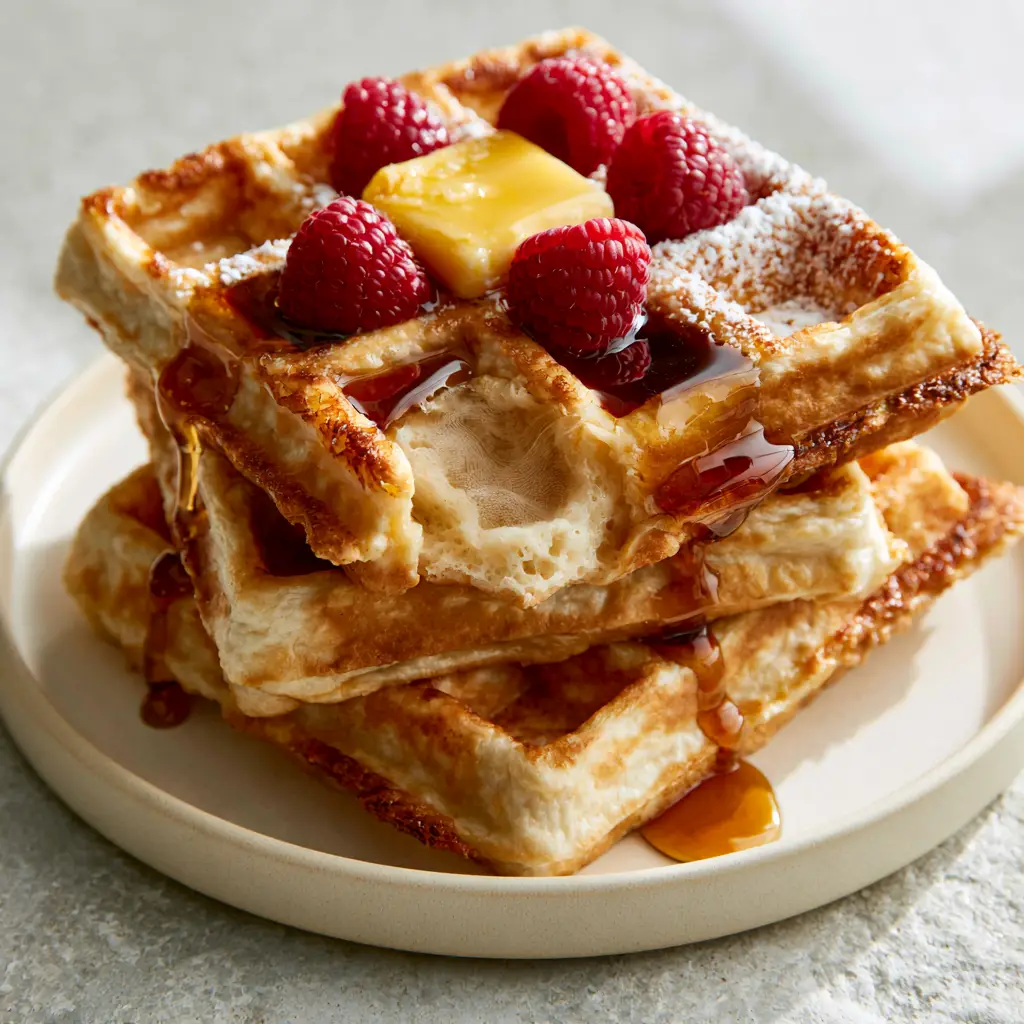
Imagine a stack of three thick, golden-brown waffles sitting on your breakfast table, their deep square wells acting as perfect reservoirs for pooling amber maple syrup. The tang of the yogurt perfectly offsets the sweetness of the syrup, while a melting pat of salted butter adds a rich, savory dimension. This isn’t just a meal; it is a sensory experience designed for the enthusiastic home cook who appreciates the finer details of culinary science.
By using Greek yogurt, we introduce acidity into the batter, which works in tandem with leavening agents to produce a spectacular rise. This results in the “torn waffle” effect seen in professional food photography, where the steam-filled, soft interior is revealed beneath a toasted, golden-brown crust. Let’s dive into why this recipe will become your new weekend tradition.
Why These Protein-Packed Greek Yogurt Waffles Outperform Traditional Recipes
- Unrivaled Texture: The thick consistency of Greek yogurt ensures the batter remains viscous, leading to a waffle that is structurally sound yet incredibly tender.
- Deep Flavor Profile: Unlike standard waffles, these offer a subtle, sophisticated tang that pairs beautifully with fresh red raspberries and dark maple syrup.
- The Golden-Brown Standard: Through the Maillard reaction, the sugars in the yogurt and flour caramelize to create that signature toasted, crispy edge you crave.
- Visual Perfection: These waffles are designed to hold their shape, allowing for deep wells that capture every drop of syrup and dusting of powdered sugar.
The Anatomy of the Batter: Essential Ingredients and Smart Substitutions
To achieve the visual and structural results of our Greek Yogurt Waffles, every ingredient serves a specific scientific purpose. We avoid “fluff” and focus on components that contribute to the golden-brown toasted finish and the airy cooked batter interior.
All-Purpose Flour: 2 cups (250g). This provides the necessary gluten structure to hold those deep square wells together without becoming tough or chewy.
Greek Yogurt: 1 cup (245g) of full-fat, plain Greek yogurt. The acidity tenderizes the gluten, while the thick texture ensures the waffles don’t turn out thin or soggy.
Large Eggs: 2 units, room temperature. Eggs act as the primary binding agent and contribute to the “steam-filled” airy interior as they expand during the cooking process.
Melted Salted Butter: 1/2 cup (115g). Fat is essential for achieving the crispy, toasted edges and provides the rich flavor that complements the melting butter pat on top.
Granulated Sugar: 2 tbsp (25g). Beyond sweetness, sugar is the key to the Maillard reaction, helping the waffle iron produce that perfect golden-brown hue.
Baking Powder & Baking Soda: 2 tsp (8g) and 1/2 tsp (3g) respectively. The baking soda reacts instantly with the Greek yogurt’s acidity to create immediate lift and fluffiness.
Vanilla Extract: 1 tsp (5ml). This adds a floral aroma that makes the kitchen smell like a professional patisserie while the waffles bake.
Whole Red Raspberries: 1/2 cup (60g) for garnish. These provide a vibrant pop of color and a tart contrast to the viscous, dark amber maple syrup.
Powdered Sugar: 1 tbsp (8g) for dusting. A fine, light dusting provides that professional “styled” look that makes the waffles look as good as they taste.
Pro-Level Equipment for the Perfect High-Angle Breakfast Shot
To replicate the high-angle, smartphone-photo aesthetic, you need the right tools to ensure the waffles cook evenly and maintain their height. A Belgian waffle maker is highly recommended for those deep, square wells that define the visual blueprint of this dish.
You will also need a matte ceramic plate to reduce glare during photography, especially when capturing the “cascading syrup” effect. A fine-mesh sieve is indispensable for achieving that “light, fine dusting” of powdered sugar without creating clumps that obscure the waffle’s texture.
Finally, ensure you have a high-quality wire cooling rack. Placing the waffles directly on a flat surface after cooking allows steam to build up underneath, which destroys the crispy, toasted edges we worked so hard to create. A rack allows air to circulate, keeping the exterior brittle and the interior soft.
Step-by-Step Guide to Achieving the Perfect Toasted Waffle Stack
Phase 1: Emulsifying the Wet Ingredients for Maximum Rise
Start by whisking your 2 large eggs in a large mixing bowl until they are frothy and pale yellow. Incorporate the 1 cup (245g) of Greek yogurt and the 1/2 cup (115g) of melted salted butter, ensuring the butter is not so hot that it cooks the eggs on contact.
Whisk vigorously until the mixture is completely smooth with no visible clumps of yogurt. This emulsification is what creates the “airy cooked batter interior” mentioned in our visual blueprint, as it traps tiny air bubbles that expand under the heat of the waffle iron.
Phase 2: Folding the Dry Components with Precision
In a separate bowl, sift together the 2 cups (250g) of flour, sugar, baking powder, and baking soda. Sifting is a non-negotiable step if you want that “fine, light texture” and an even distribution of leavening agents throughout the Greek Yogurt Waffles.
Create a well in the center of the dry ingredients and pour in the yogurt mixture. Use a silicone spatula to gently fold the batter just until no large streaks of flour remain; over-mixing will develop too much gluten, leading to a rubbery waffle rather than a tender, torn crumb.
Phase 3: The Searing Process and Visual Cues
Preheat your waffle iron to a medium-high setting. You are looking for a surface temperature that will immediately sizzle when the batter hits it. Lightly grease the plates with a neutral oil spray, even if they are non-stick, to enhance the “golden-brown” toasted finish.
Ladle about 1/2 cup of batter into the center of the iron. Close the lid and watch for the steam. A key sensory cue is the reduction of steam; when the steam stops billowing from the sides, the interior is set and the exterior has likely reached that deep, perfectly square-well toasted state.
Phase 4: The Art of the Garnish and Syrup Drizzle
Stack three thick waffles on a matte cream ceramic plate. While they are still piping hot, place a single pat of salted butter in the center of the top waffle, allowing it to begin its slow, golden melt into the wells.
Drizzle the dark amber maple syrup slowly, allowing it to pool in the deep wells and cascade down the sides in a viscous, thick stream. Arrange five plump, vibrant red raspberries around the stack. Finish with a light, fine dusting of white powdered sugar through a sieve to complete the visual masterpiece.
Expert Culinary Tips for Success
- Temperature Control: Ensure your Greek yogurt and eggs are at room temperature. Cold ingredients can cause the melted butter to solidify in the batter, leading to uneven cooking and a greasy mouthfeel.
- Don’t Peek: Resist the urge to open the waffle iron too early. Opening it before the structure has set can tear the waffle in half, ruining the “perfectly square wells.”
- The Flour Trick: If you want an even crispier exterior, replace 2 tablespoons of the all-purpose flour with cornstarch. This creates a brittle, glass-like crunch on the toasted edges.
- Salt Matters: Using salted butter in the batter and for the garnish provides a necessary contrast to the maple syrup, elevating the flavor from one-dimensionally sweet to complex and savory.
Smart Storage, Reheating, and Freezing Strategies
Greek Yogurt Waffles are best enjoyed immediately, but they are surprisingly resilient. To store leftovers, let them cool completely on a wire rack to prevent sogginess. Once cool, place them in an airtight container in the refrigerator for up to 3 days.
For long-term storage, flash-freeze the waffles on a baking sheet for one hour before transferring them to a freezer-safe bag. They will stay fresh for up to 2 months. This is an excellent way to have a high-protein breakfast ready on busy weekday mornings.
Never use a microwave to reheat these waffles, as it will make them limp and rubbery. Instead, use a toaster or a 350°F (175°C) oven for 5-8 minutes. This restores the crispy, toasted edges and the warm, airy interior, making them taste as if they were just pulled from the iron.
What to Serve with Greek Yogurt Waffles
These waffles are the star of the show, but they play well with others. If you are hosting a brunch, consider pairing them with a savory element to balance the maple syrup. A side of Mexican street corn salad offers a creamy, spicy contrast that works surprisingly well in a brunch setting.
For those who enjoy a variety of textures, serving these alongside kelewele (spiced fried plantains) adds a wonderful West African flair and a kick of ginger heat. If you’re looking for more traditional pairings, these waffles are the perfect precursor to a light lunch of Mediterranean quinoa salad.
If you’re in the mood for more baking, you might also enjoy experimenting with cinnamon waffles, which use a similar base but lean heavily into warm spice profiles. For a complete breakfast spread, include a dish of baked zucchini, spinach, and feta casserole to provide a salty, veggie-packed counterpoint.
Frequently Asked Questions About Greek Yogurt Waffles
It is best to cook the batter immediately. The baking soda reacts with the acidic yogurt as soon as they are mixed; if the batter sits too long, it will lose its potency, resulting in less airy waffles.
While you can use non-fat yogurt, full-fat Greek yogurt is recommended for the best texture and a richer flavor. The fat content helps achieve those crispy, toasted edges and a more tender crumb.
You can use a standard waffle iron, but a Belgian iron is preferred for its deep wells, which are essential for capturing the syrup and butter as described in our visual blueprint.
The best way to maintain the ‘toasted’ quality is to use a toaster or a 350°F (175°C) oven. This ensures the outside stays crispy while the airy interior remains soft.
Sogginess usually occurs if the waffle iron wasn’t hot enough or if the waffles weren’t placed on a wire cooling rack immediately after cooking. Steam trapped against a flat plate will quickly soften the crust.
The Ultimate Greek Yogurt Waffle Recipe
Greek Yogurt Waffles: The Ultimate Crispy and Fluffy Protein Breakfast
Ingredients
Equipment
Method
- In a large bowl, whisk eggs until frothy. Add Greek yogurt, melted butter, and vanilla, whisking until smooth.
- In a separate bowl, sift together flour, sugar, baking powder, and baking soda.
- Gently fold the wet ingredients into the dry ingredients using a spatula until just combined. Do not overmix.
- Preheat your Belgian waffle iron and lightly grease with oil spray.
- Ladle batter onto the iron and cook until the steam subsides and the waffles are a deep golden-brown.
- Stack three waffles on a plate. Top with a pat of salted butter and a drizzle of maple syrup.
- Add fresh raspberries and a light dusting of powdered sugar before serving immediately.
Notes
For extra crispiness, replace 2 tbsp of flour with cornstarch.
Closing & Call to Action
Mastering the Greek Yogurt Waffles recipe is a gateway to elevating your home brunch game to professional levels. With their perfect balance of crispy toasted edges and a soft, airy interior, these waffles are as visually stunning as they are delicious. The addition of Greek yogurt doesn’t just add protein; it creates a superior texture that traditional recipes simply cannot match.
We would love to see your breakfast creations! If you make these waffles, please leave a comment below and tell us how they turned out. Did you stick with the raspberries, or did you try a different fruit garnish? Don’t forget to share your photos and follow us on Pinterest for more culinary inspiration and visual recipe blueprints. Happy cooking!